My husband and I only have about 38 years of DIY home improvement and decorating experience. 🙂 Although we are slightly less energetic now, we still enjoy collaborating to create beauty wherever we’re planted. Since our sons have homes that often need our help, there is always a project happening. A decade ago, we left a large home we built for our family and took on a neglected fixer upper half its size. A year later, we renovated a vacation getaway. Our most recent adventure finds us re-doing a Georgian stuck in the ’90s. Today we’ll peek at my favorite before and after renovations…I’ll share secrets behind the scenes.
This post contains affiliate links which I hope you will use since they won’t cost you a penny extra yet may earn this blog a small commission.
Our Renovation Journey of Before and Afters
The images tell the story so there isn’t much I need to add. But I’ll share a few stories and lessons learned along the way.
Our Renovations at the Georgian
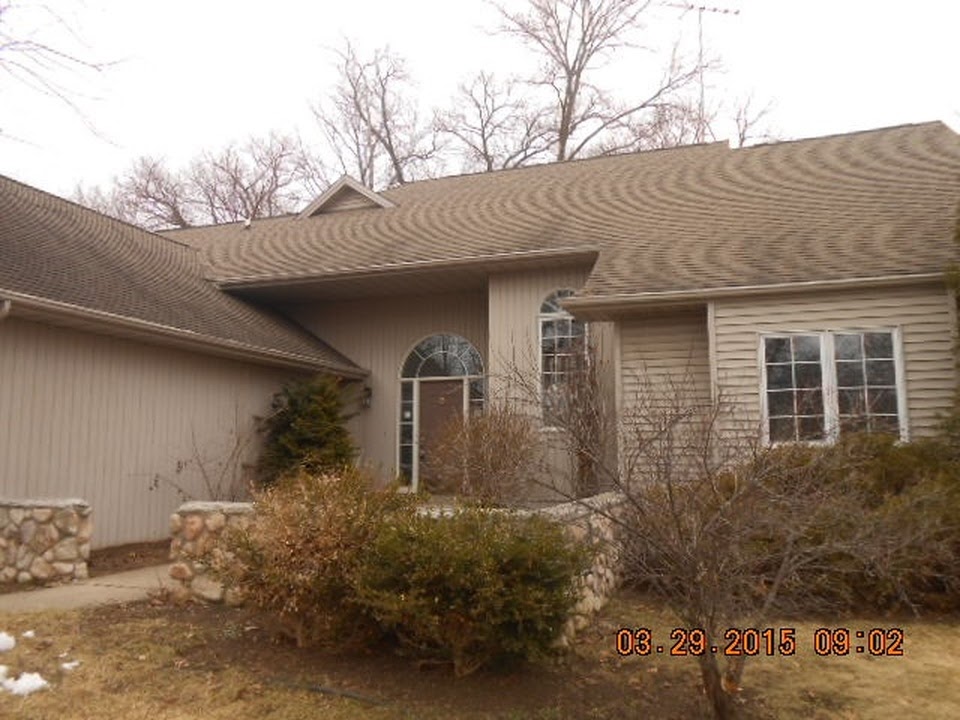
Our home was built 33 years ago, and we wanted it to feel at least 100 years old. We love 1920’s, classic, European inspired, Hamptons, coastal, and traditional styles. I wanted to calm down the formality and fuss. But I also wanted it to be atmospheric, poetic, and meditative.
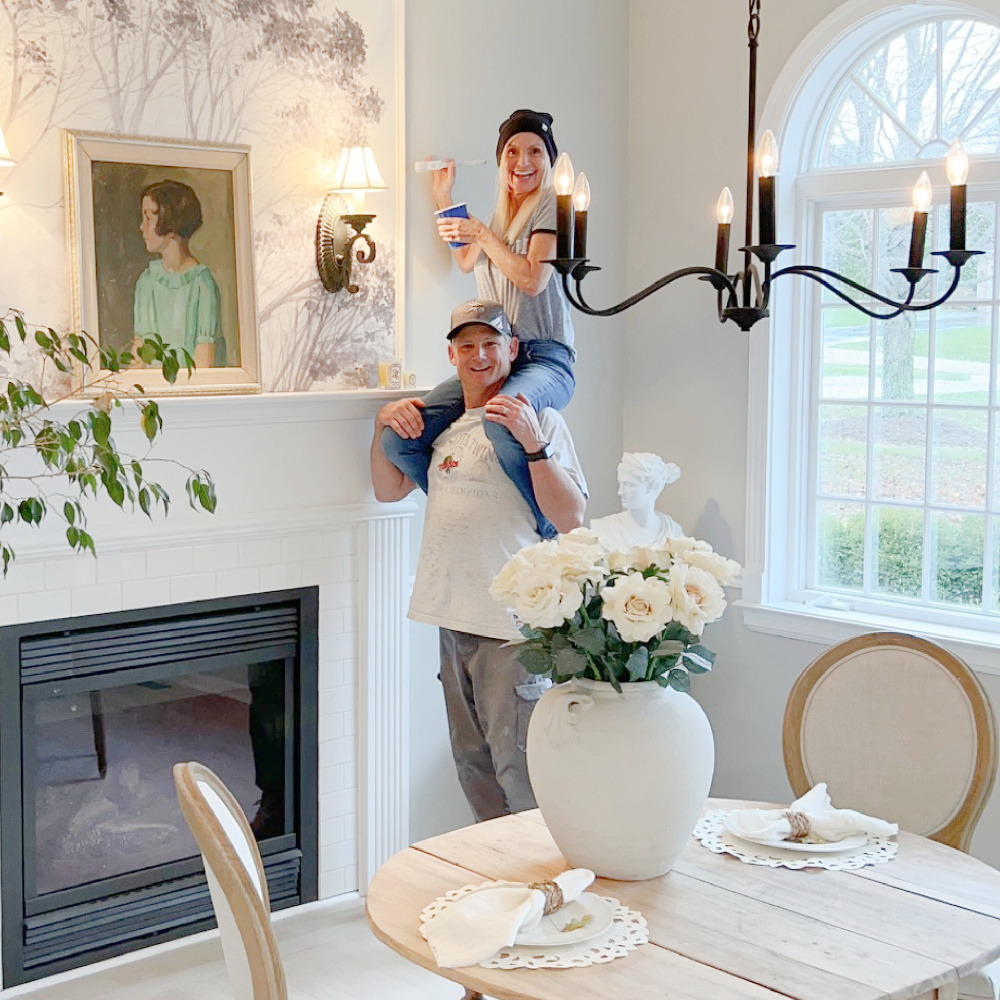
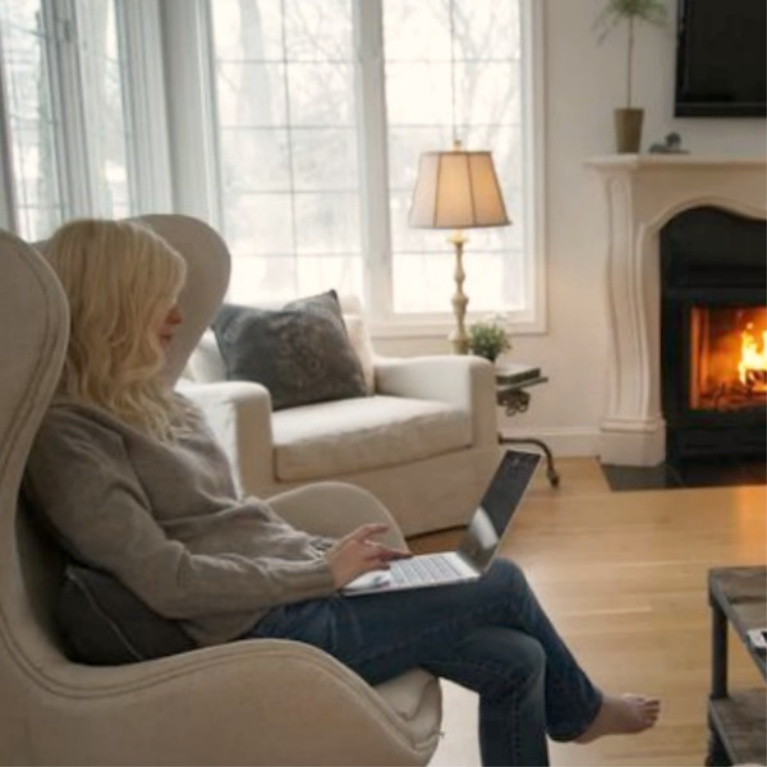
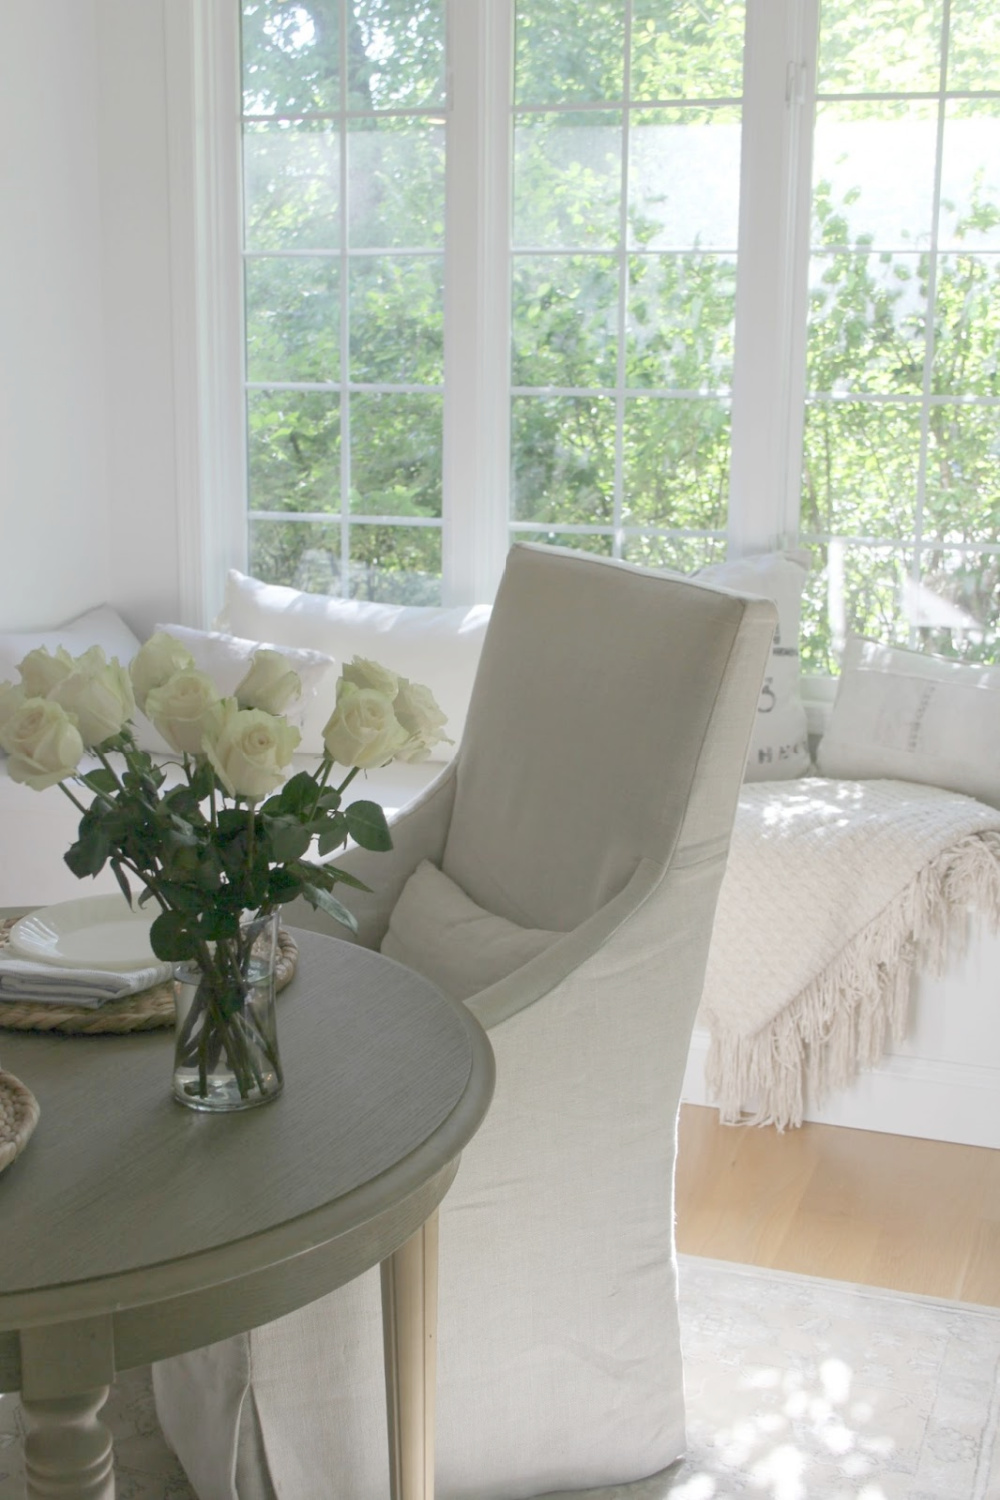
Cozy Up This Formal Dining Room!
When we toured our house the first time, we liked the built-in china cabinet but didn’t want to set any sort of formal tone. Since we don’t live or entertain in a formal way, it made sense to rethink it.
We repurposed the built-in in our kitchen pantry and replaced it with a gas fireplace. A lot of work for sure, but now the room can be a study, music room, cozy breakfast room…My husband refinished dark cherry stained oak floors himself, and it was one of the first DIYs we tackled here.
What a change! A new wall between dining and foyer, refinished floors, a fireplace, and a new lease on life for this sweet space where I play piano everyday.
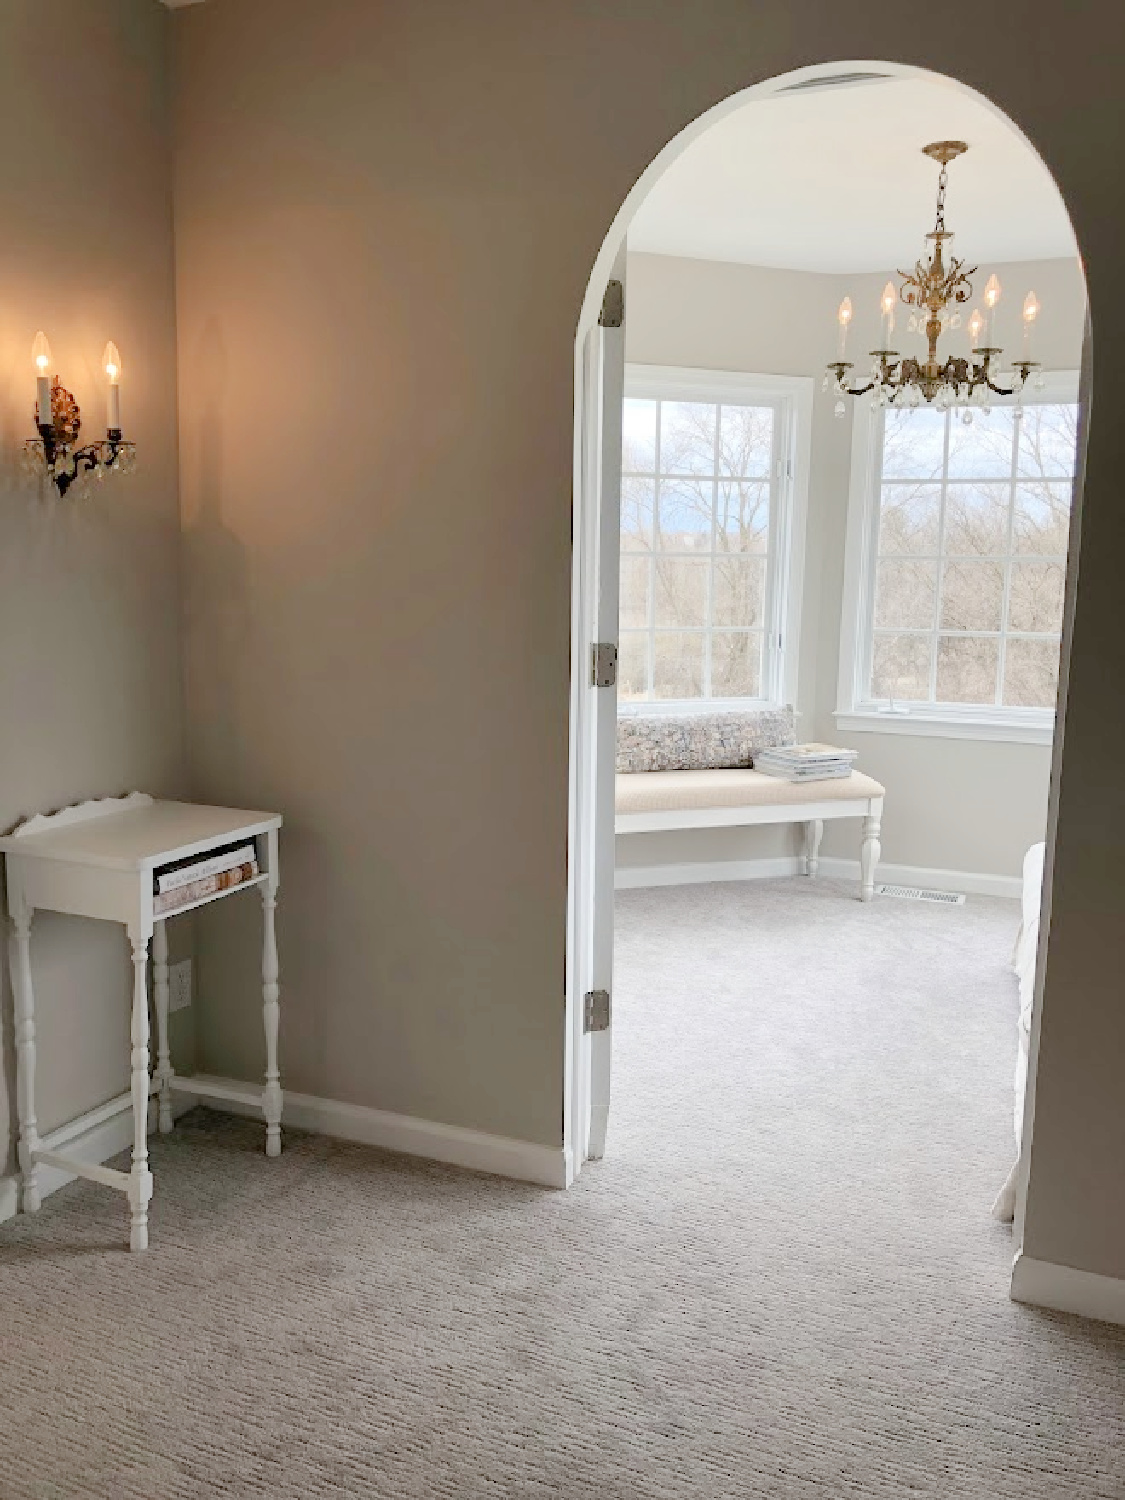
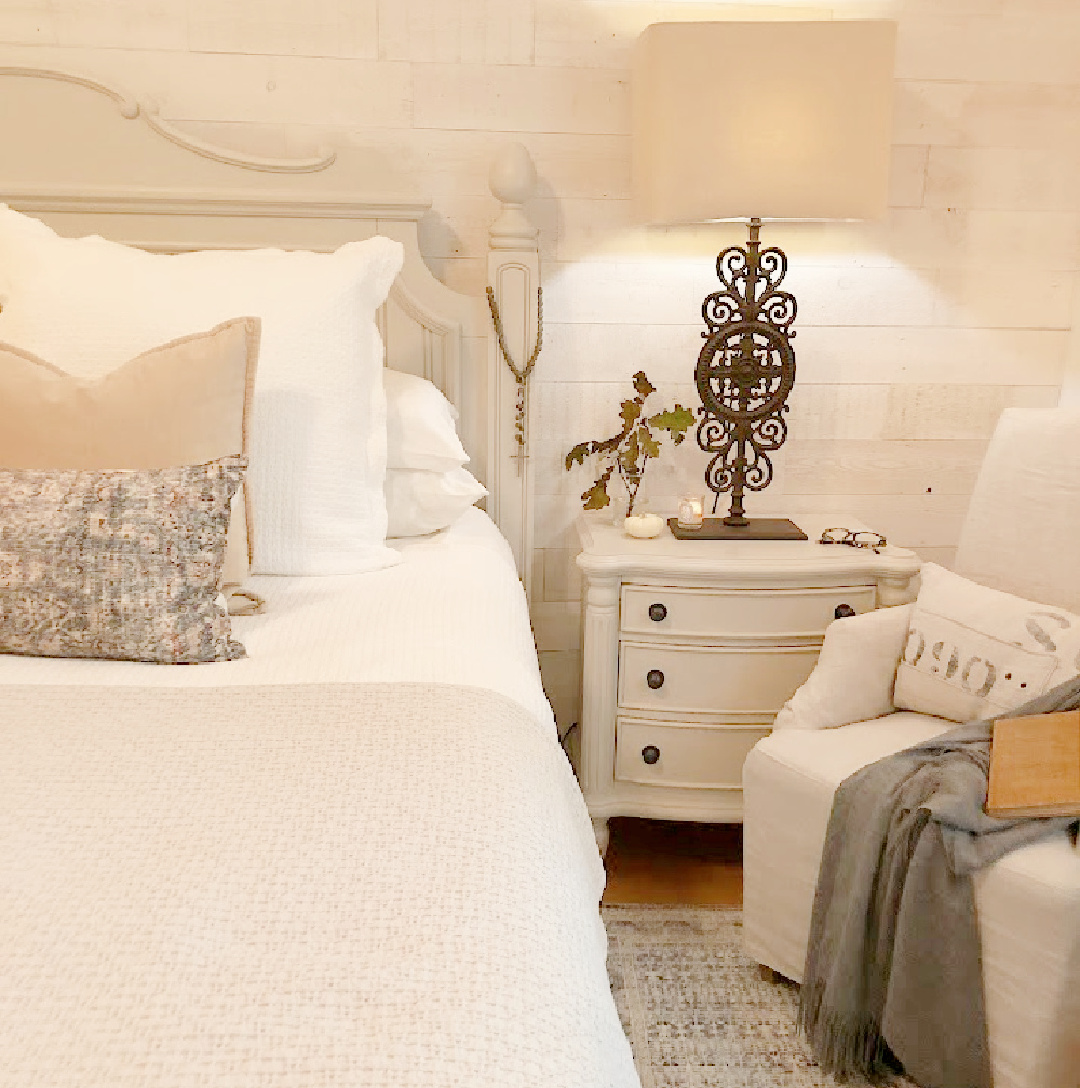
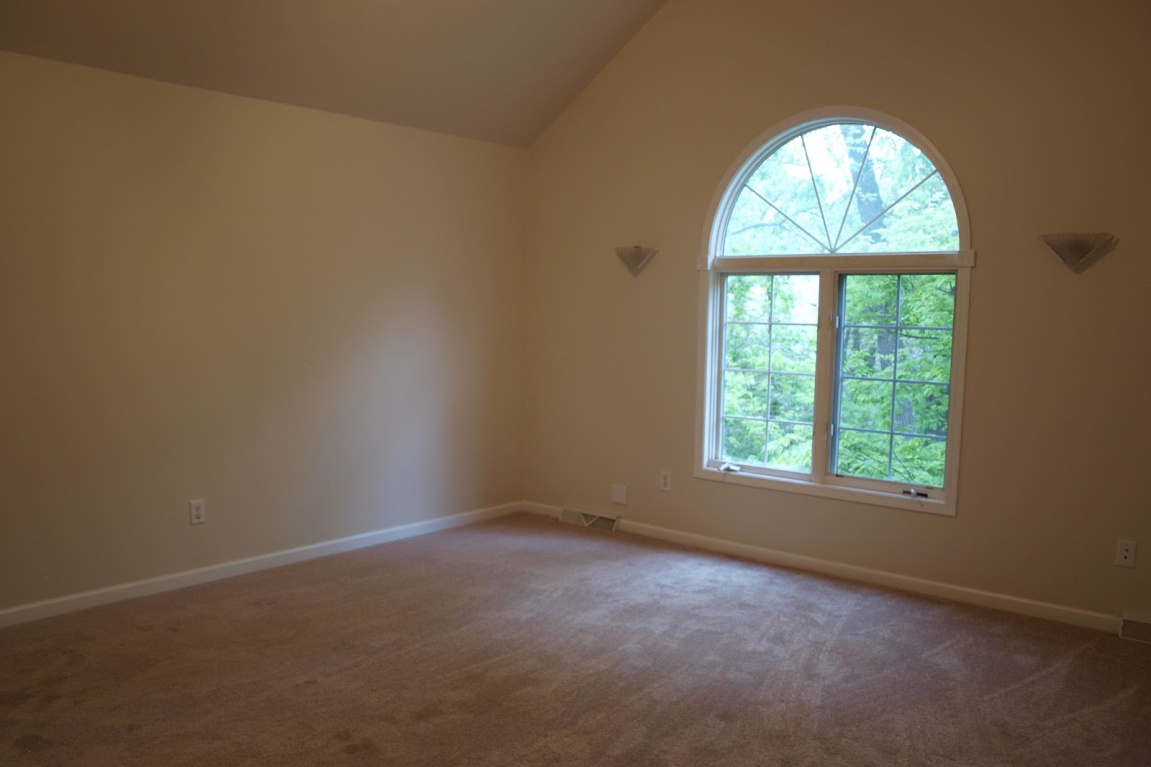
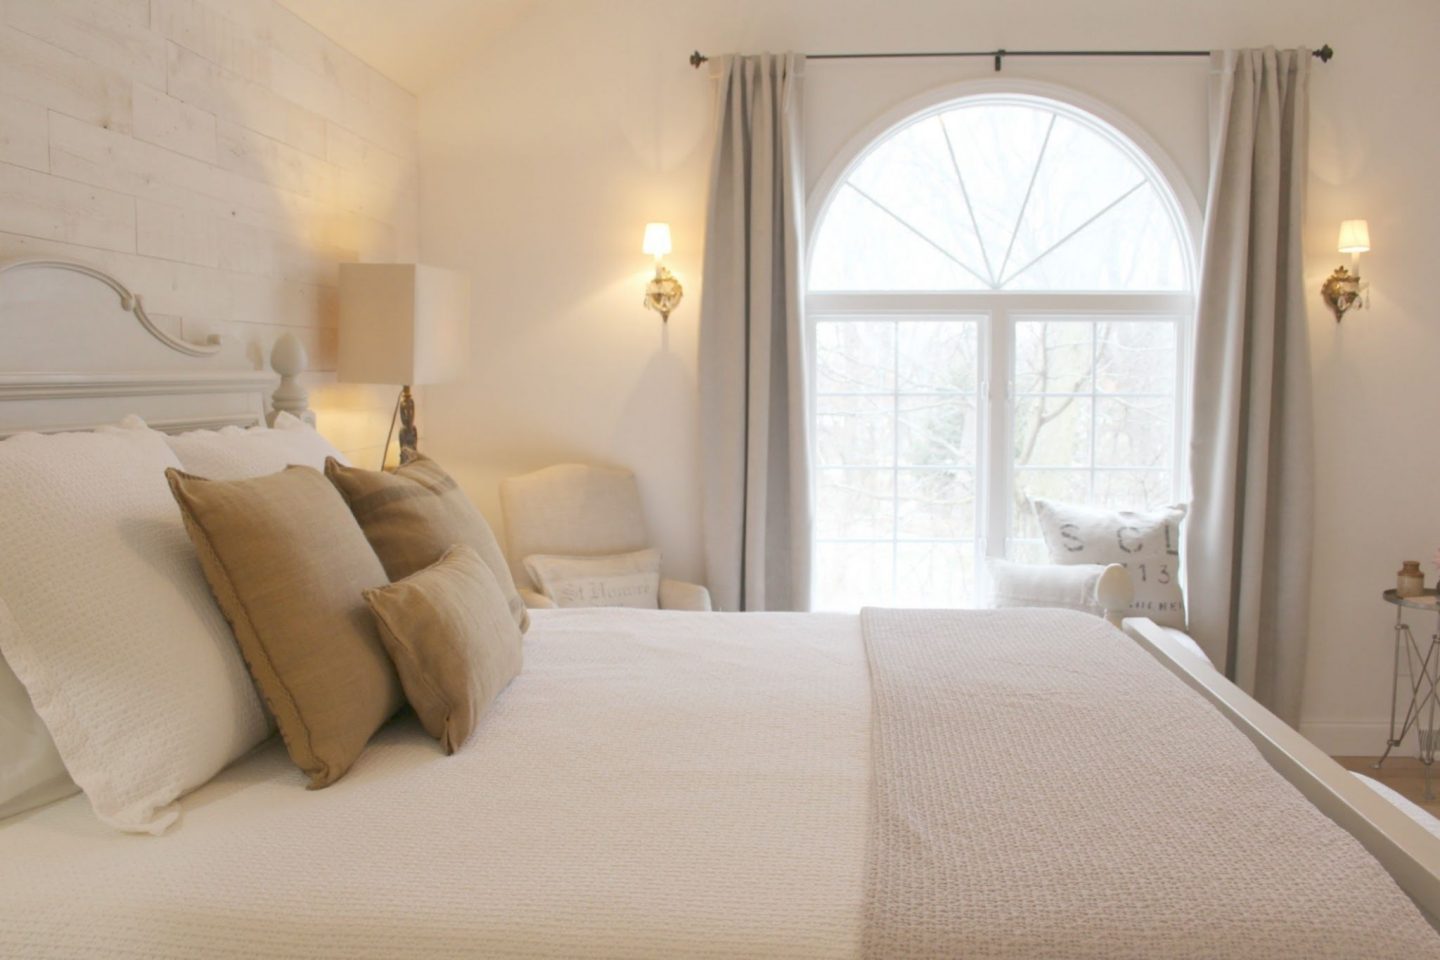
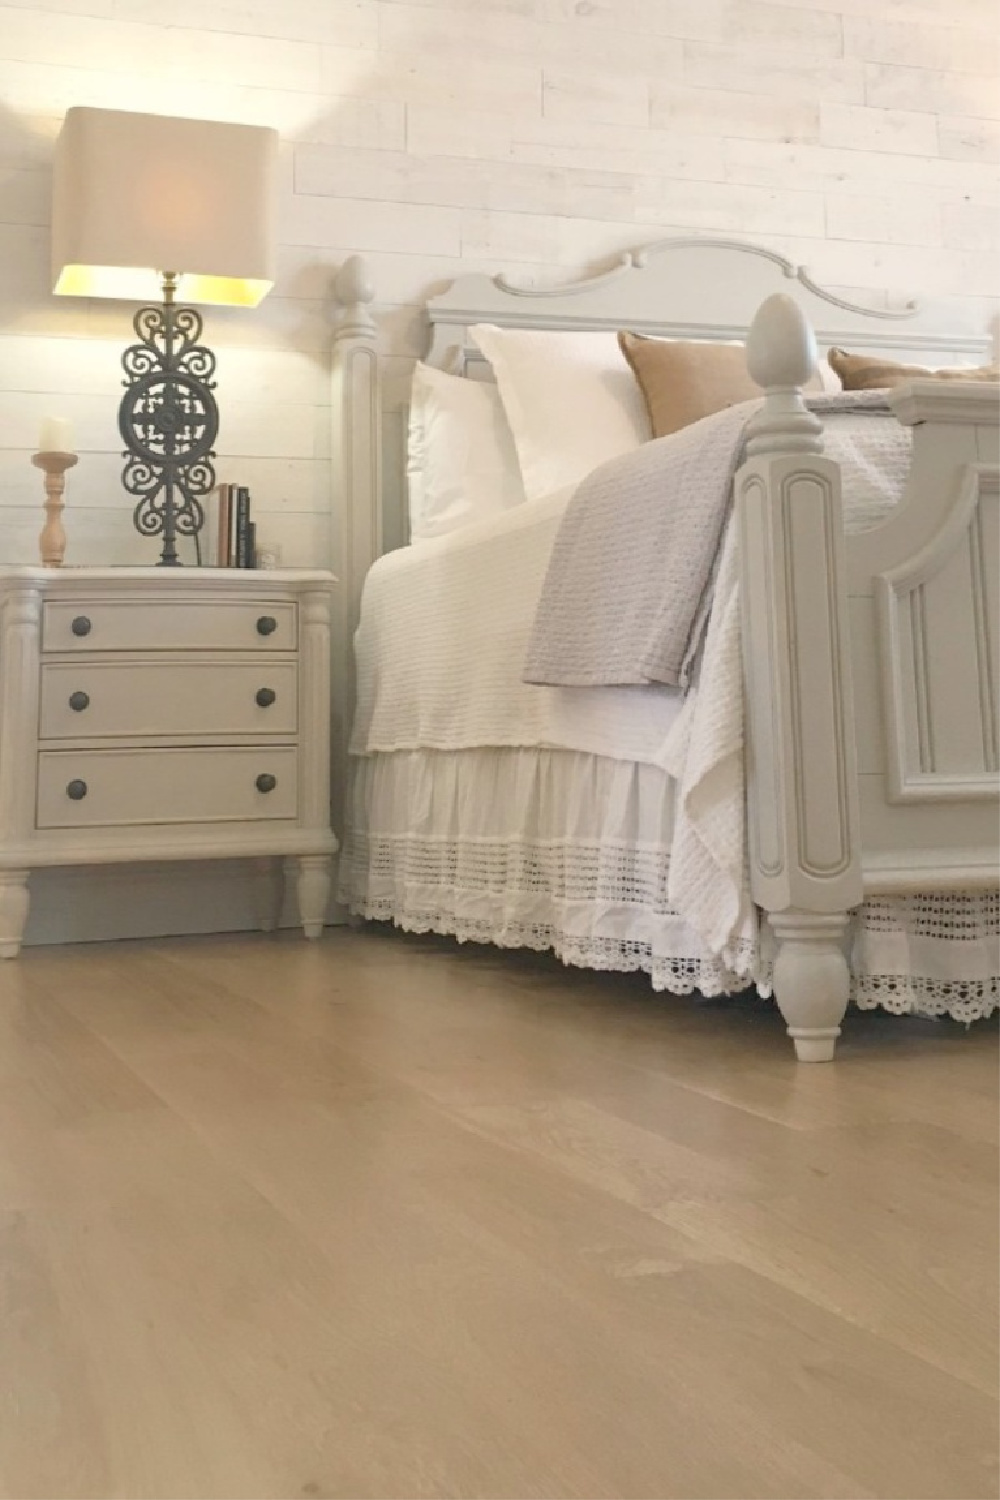
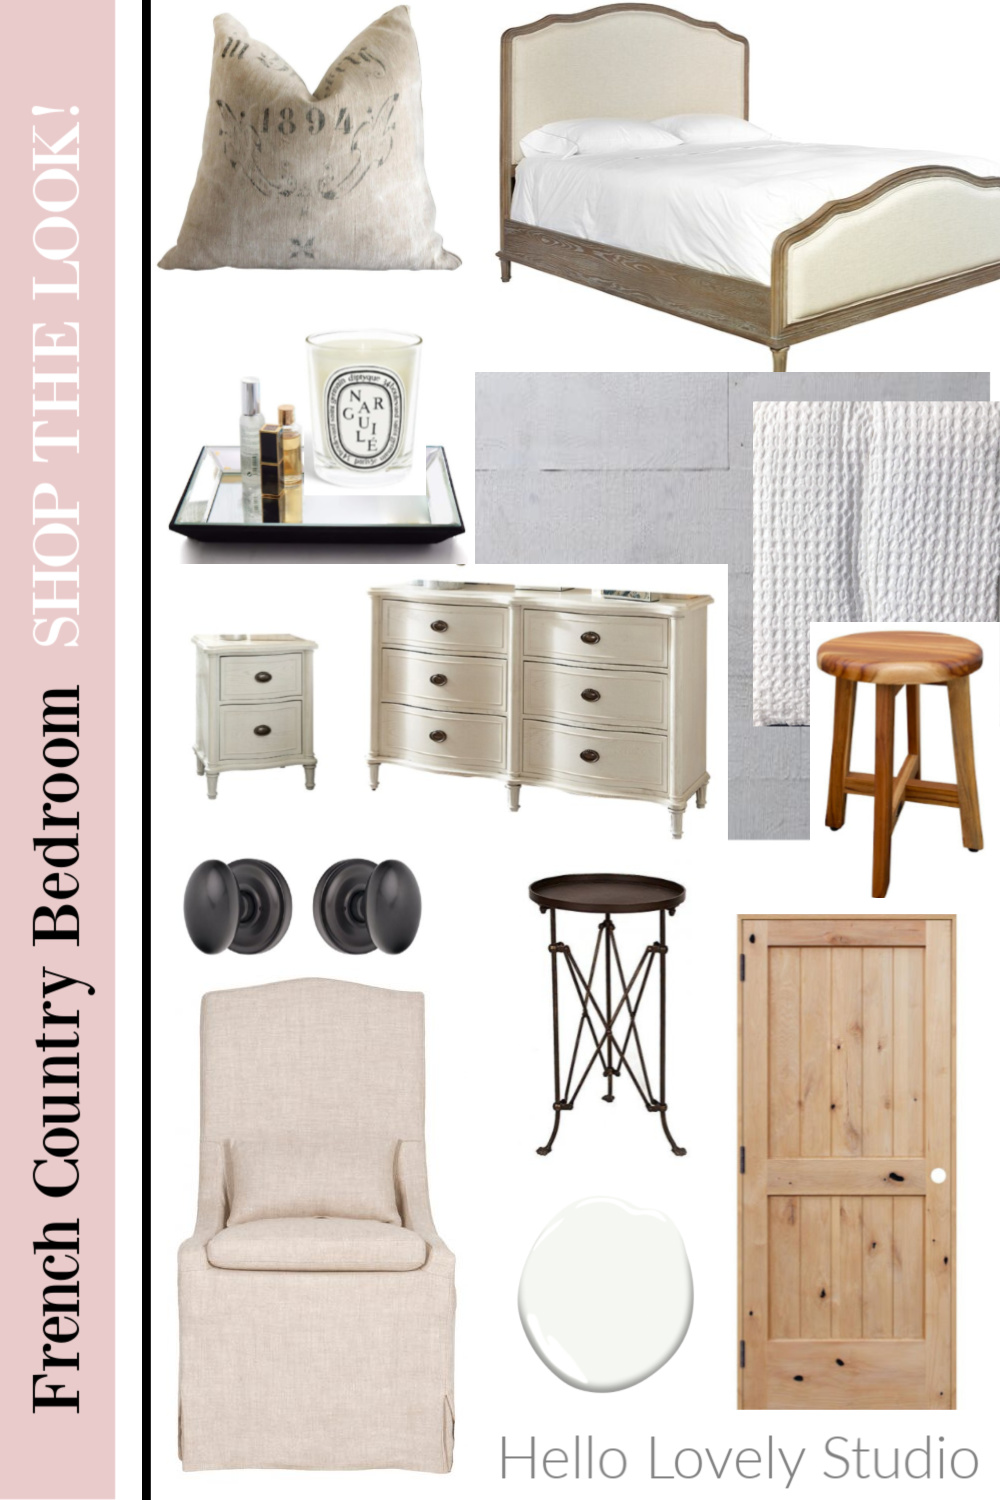
Our Bedroom’s Sitting Room
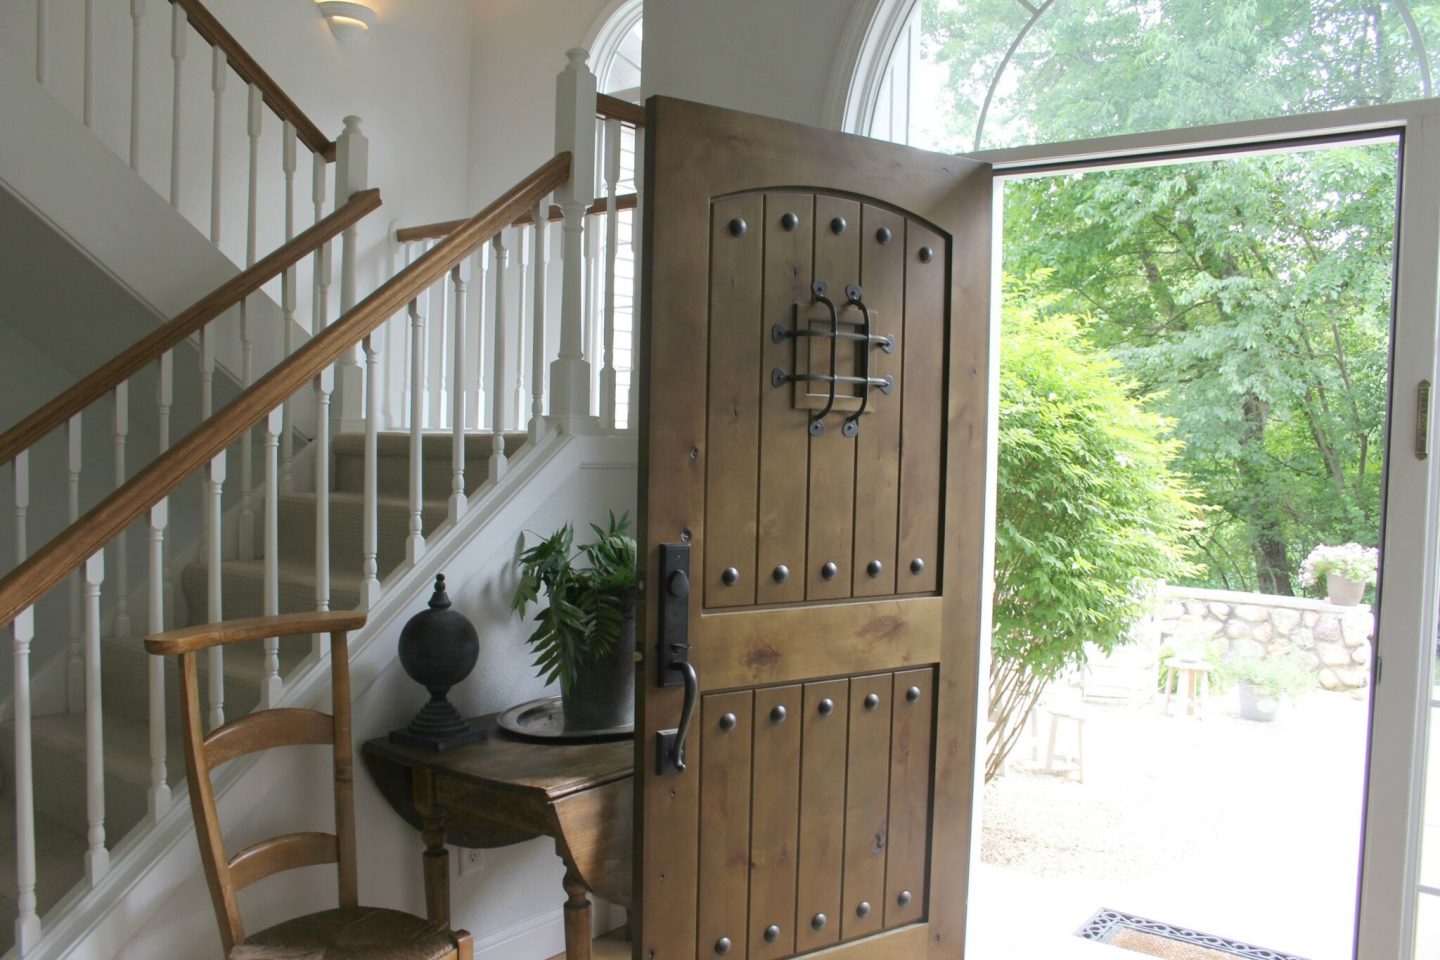
Our home is located on a forest preserve with amazing views from this turret in our bedroom. All of those exterior walls and windows made proper heating and cooling a headache. I designed this wall with an arched doorway for an antique exterior door to keep drafts to a minimum.
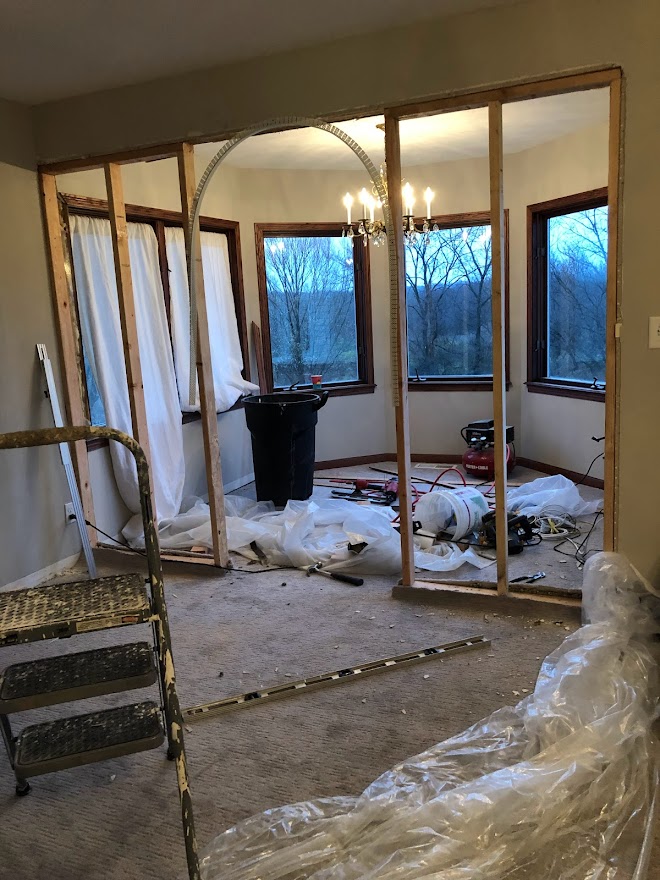
We like it so much more now, and the function of this space also improved.
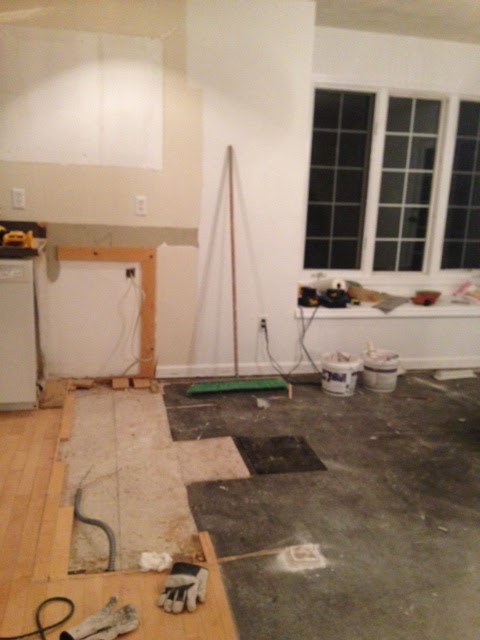
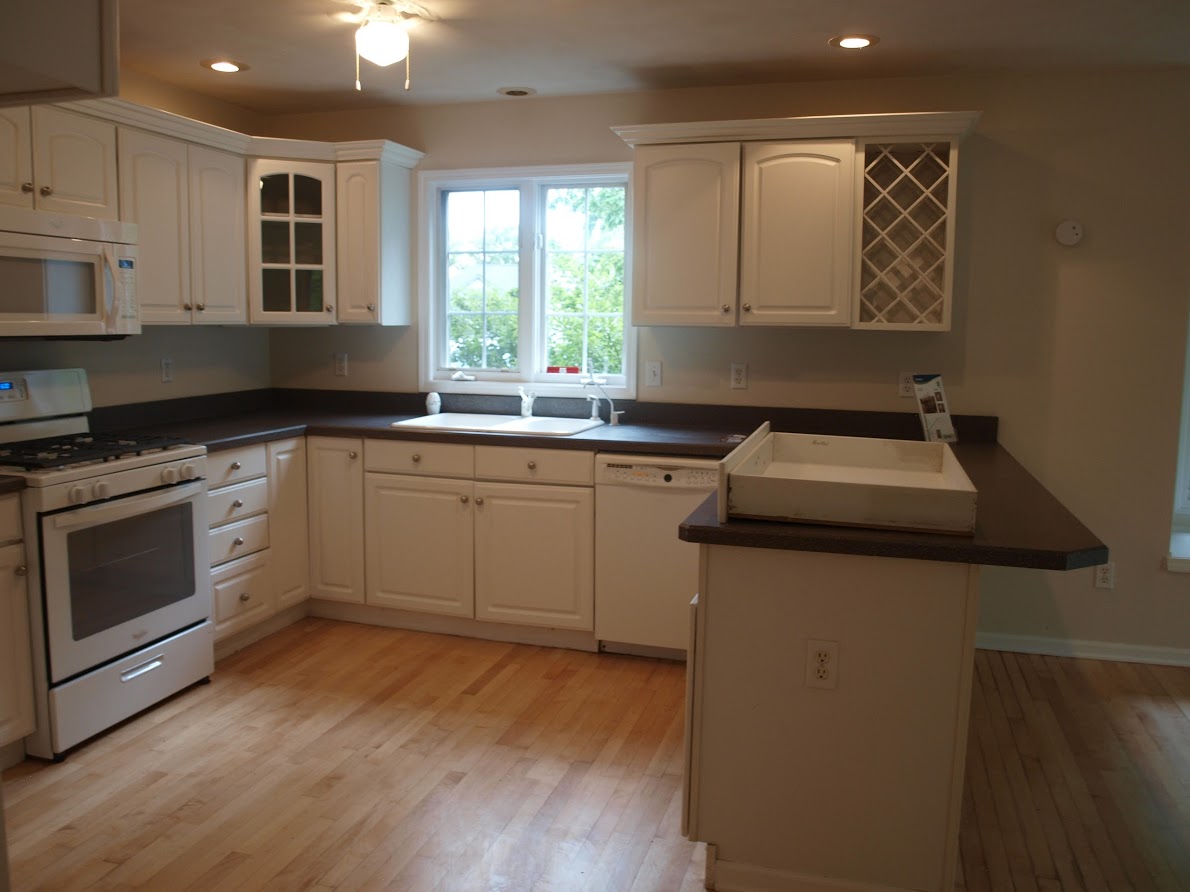
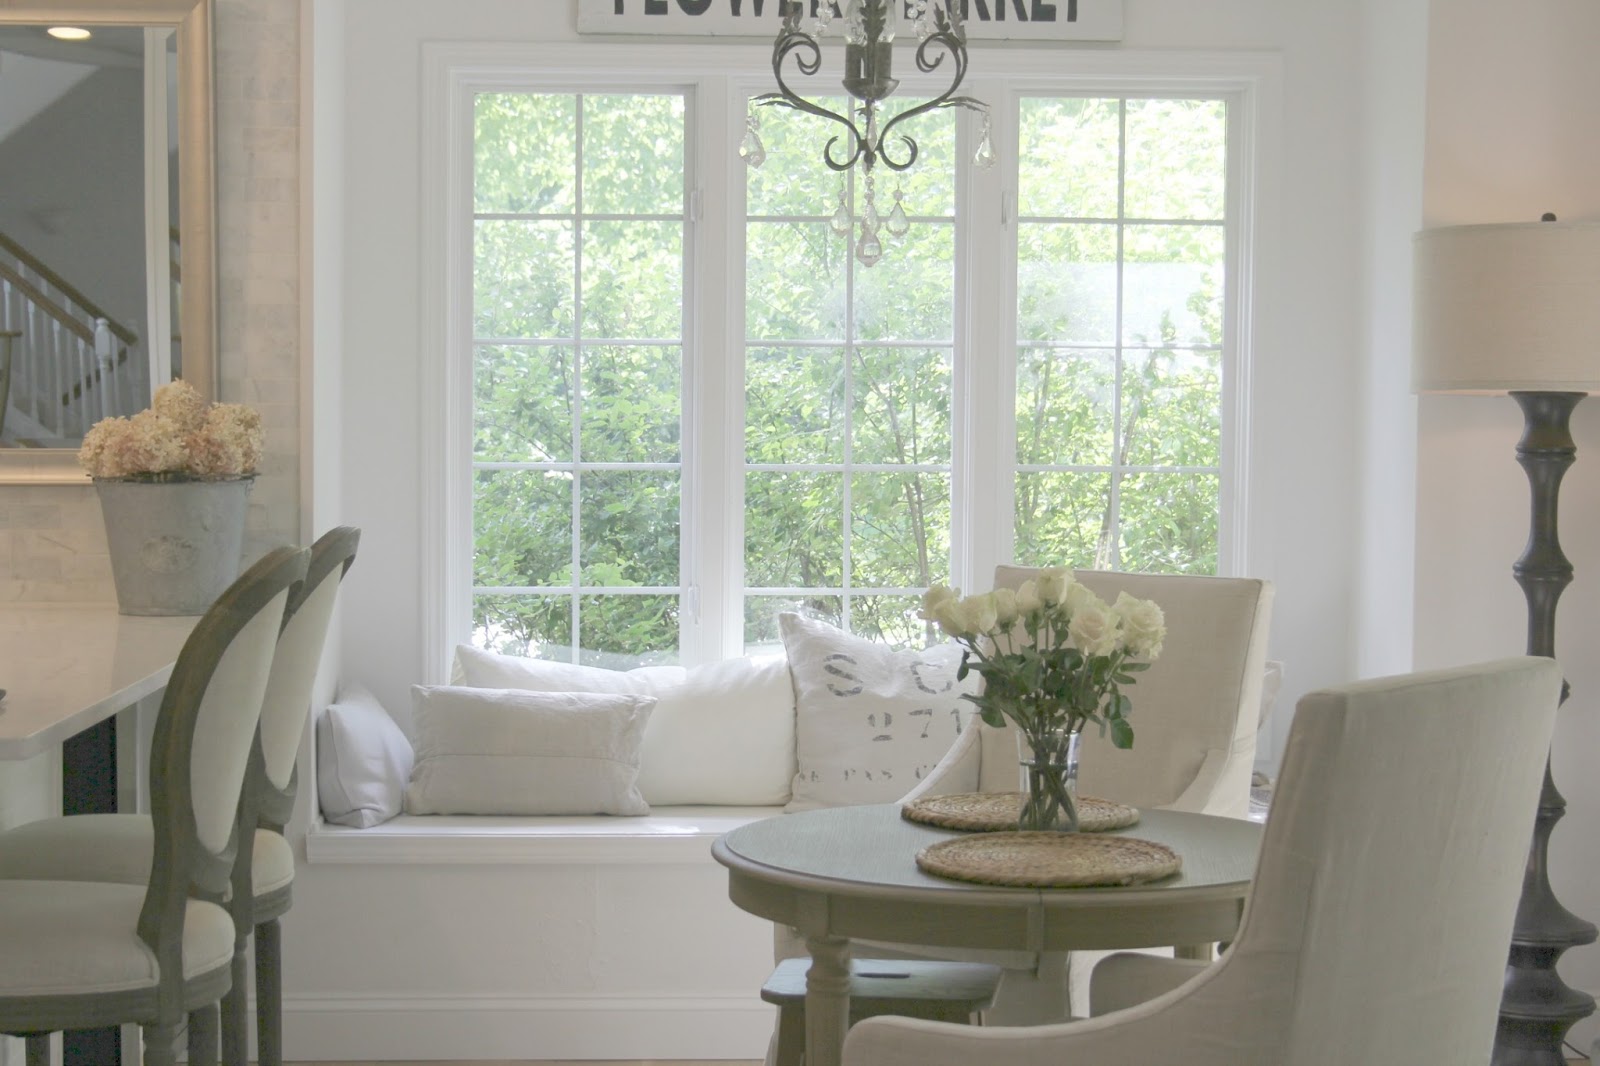
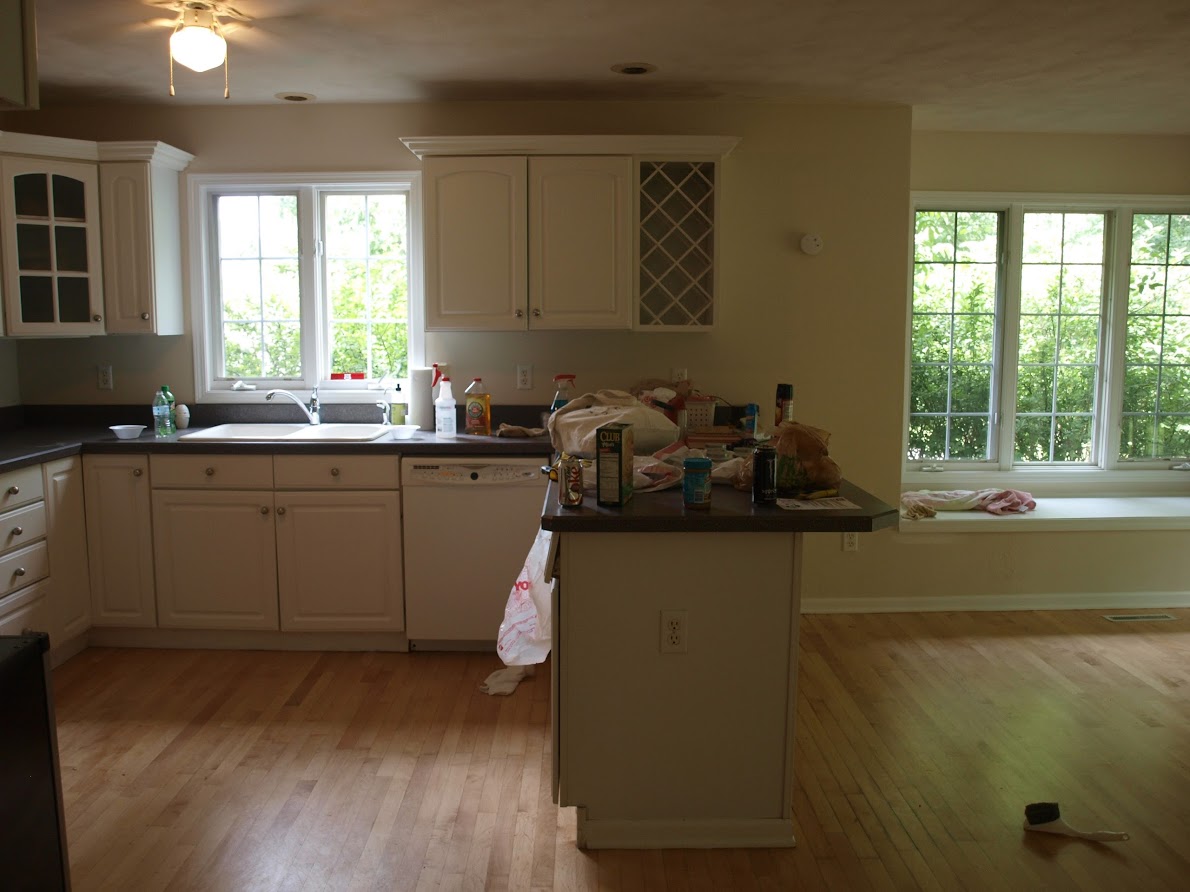
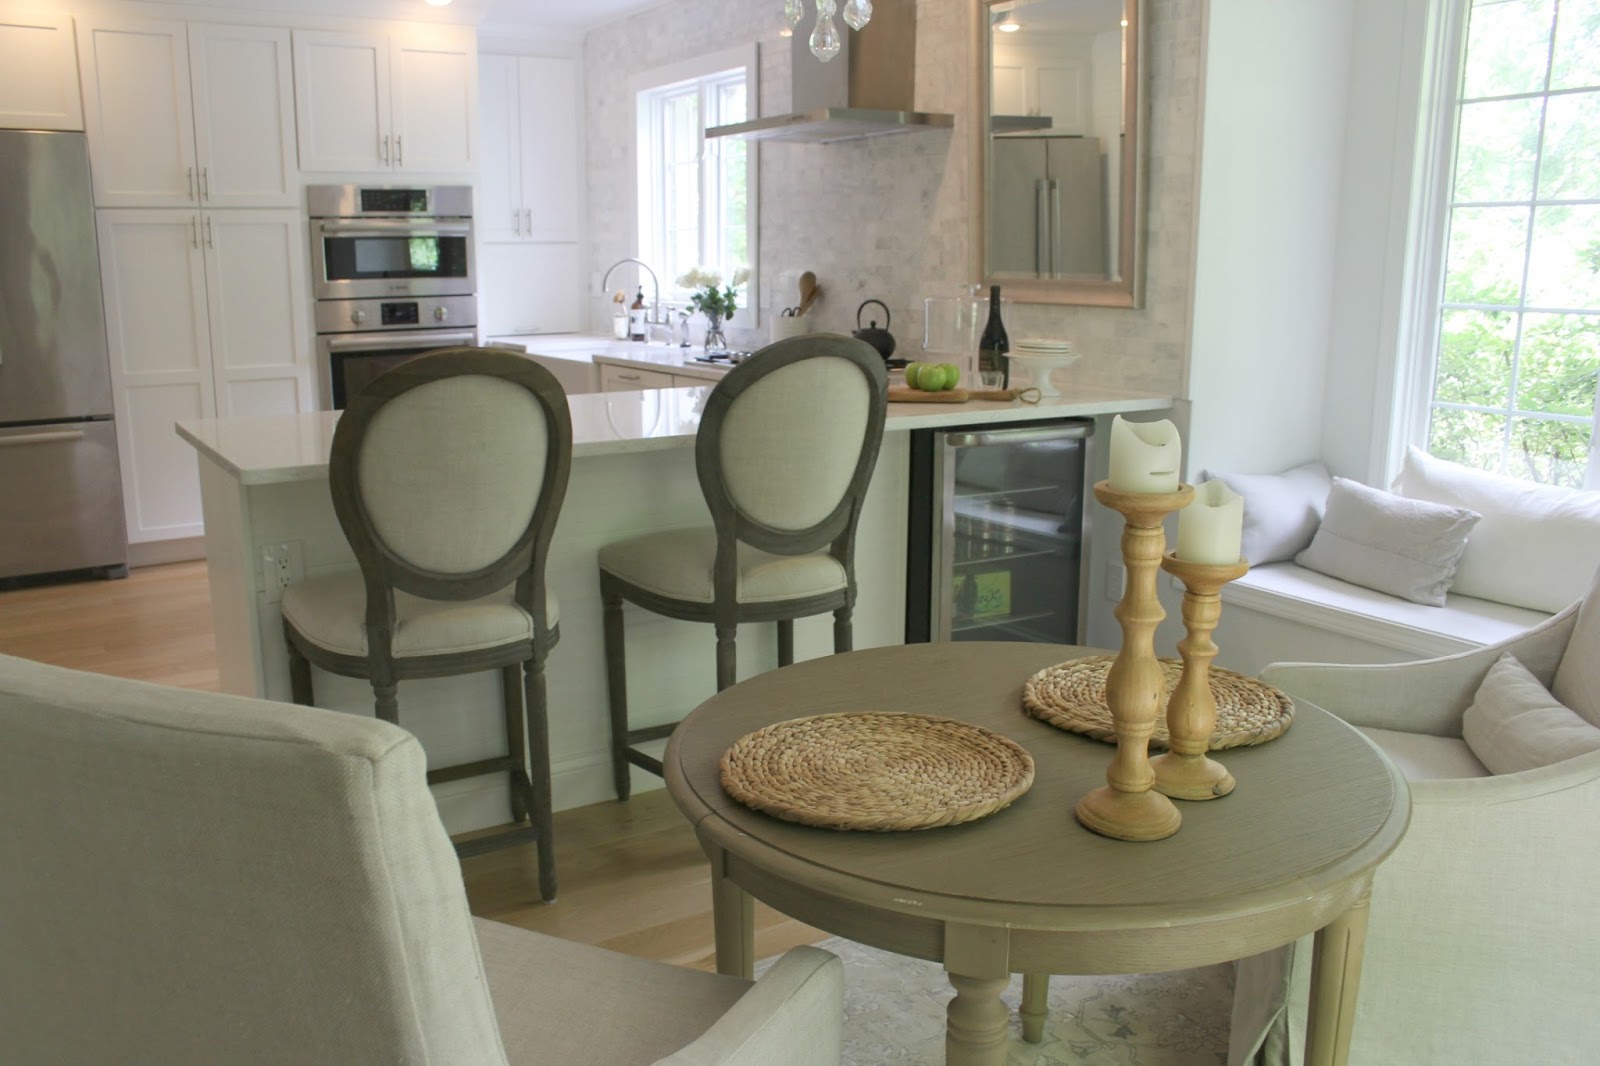
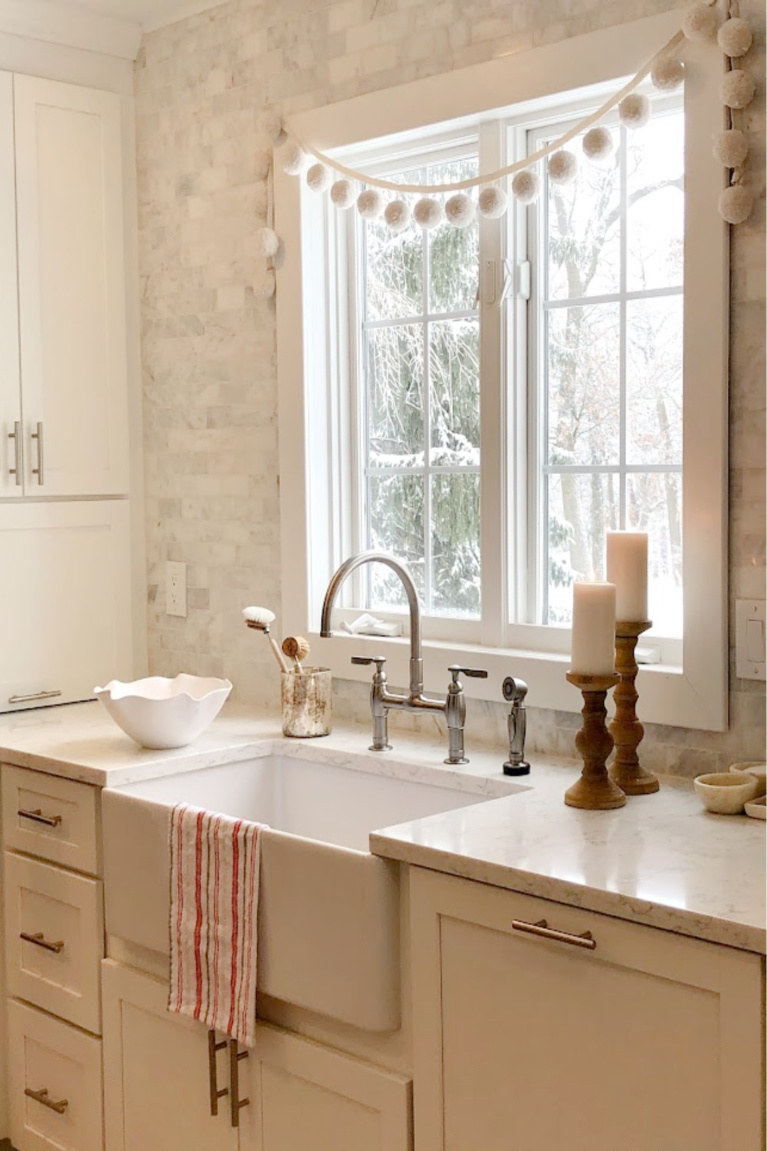
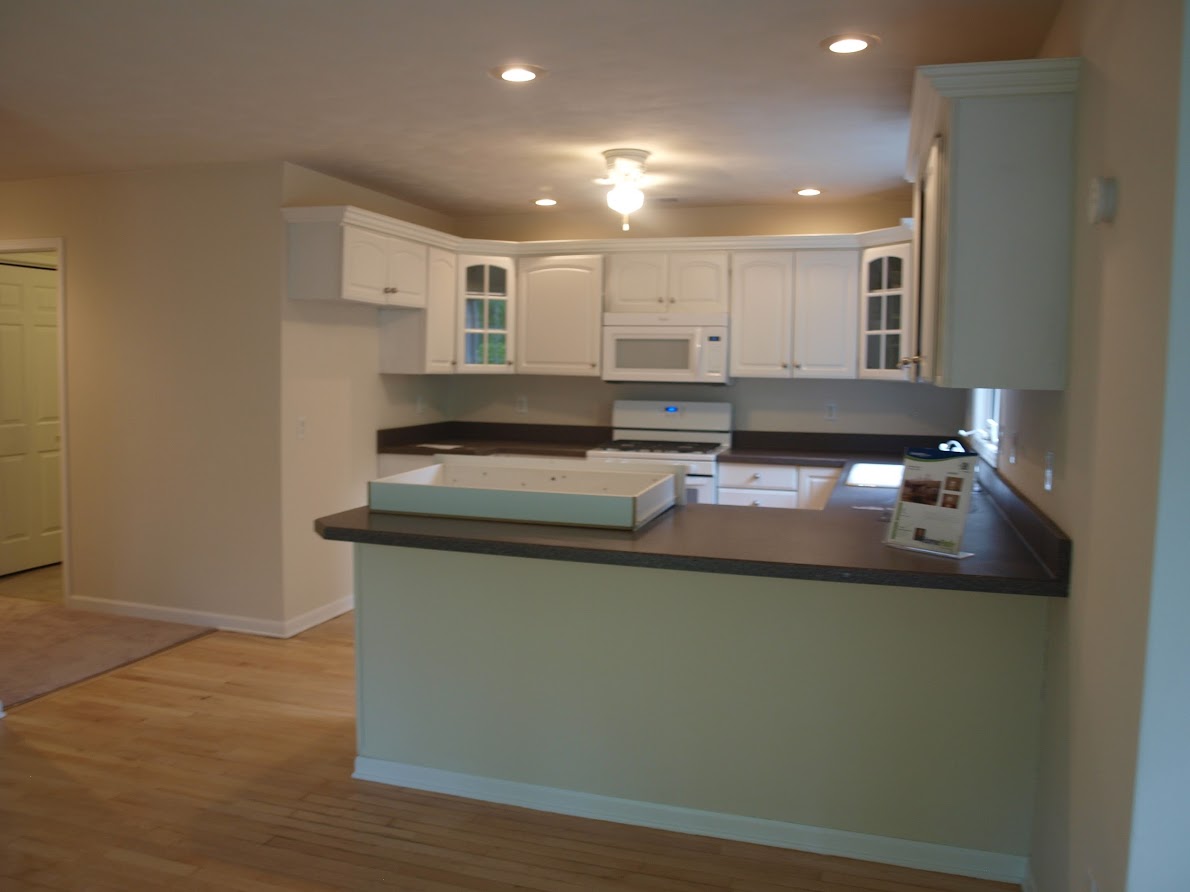
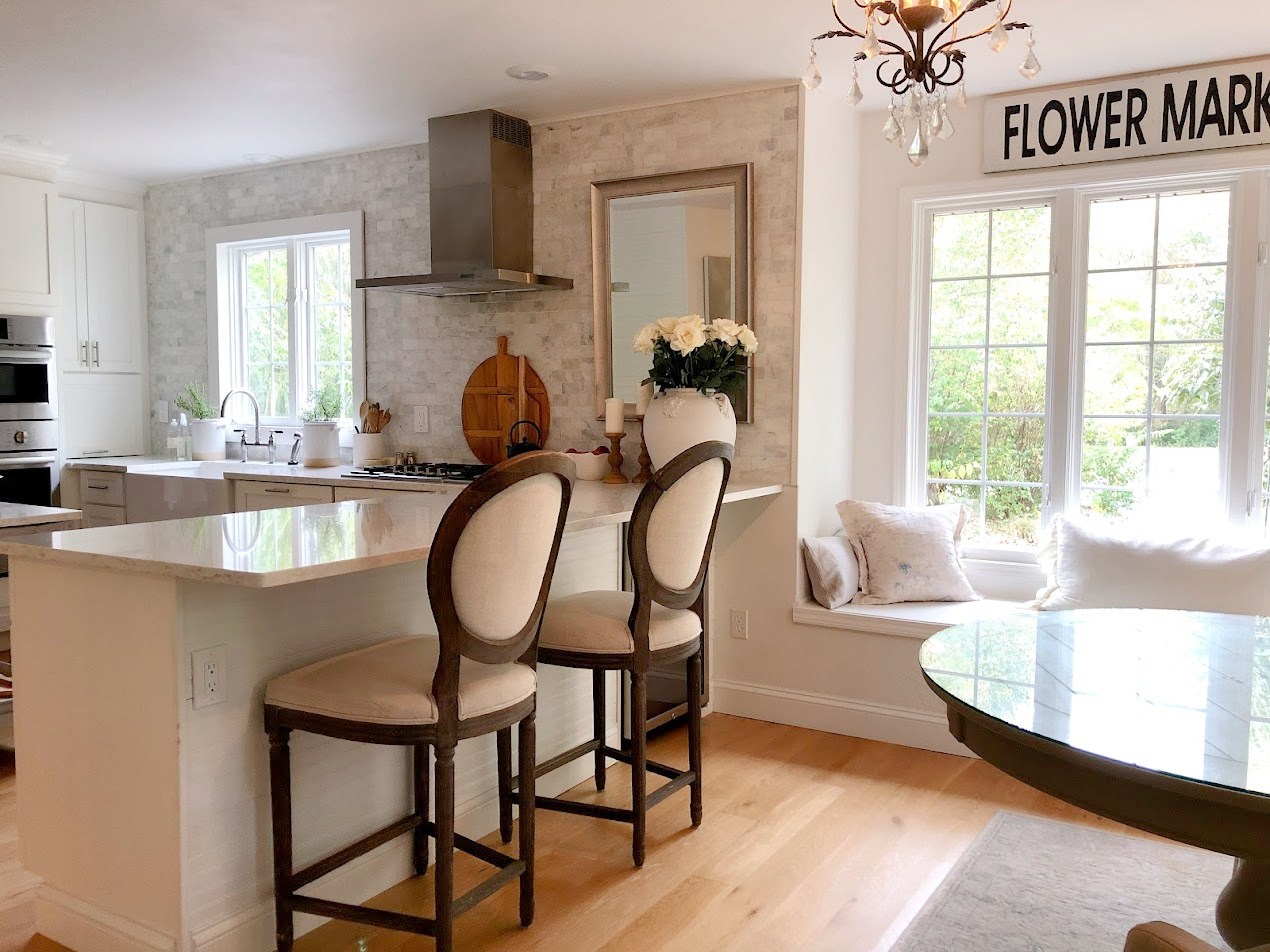
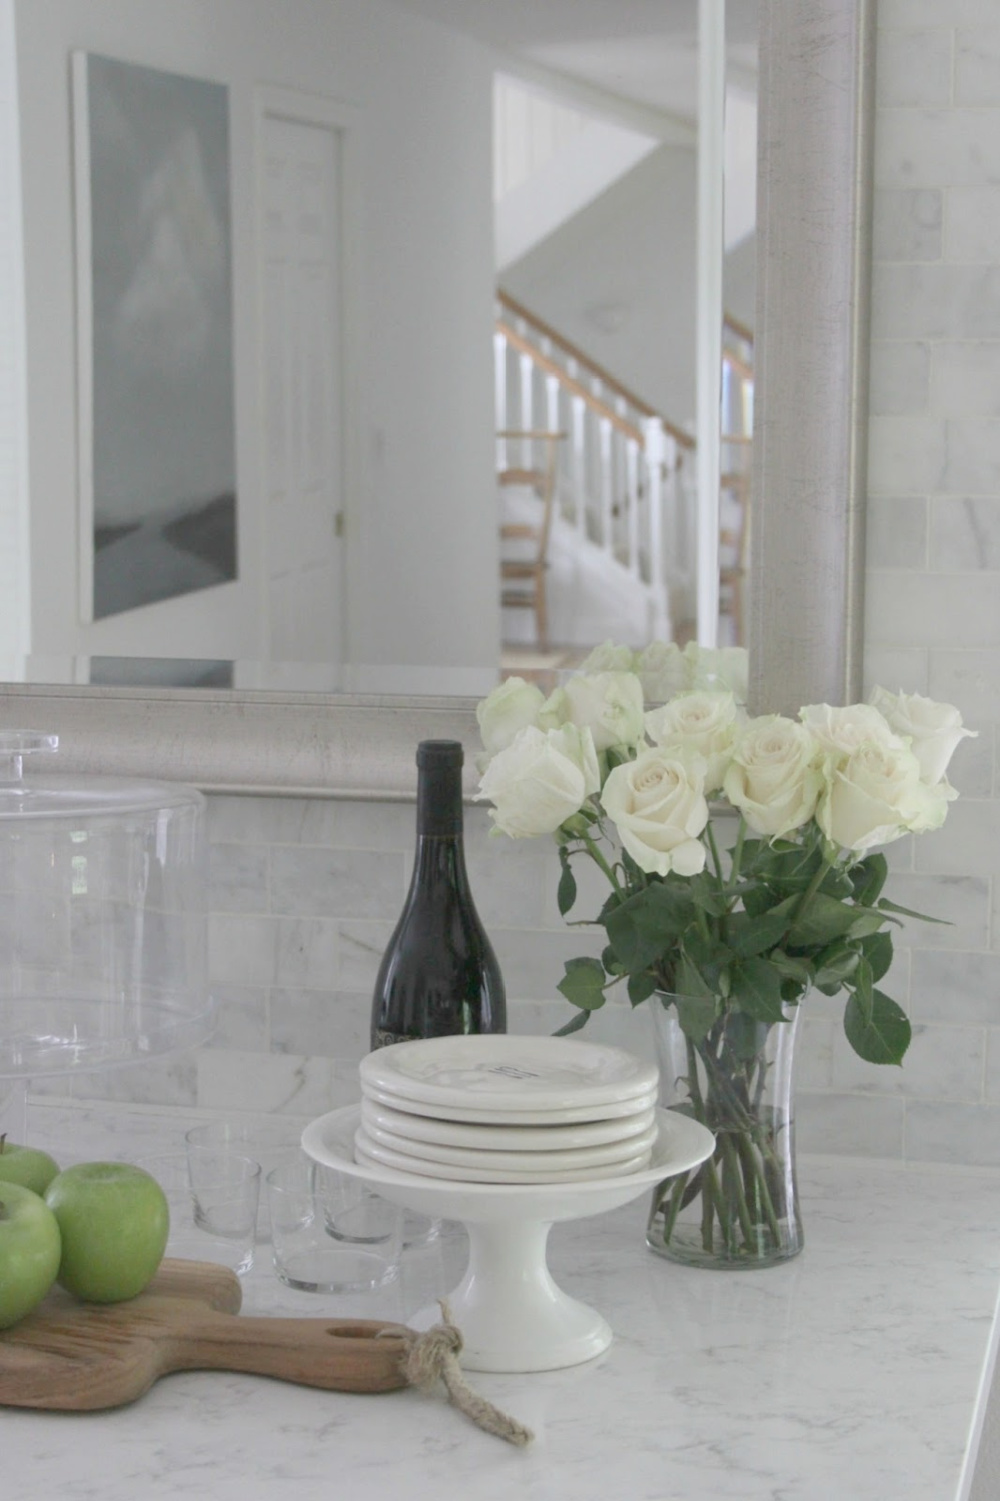
1990s Kitchen Became Timeless
We were grateful this custom kitchen already had high quality, solid wood cabinets, and I reconfigured them. Some were even placed a few in the adjacent laundry room. While the breakfast nook held potential, it was clunky and wrapped in brown…not a look I could live with.
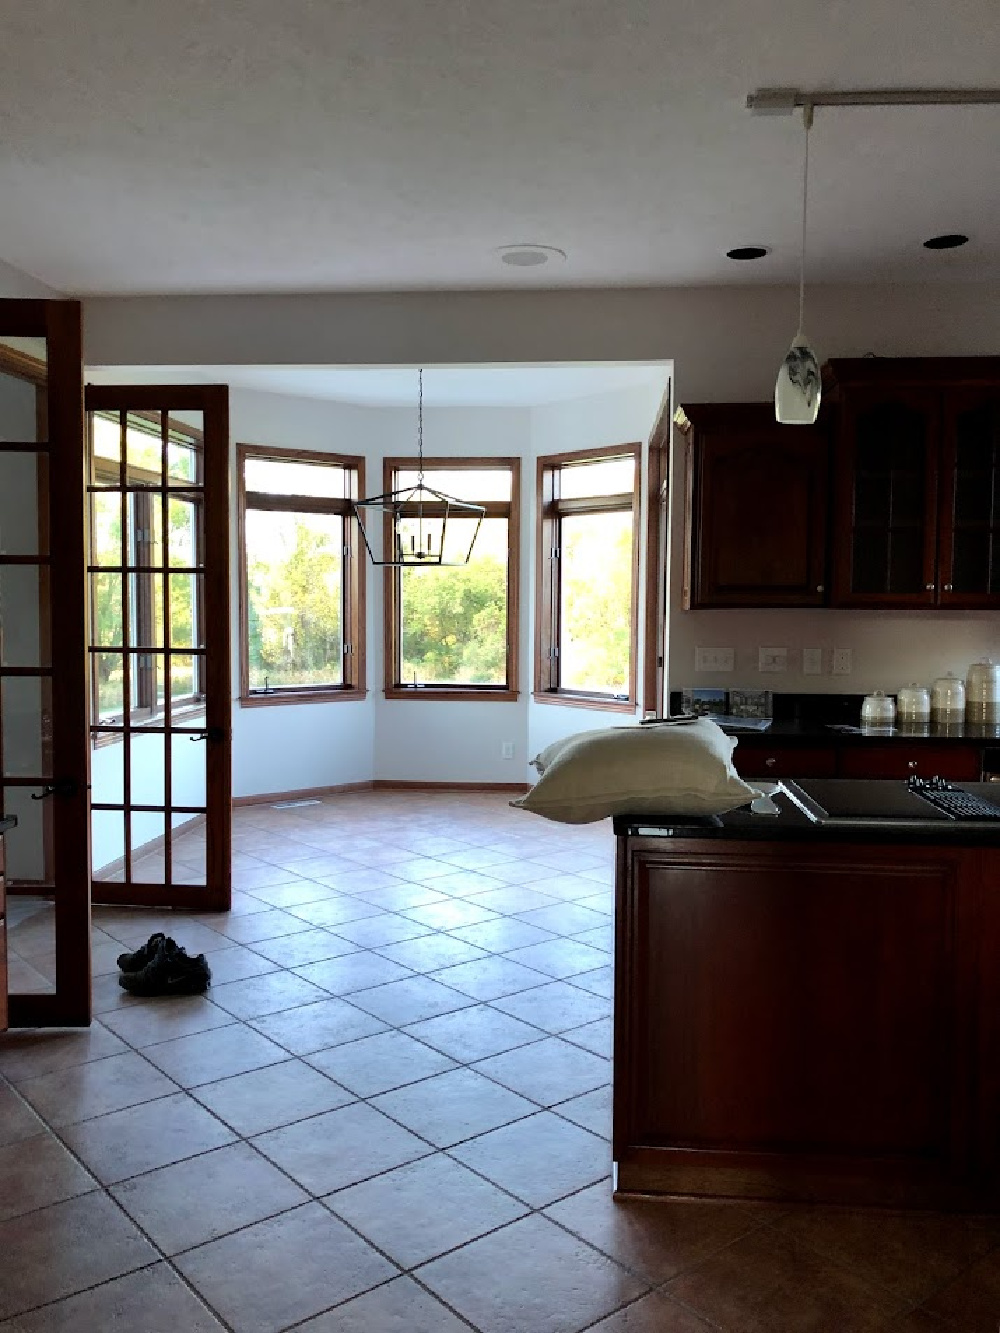
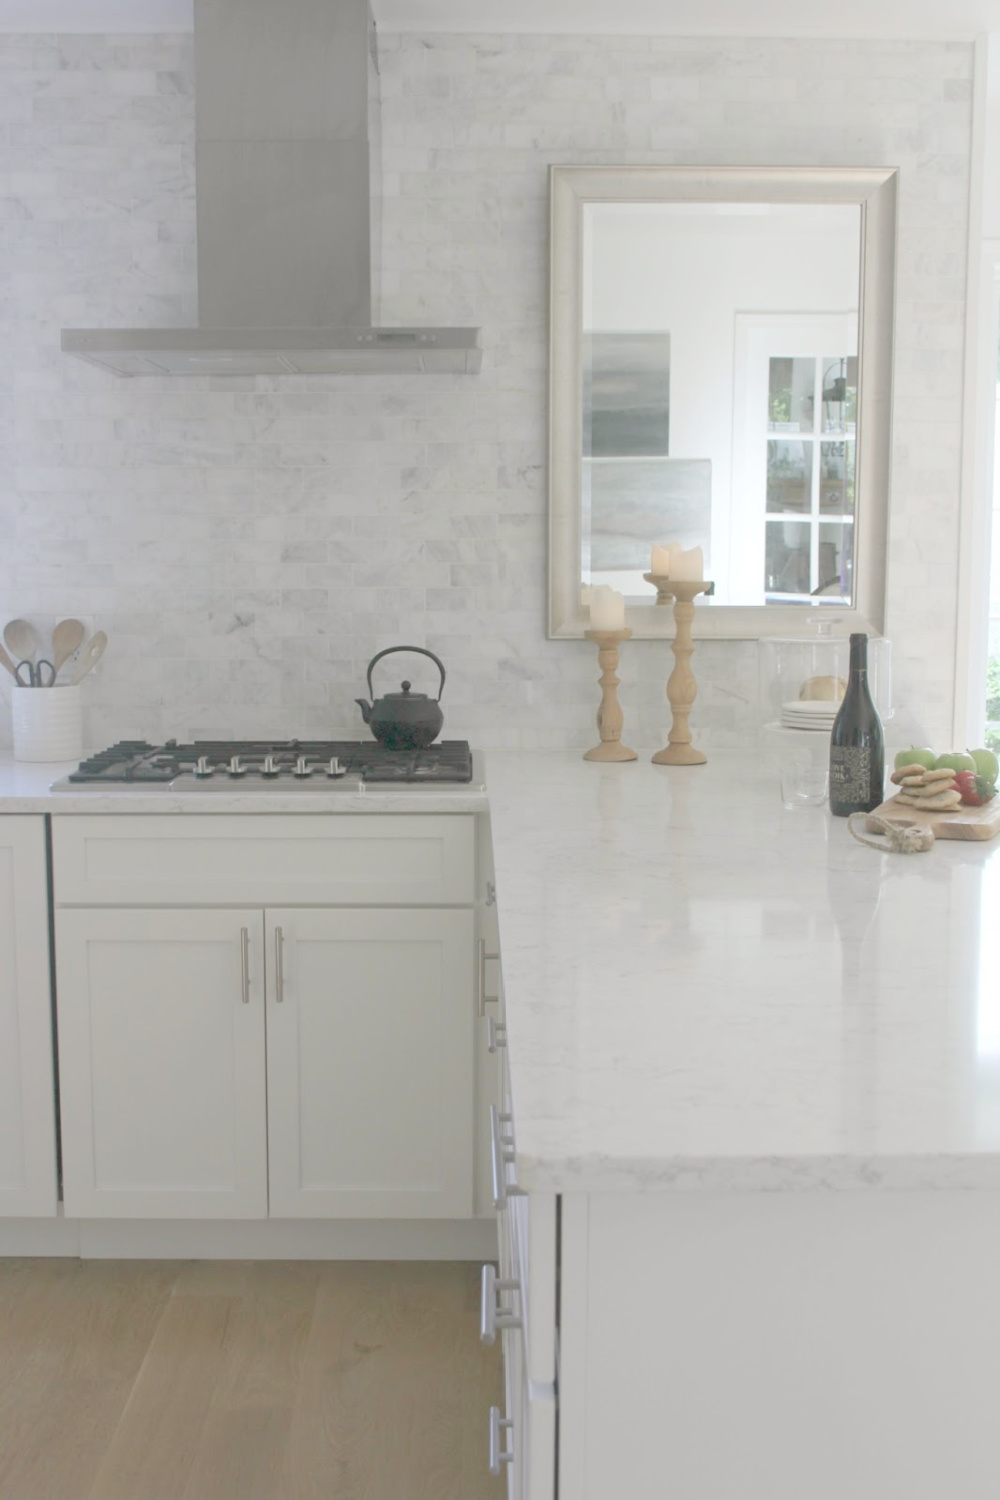
We painted the cabinetry, left just one wall cabinet, expanded the island, swapped the brown granite for white quartz, changed the flooring, upgraded lighting, added a calacatta gold backsplash, and spent weeks painting trim.
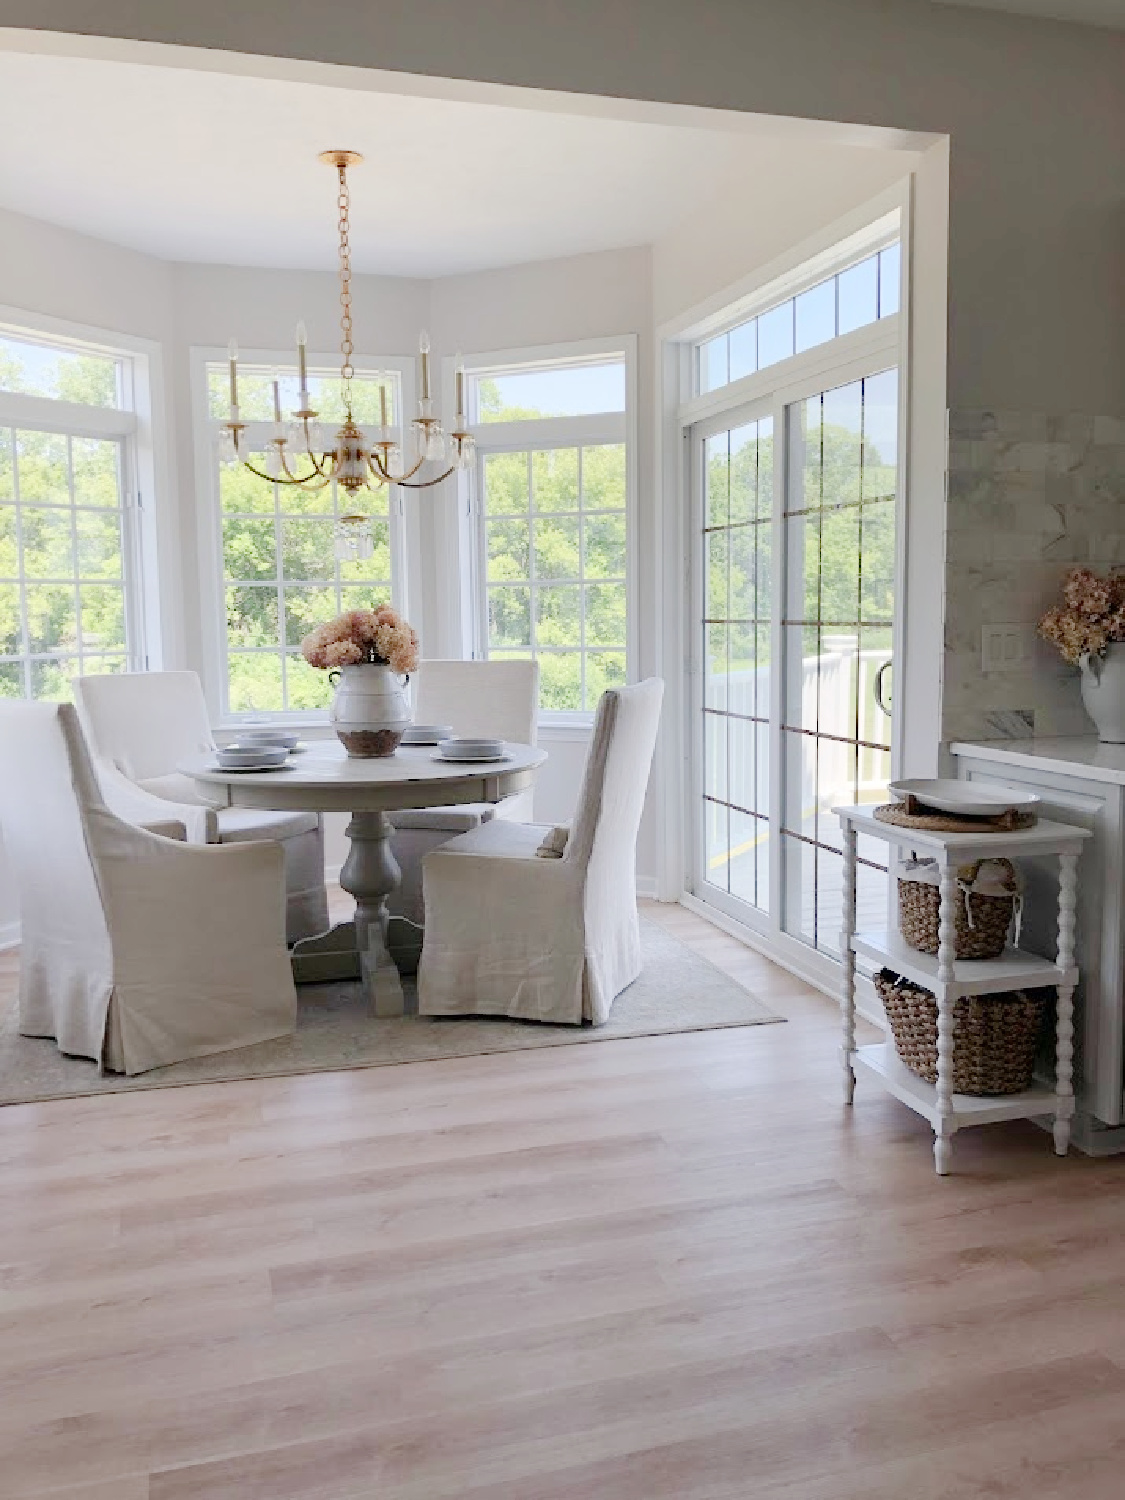
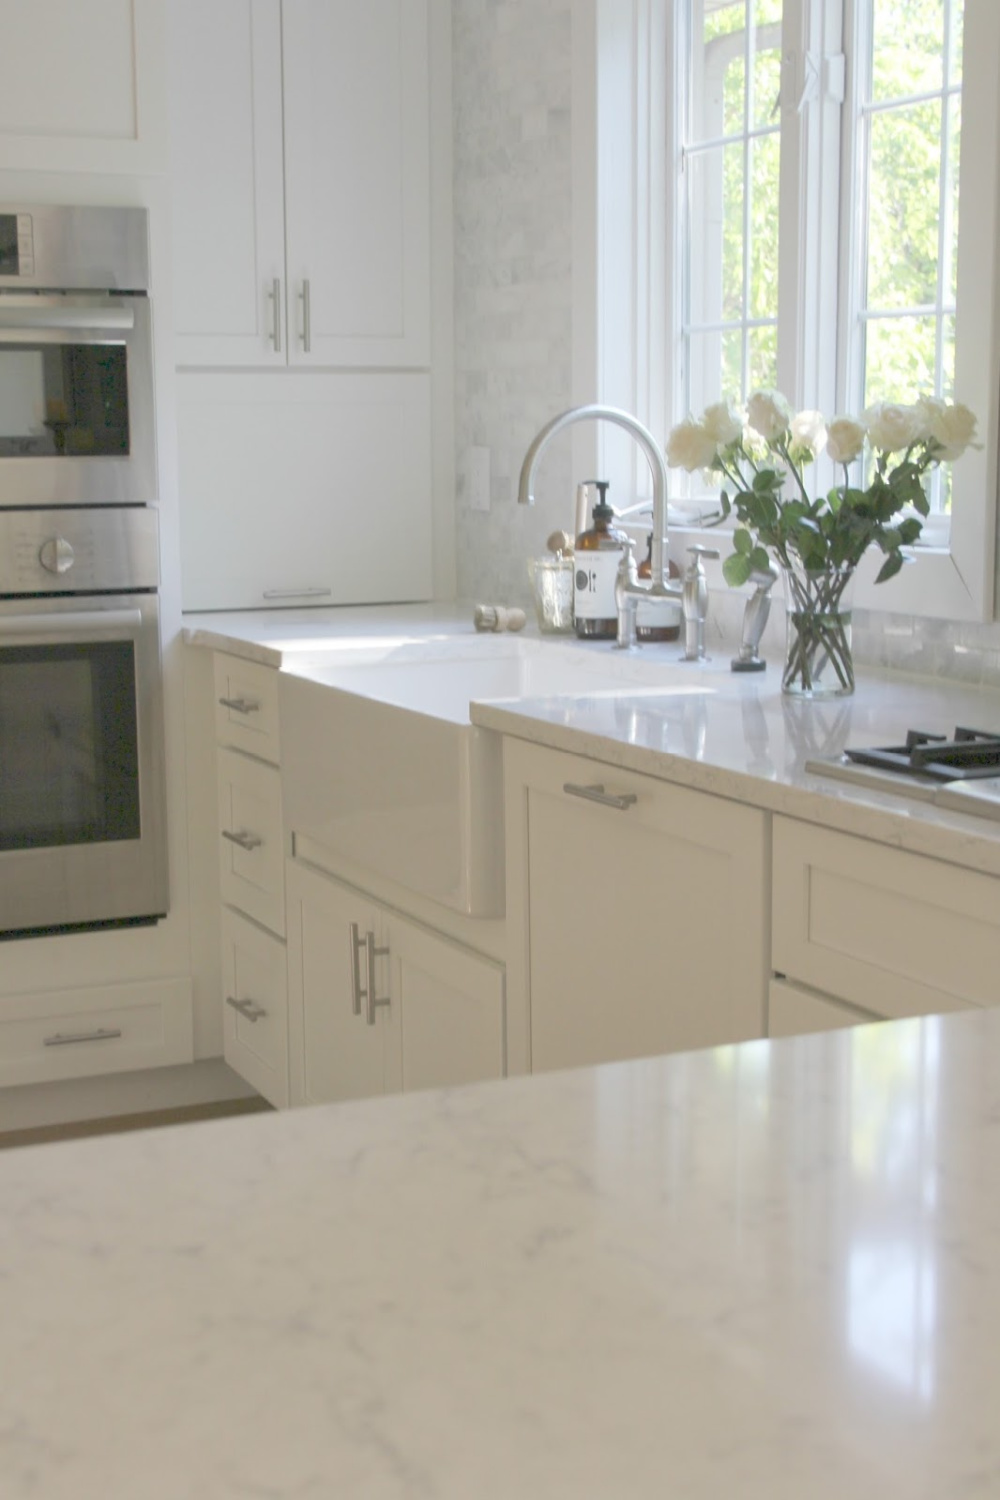
We reconfigured the corner sink base and added a farm sink as well. If you decide to DIY your marble backsplash, bear in mind that the stone tiles will soak up the mortar and change colors (ours turned yellow) until they are fully dry (our took a week). There may have been some tense days wondering if we had made the worst mistake! I have since seen some tile installers soak the marble tile in water first before applying adhesive. Also wondering if we could have sealed the back of the tile first. We’ll be more cautious and do a couple trials if ever we attempt this again.
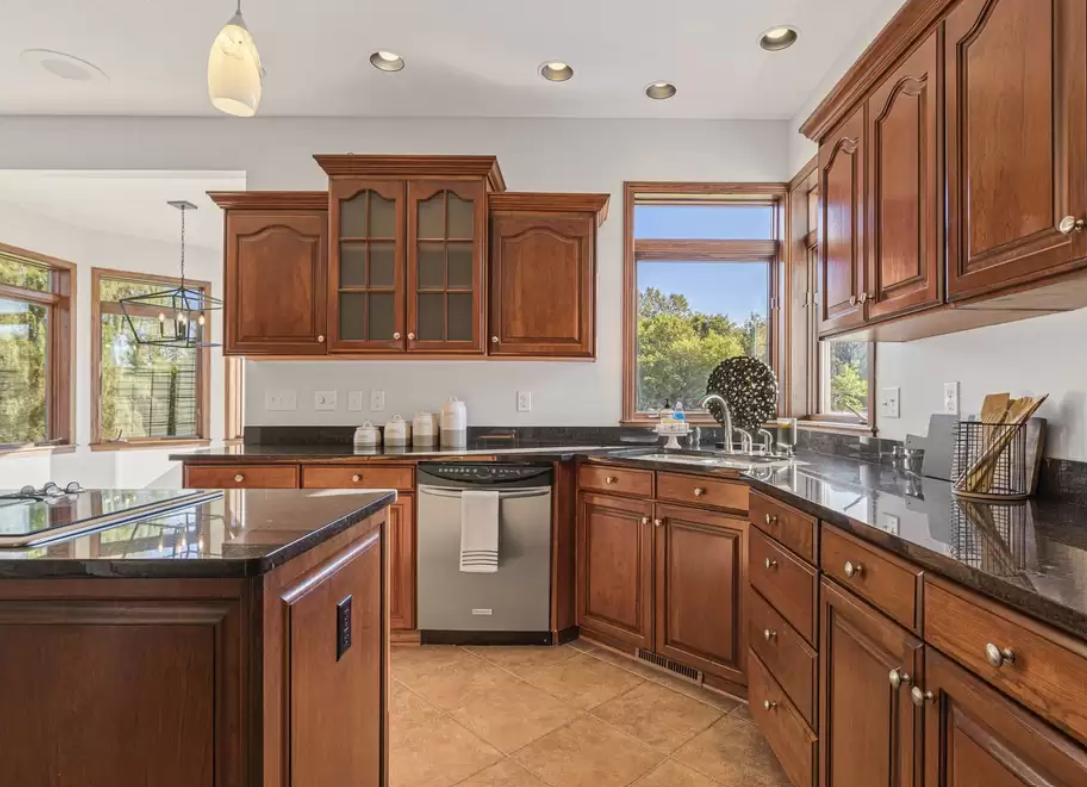
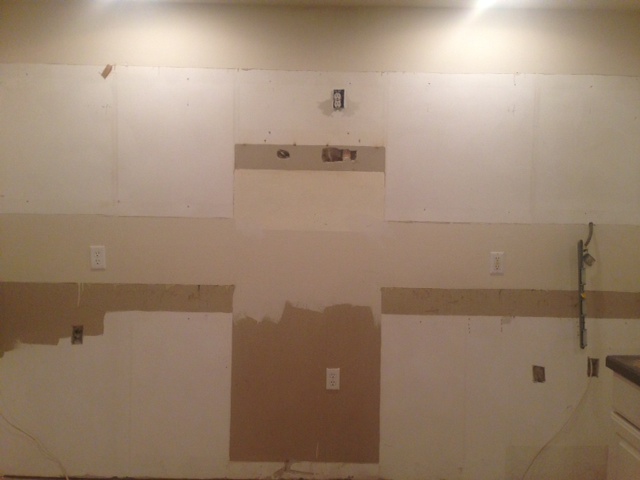
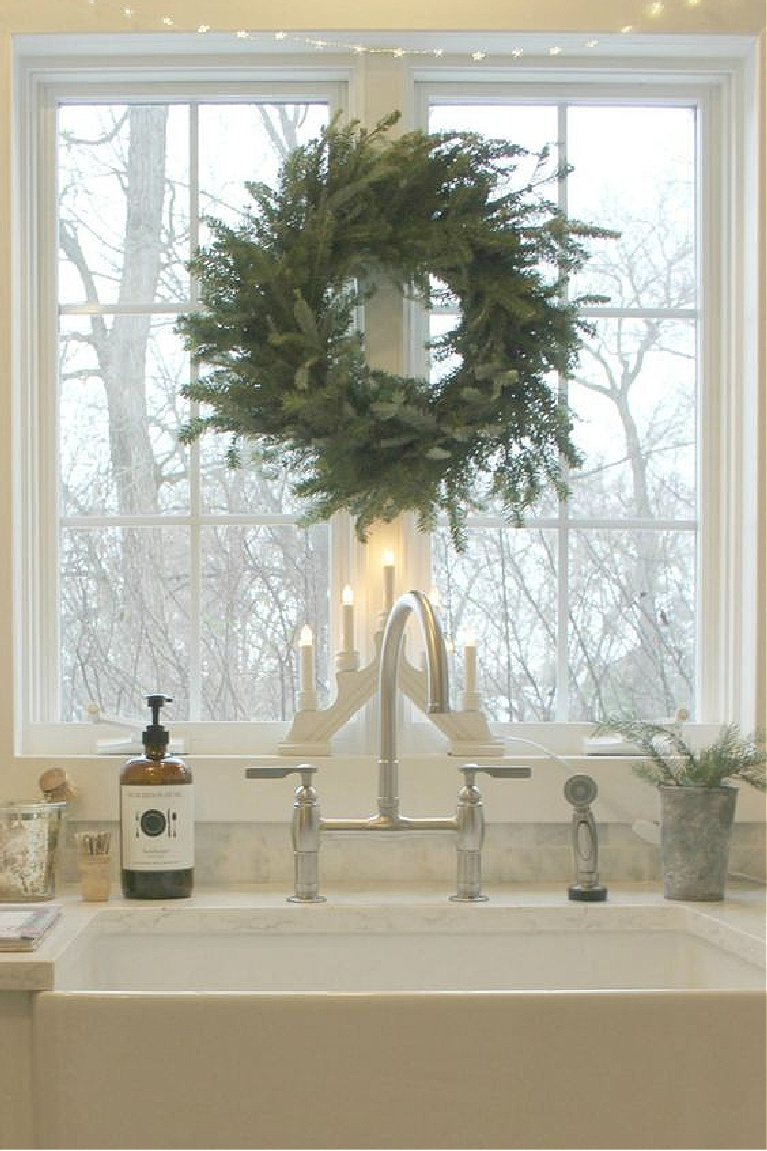
One of the more challenging tasks was installing a gas cooktop and range hood where you see the wire basket on the counter above. Lots of electrical and technical work involved in addition to my husband creating a custom range hood. There was originally a wall oven and microwave, but we placed our new oven in the island out of sight. Our microwave is also hidden so that everything feels serene and living room like.
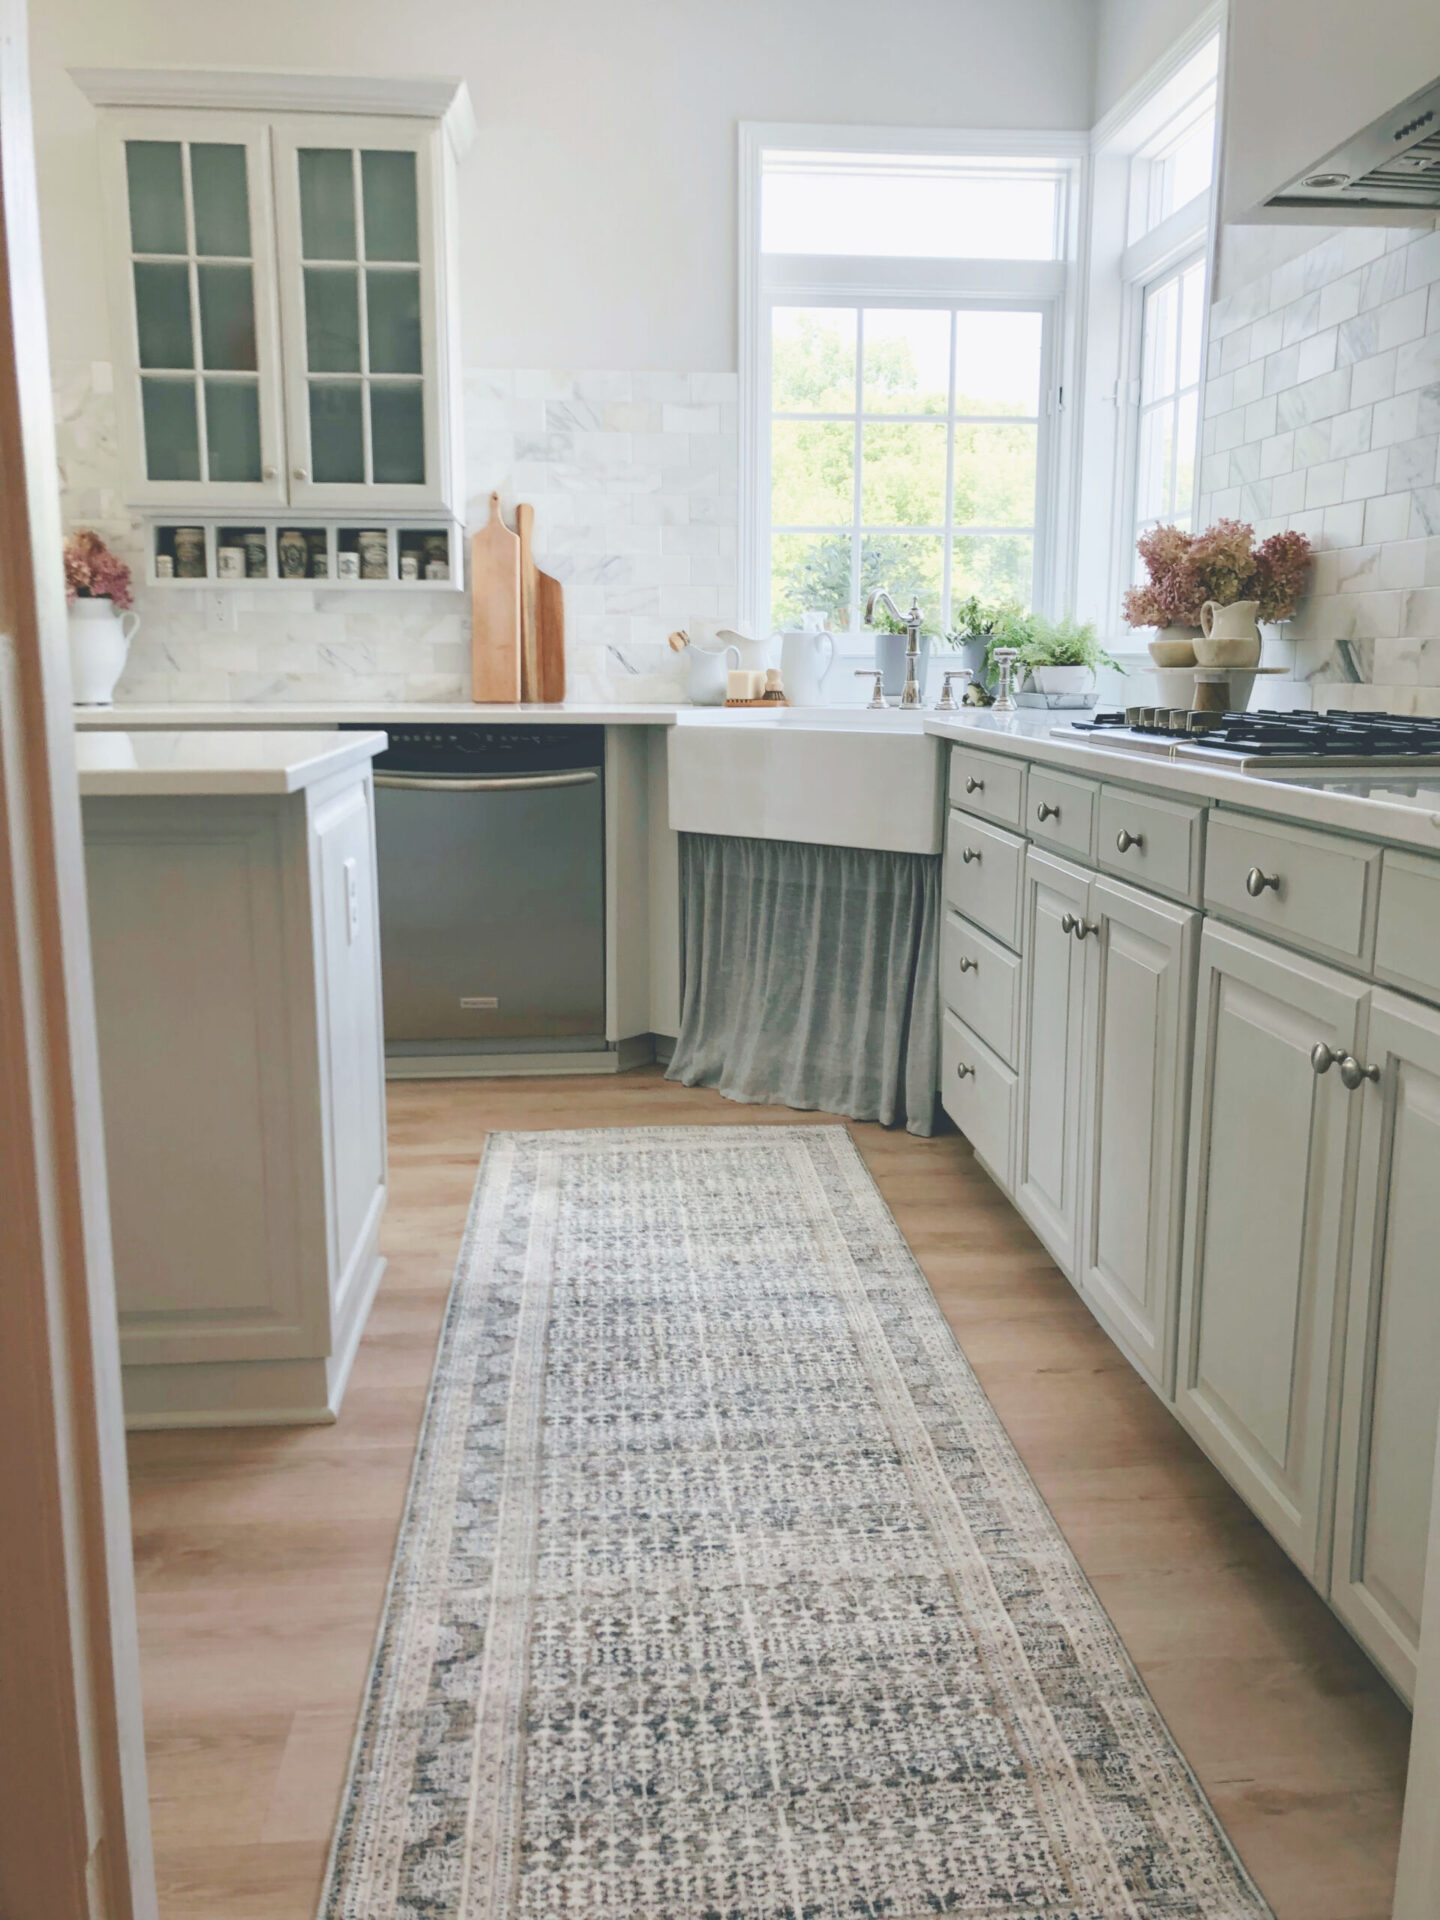
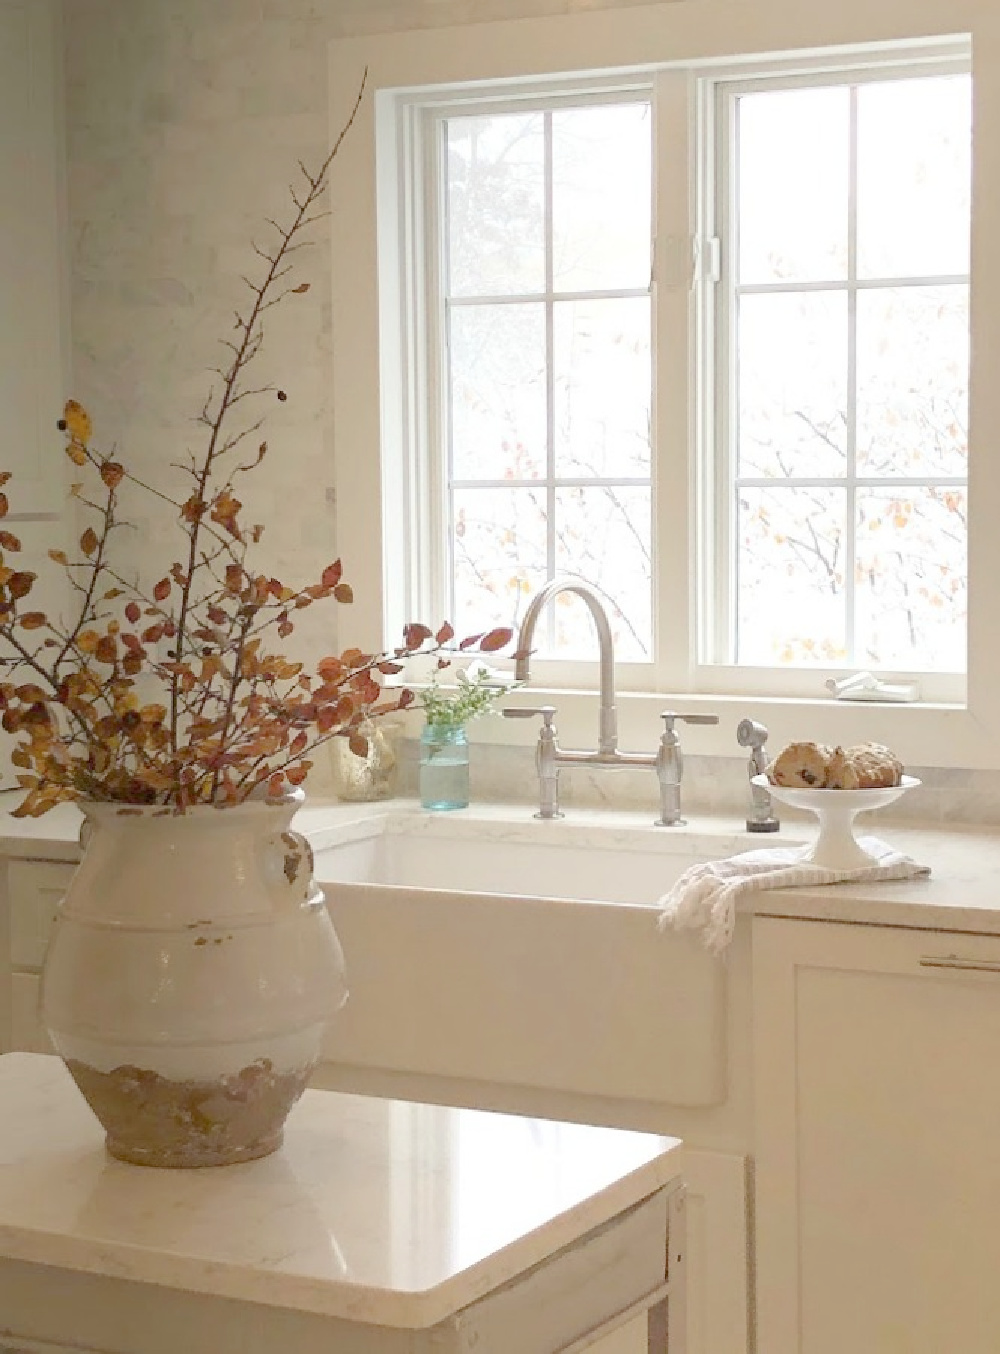
I have always wanted a skirted sink and joyfully got one this time around! It’s wonderful to live with.
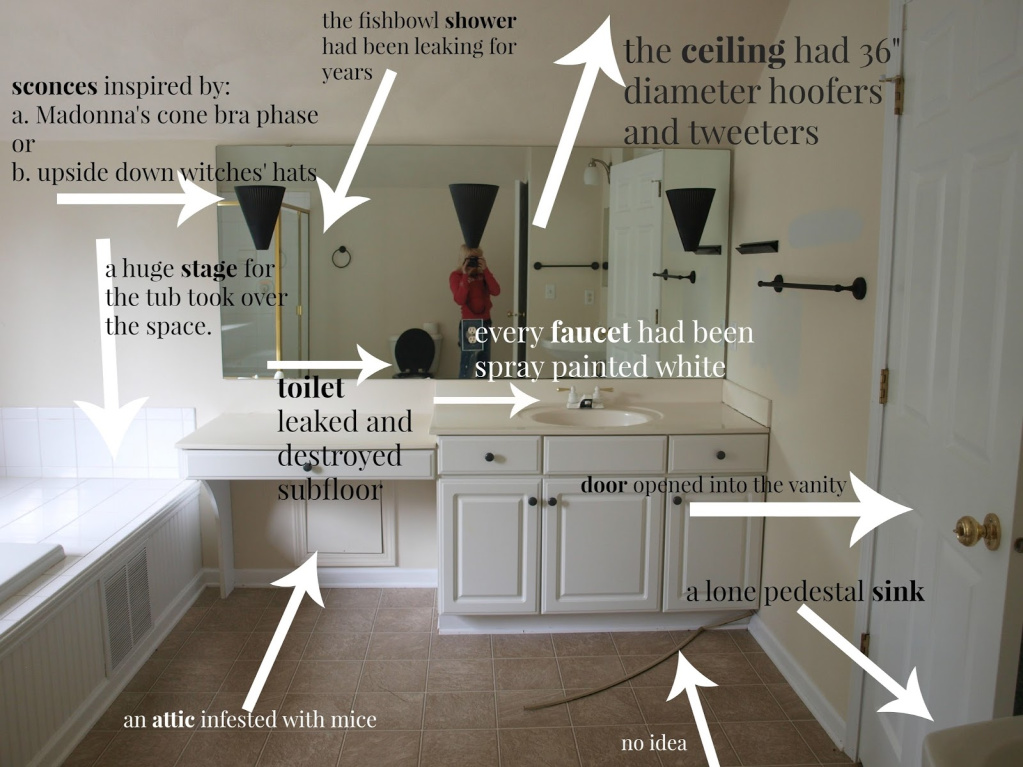
Excuzzie, Jacuzzi
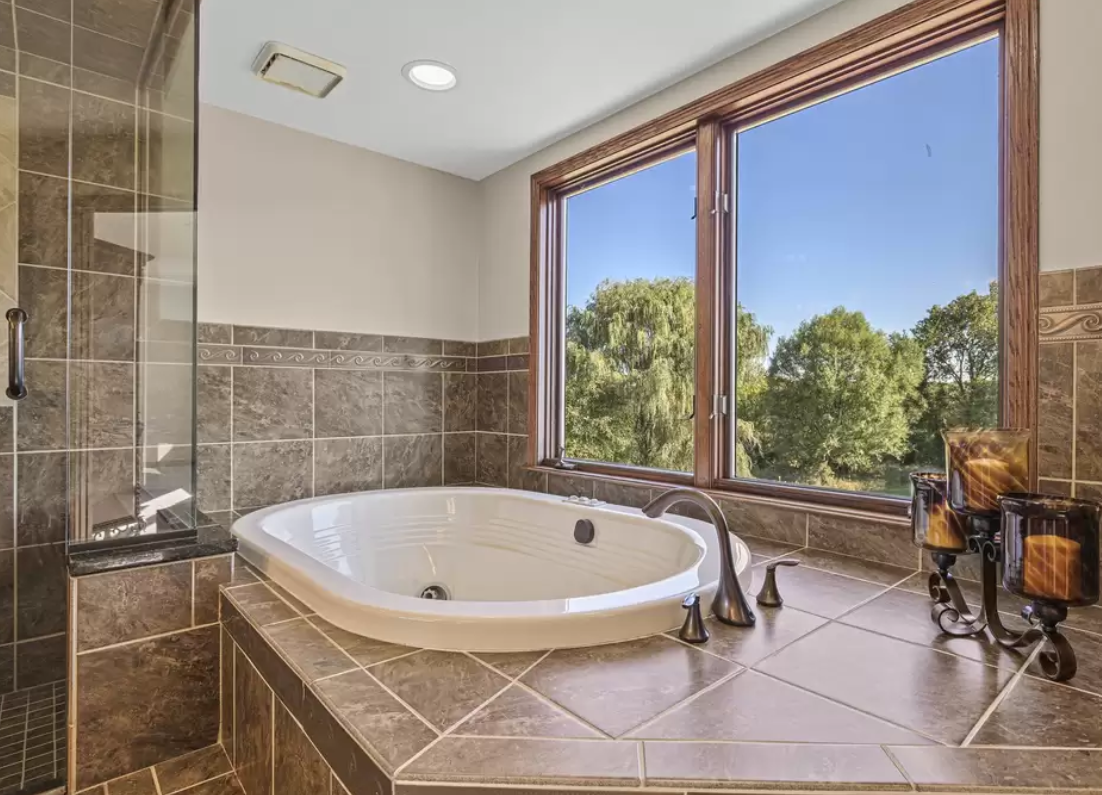
The brown tiled platform tub situation was only working as a death trap so it had to go. We gutted this entire bath and changed everything.
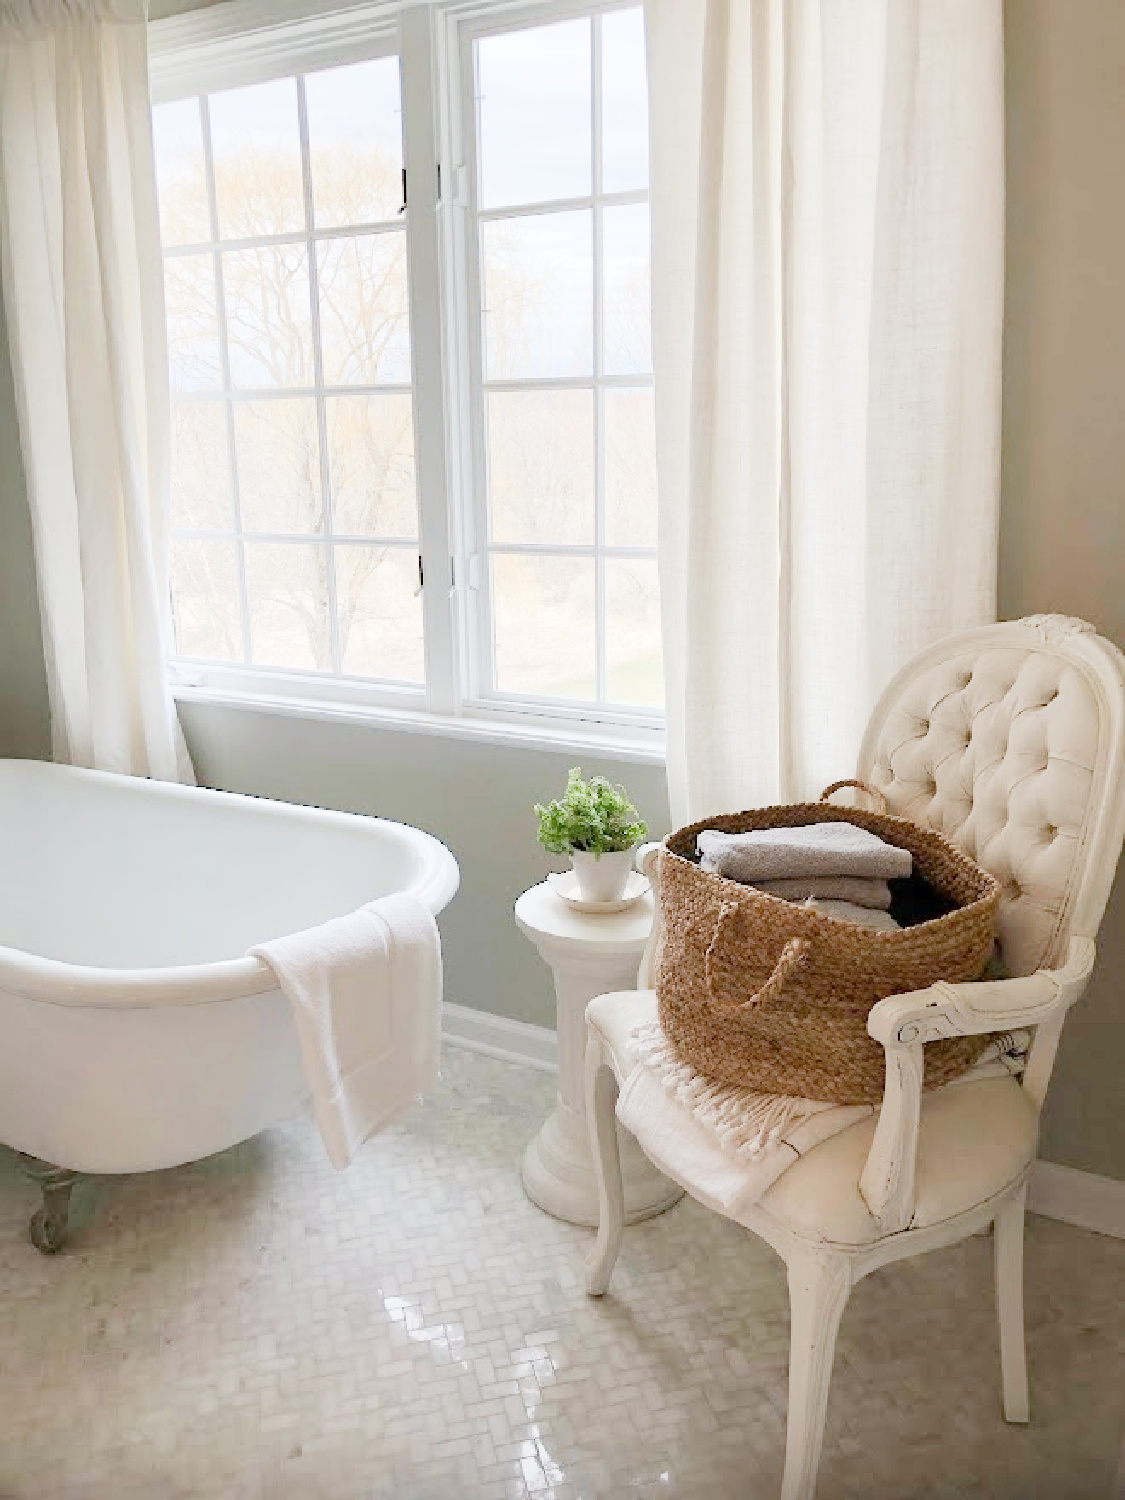
Now it’s a classic white marble tiled beauty and a pleasure to be in.
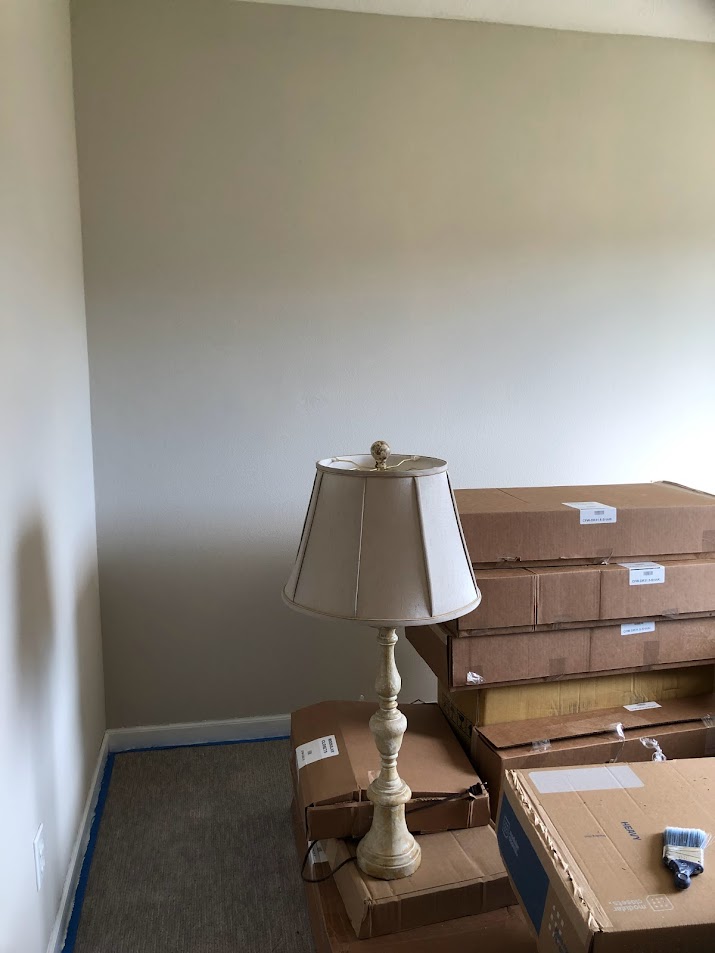
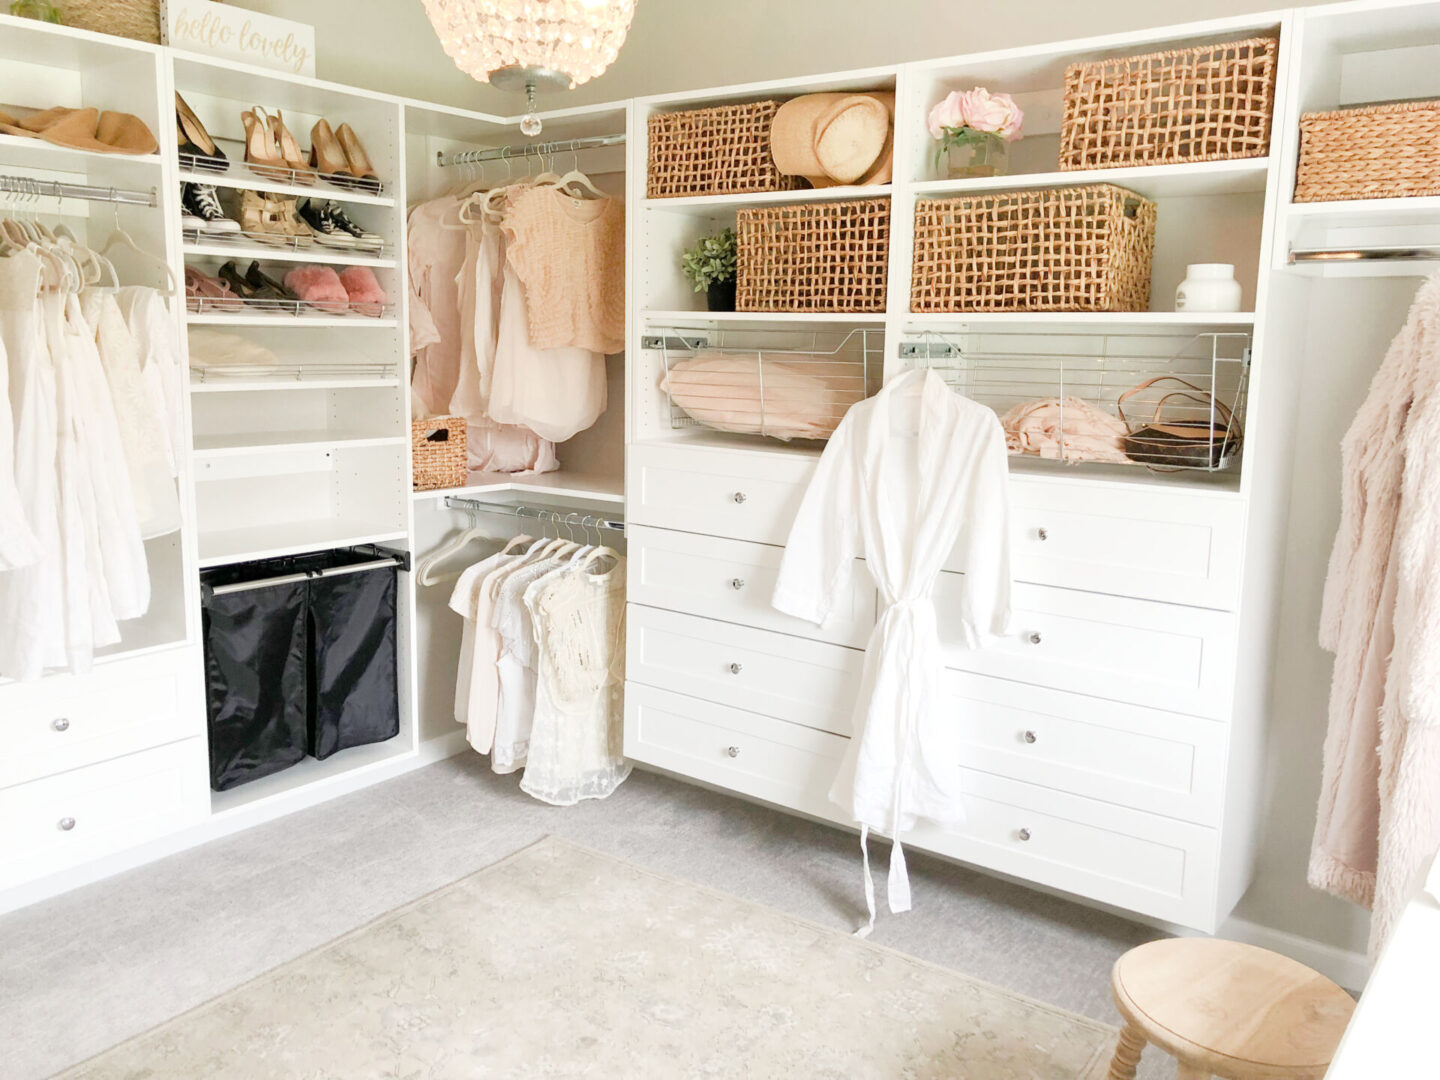
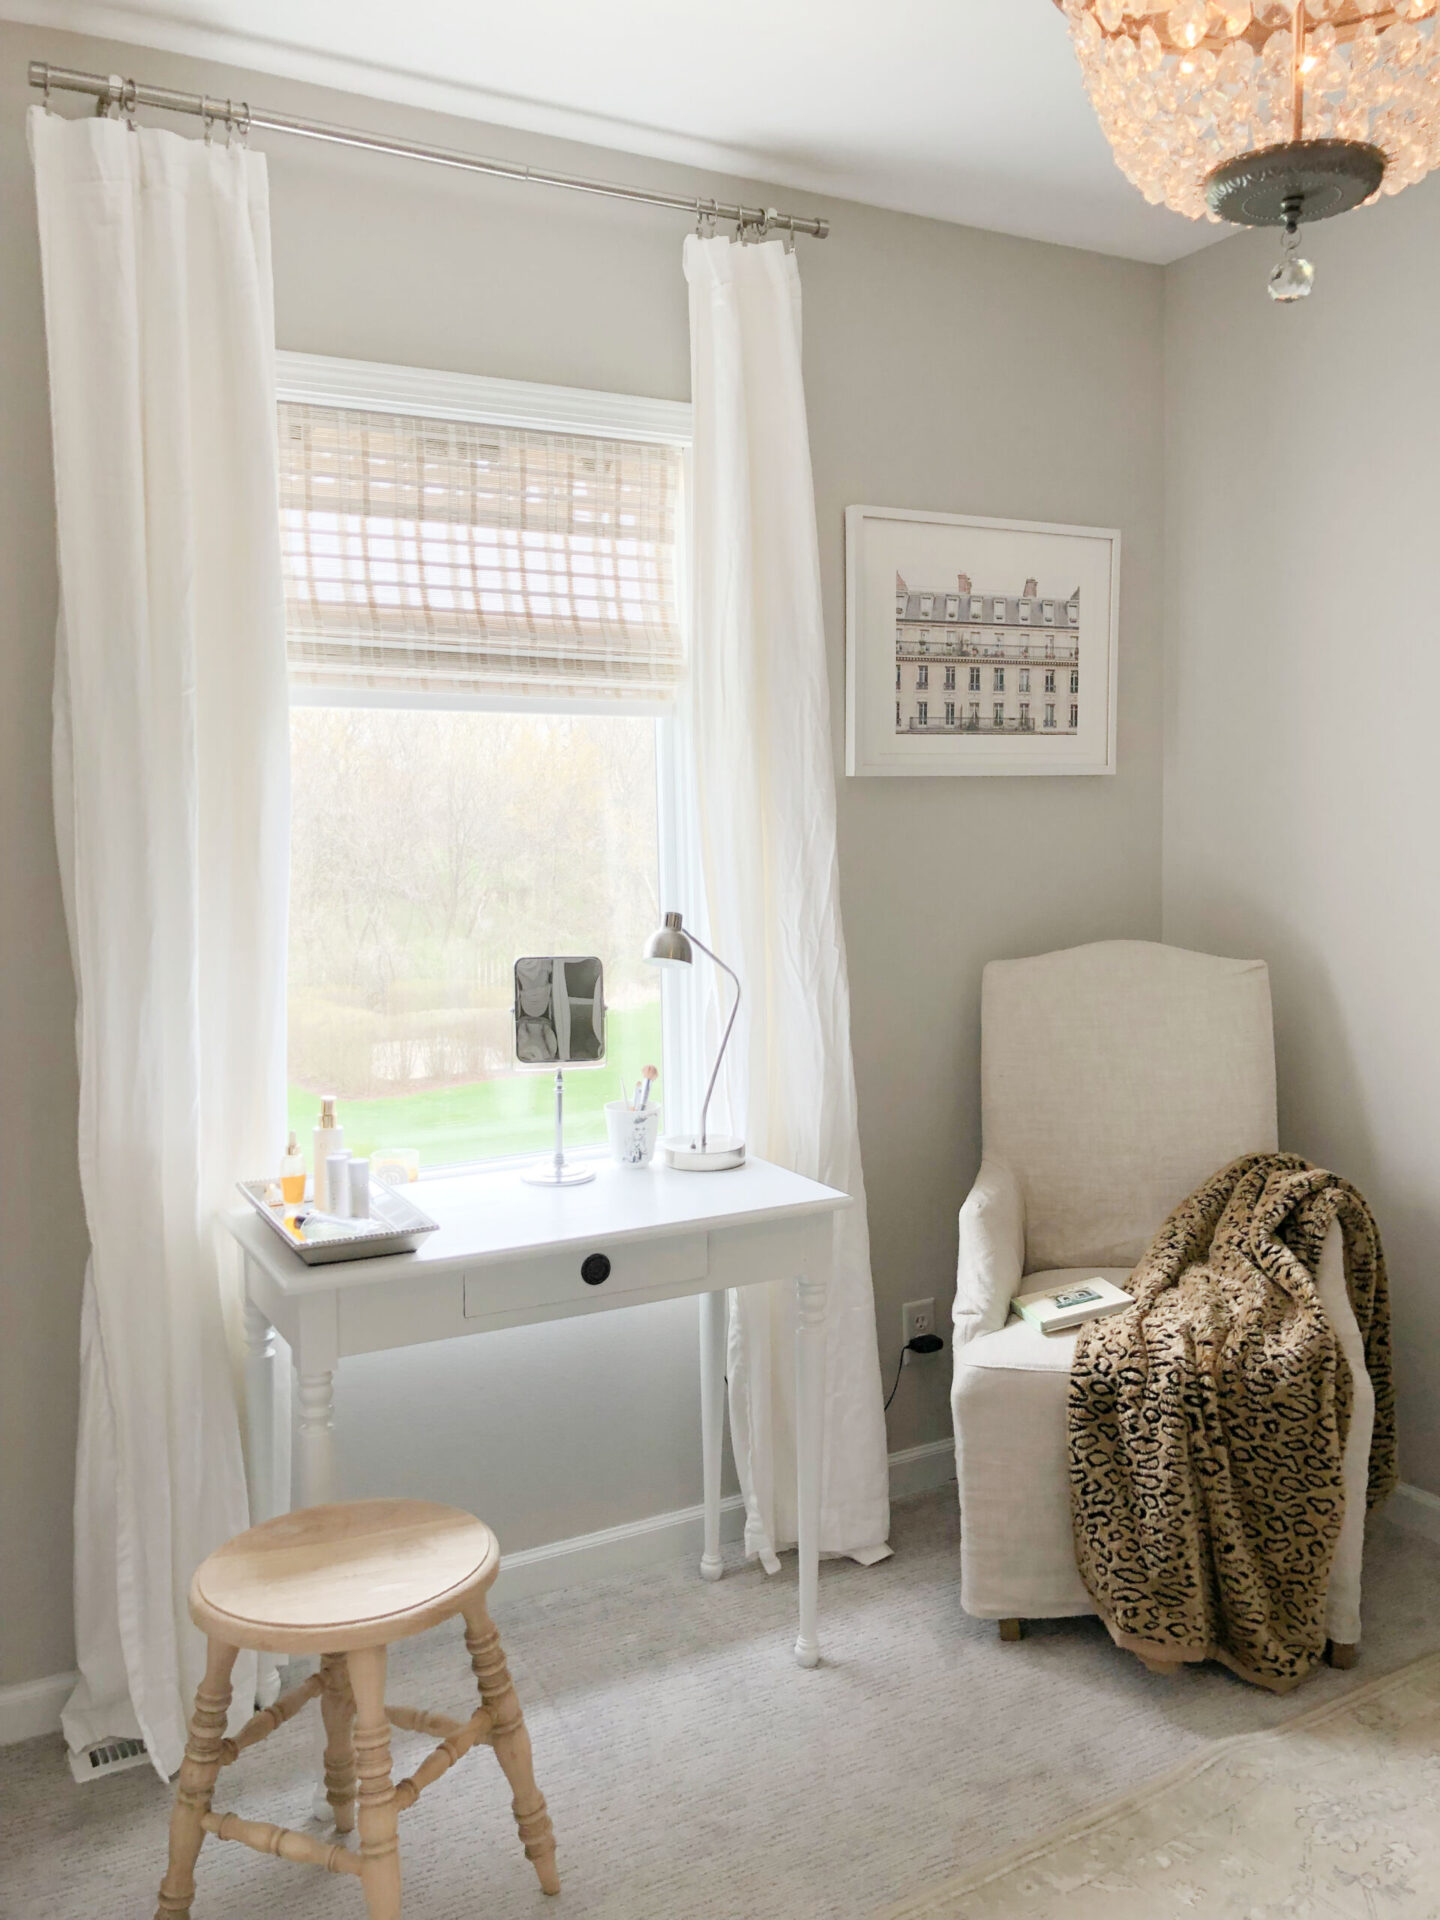
Awkward Bedroom to Dressing Room
This small spare bedroom with a view of the backyard didn’t have much going for it. It has a linen closet in addition to a closet with bifold doors in addition to a door to the hall in addition to a door to a Jack and Jill bathroom. Just too many doors and an irregular shape.
But now it’s packed with function, storage, and cuteness.
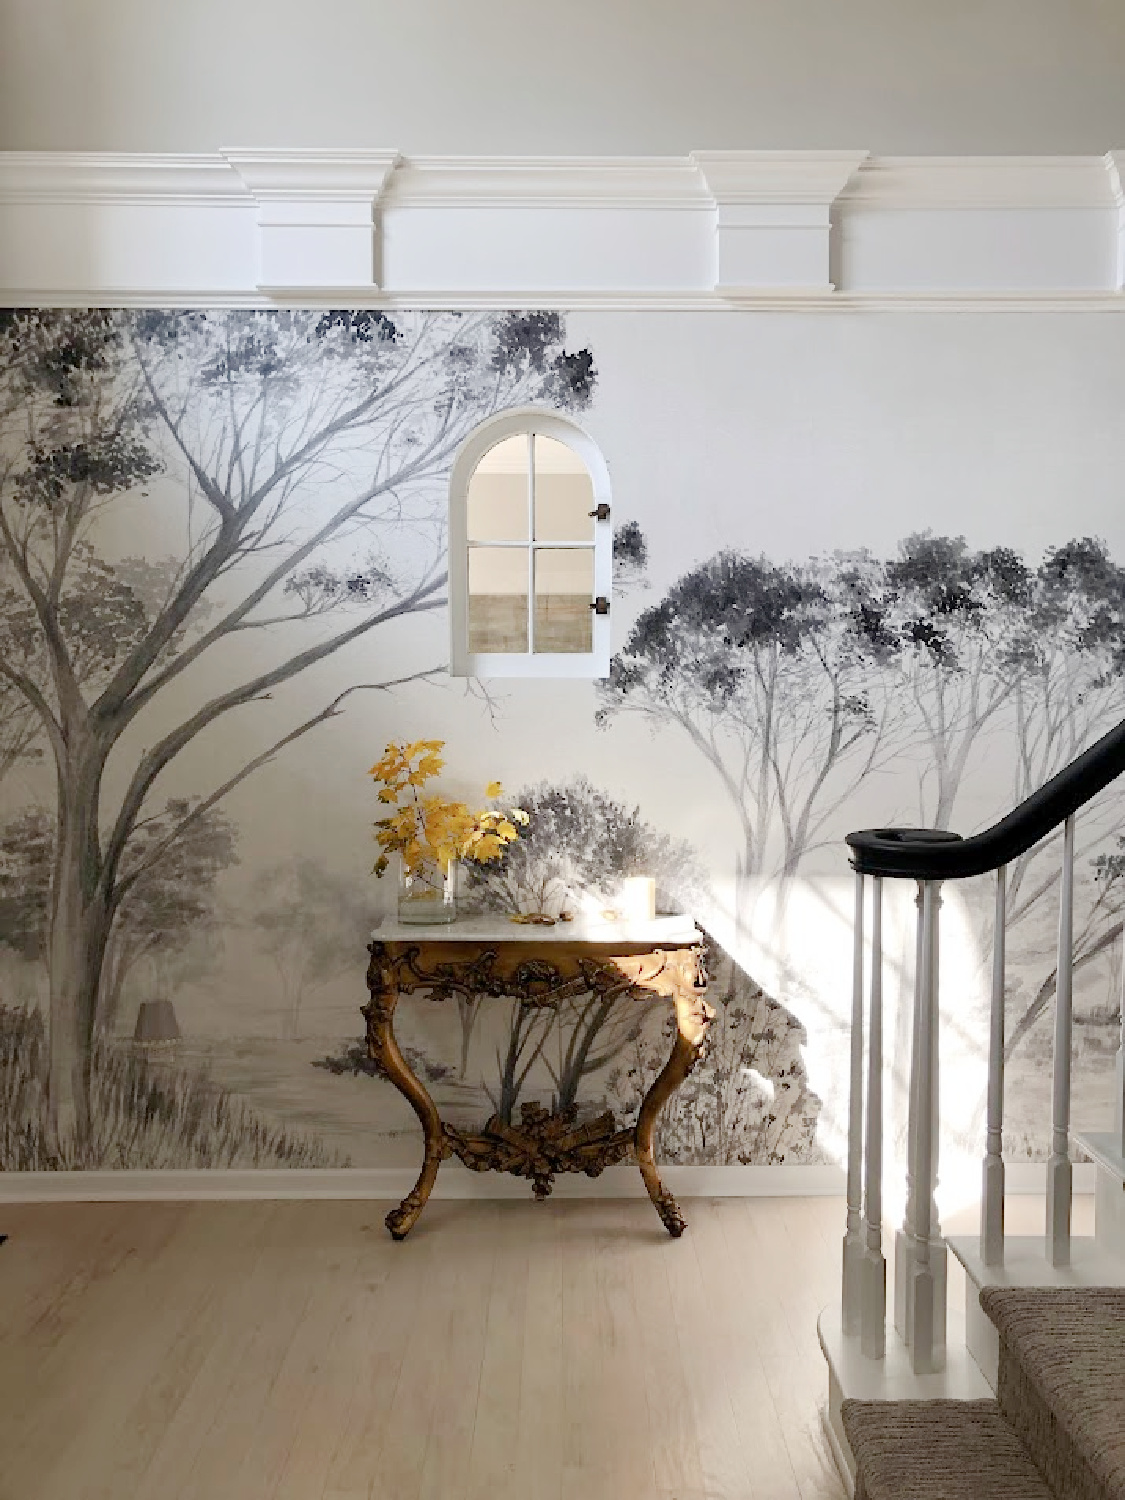
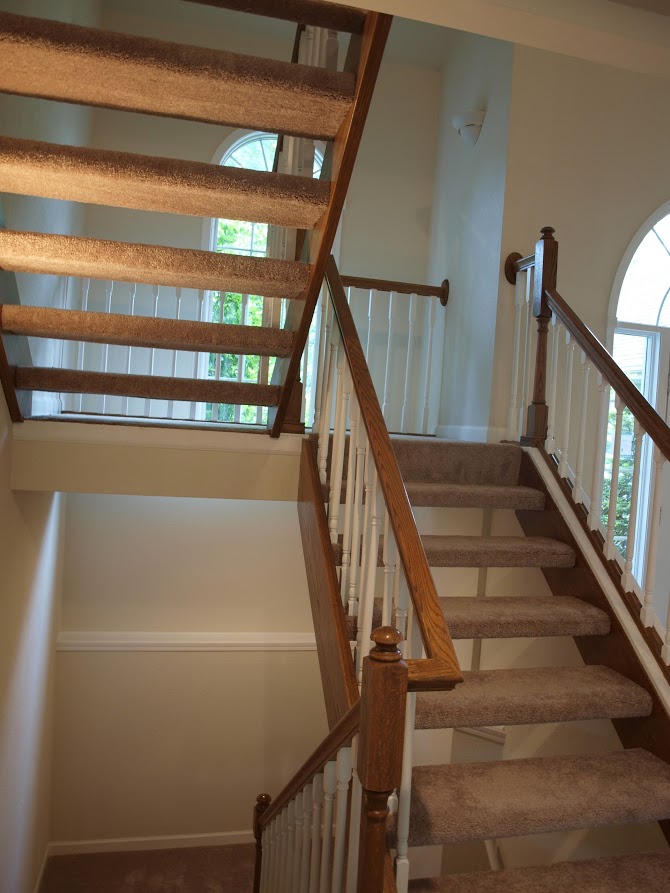
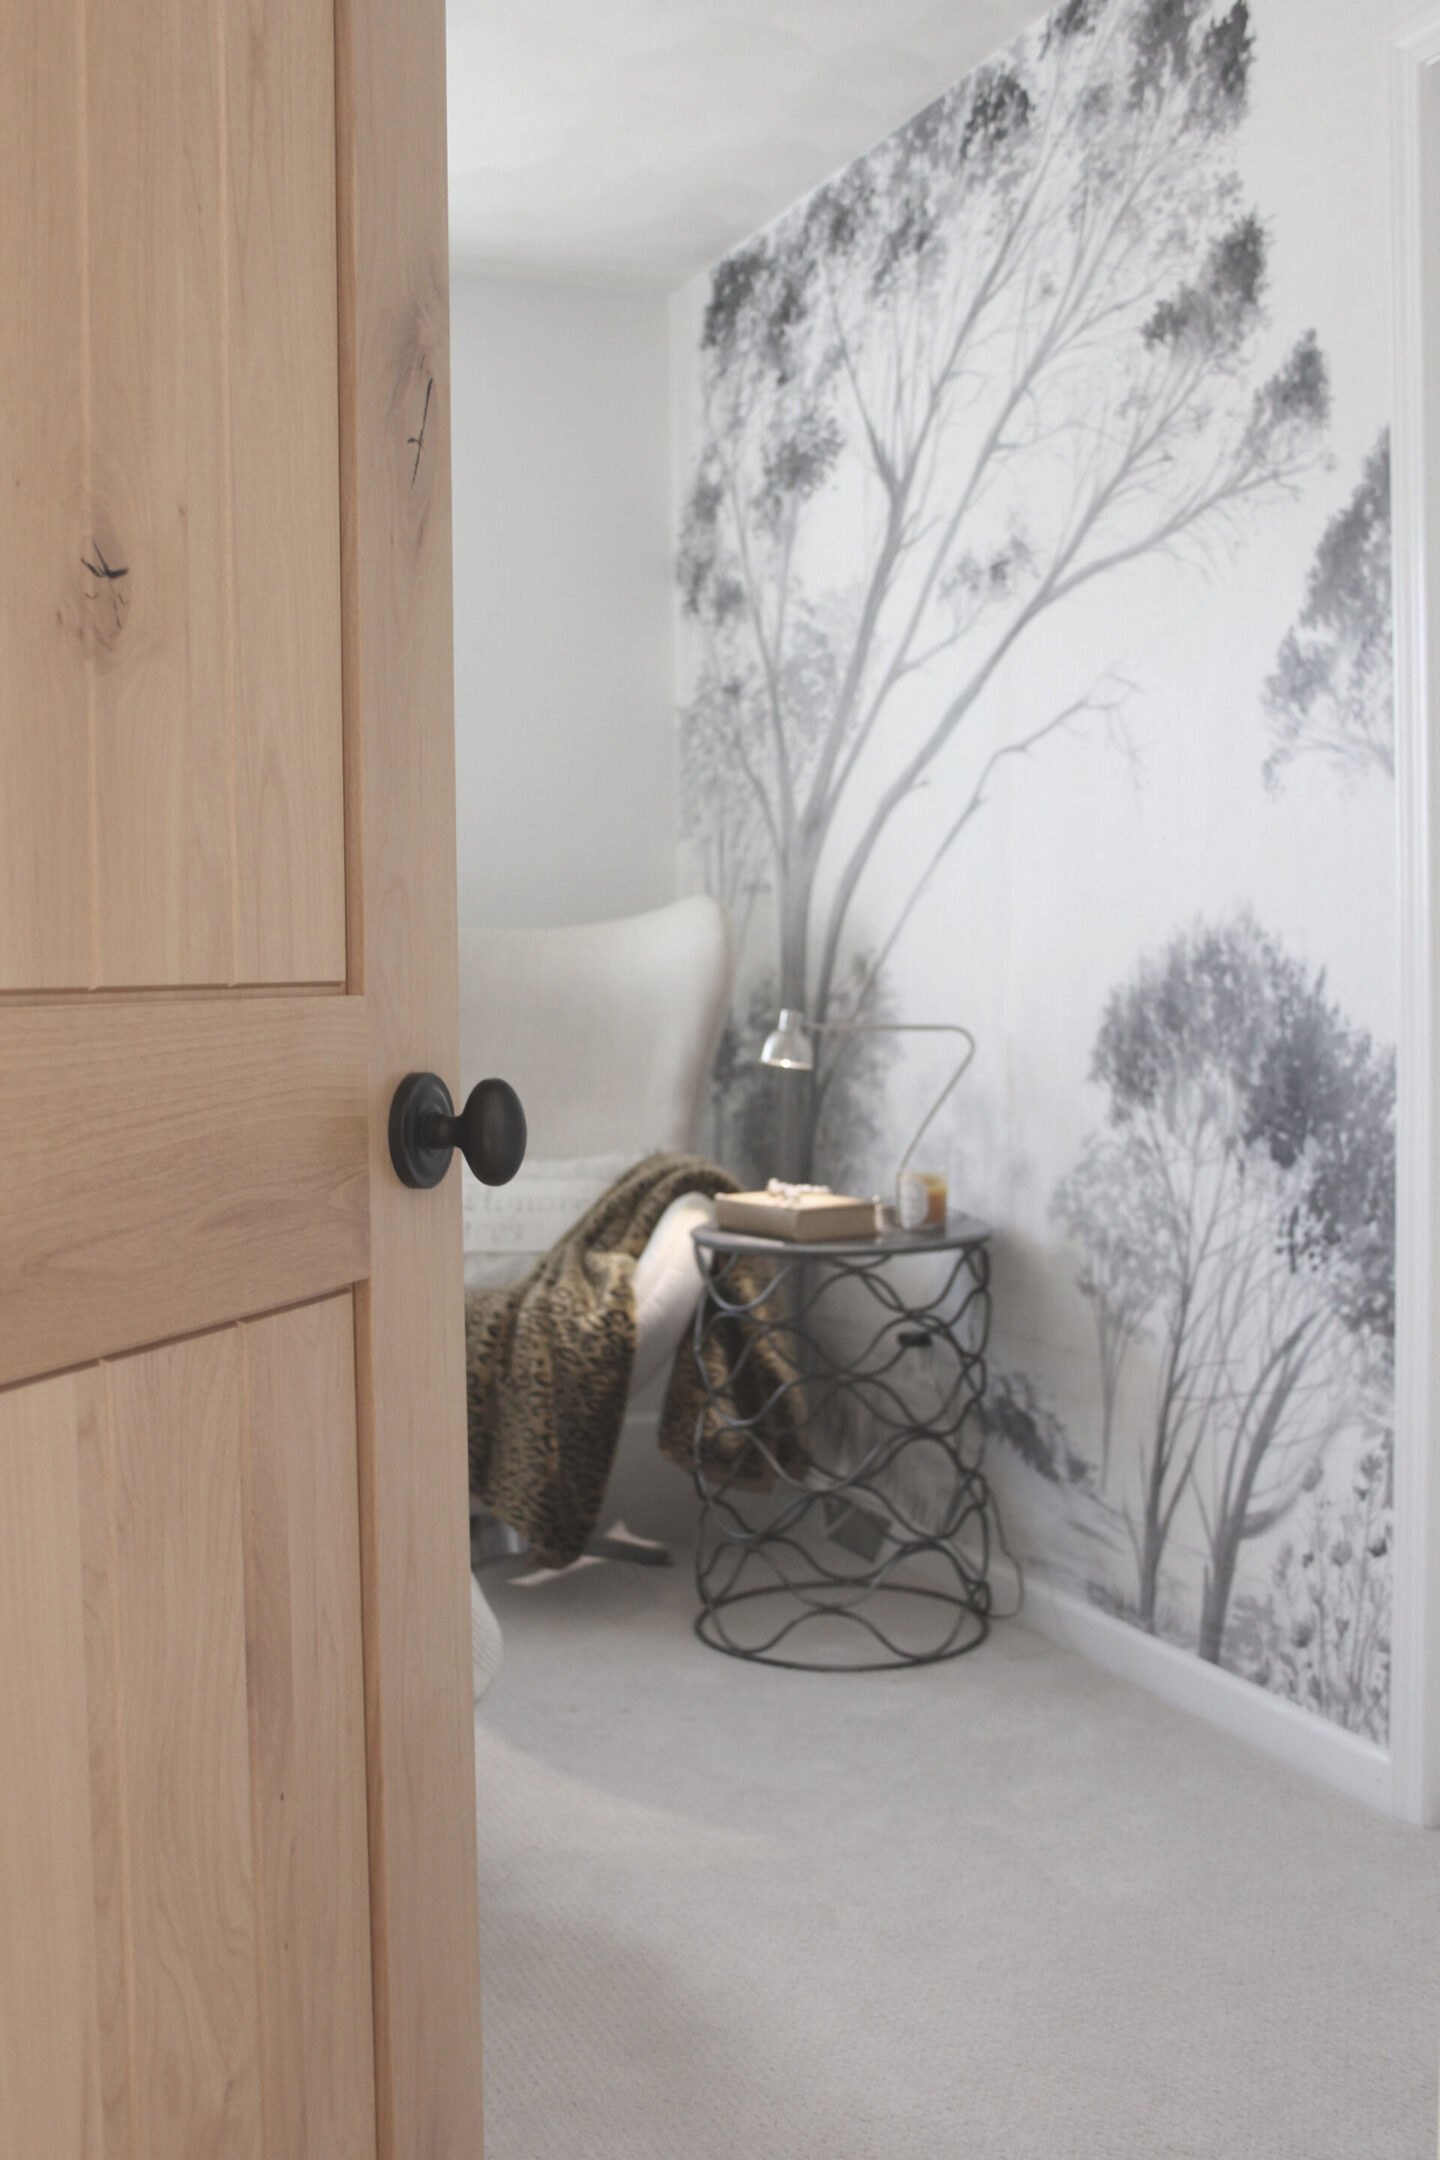
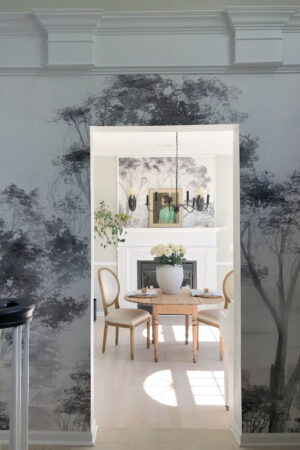
Busy Foyer Grows Gentle
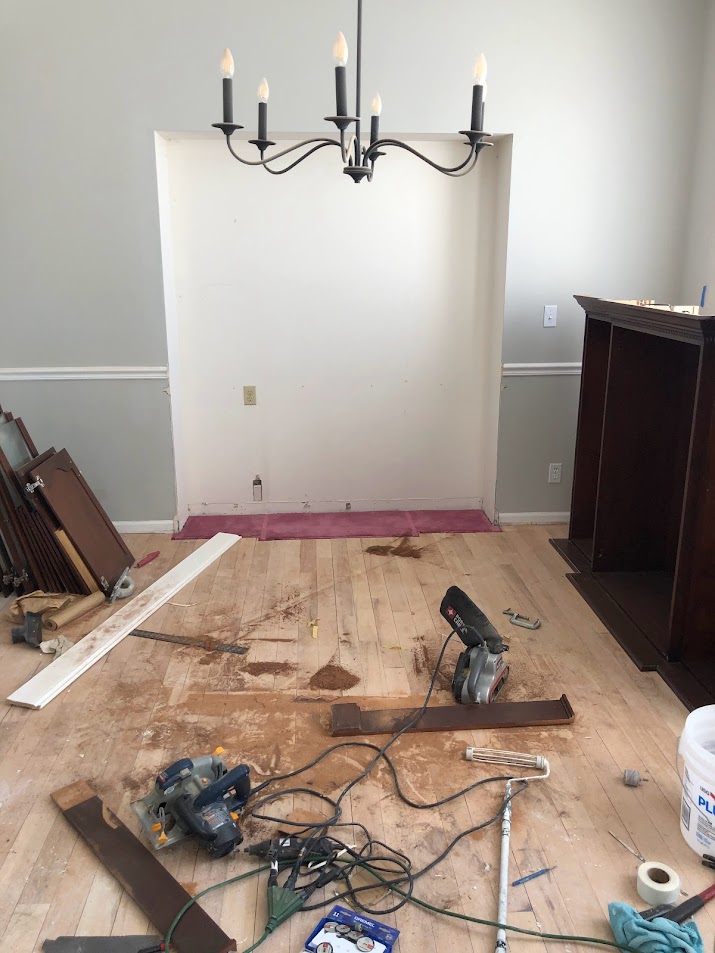
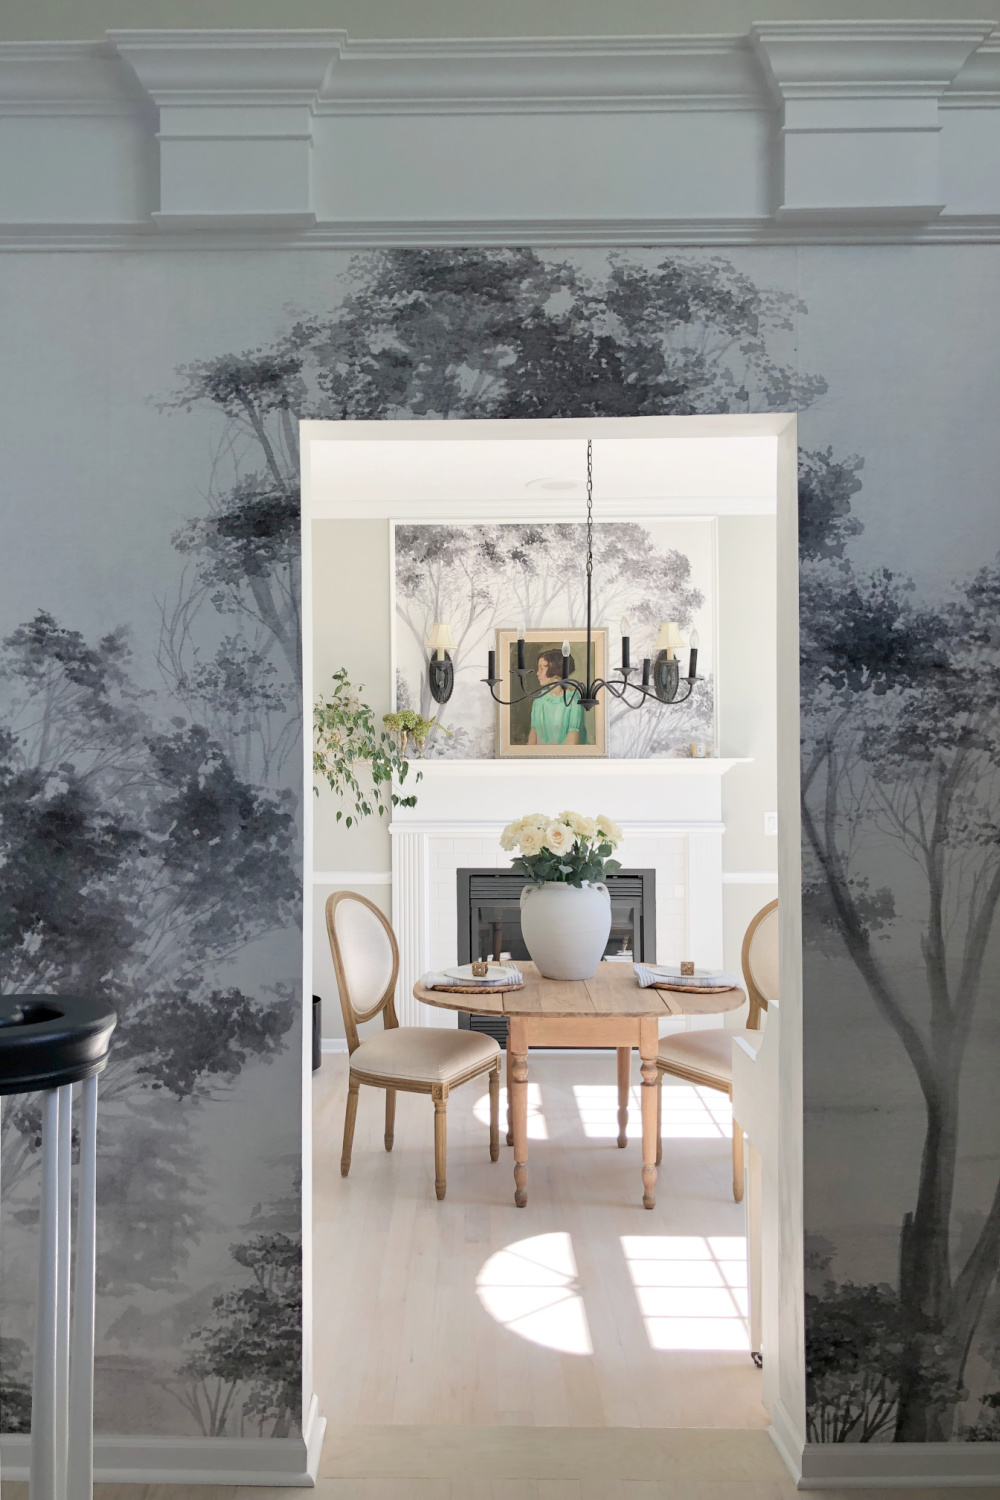
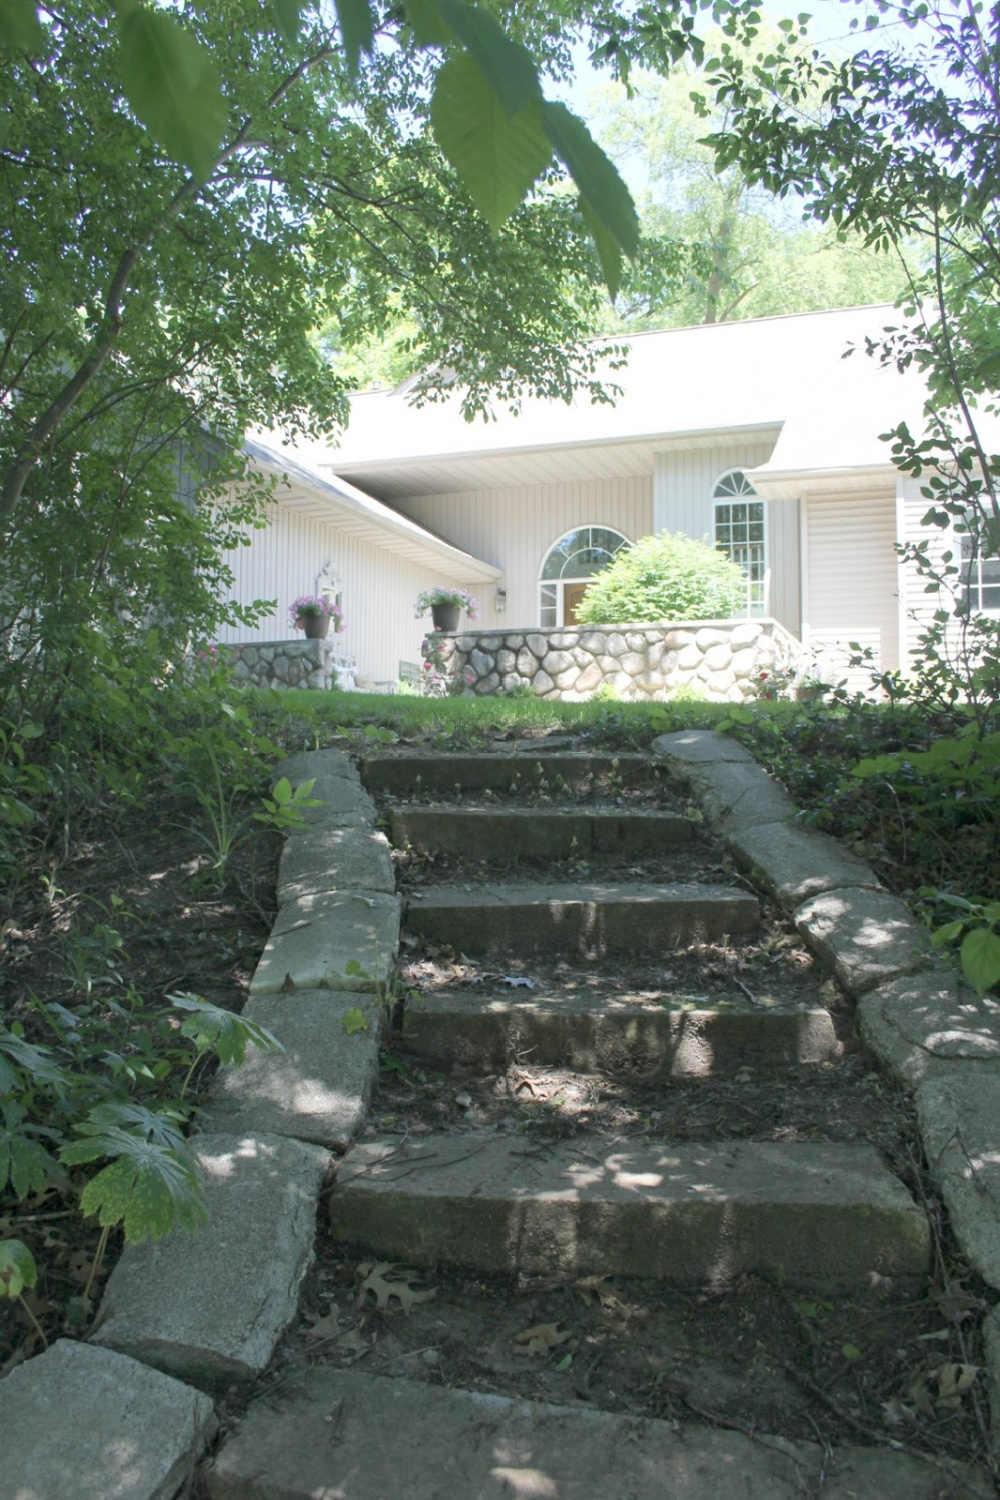
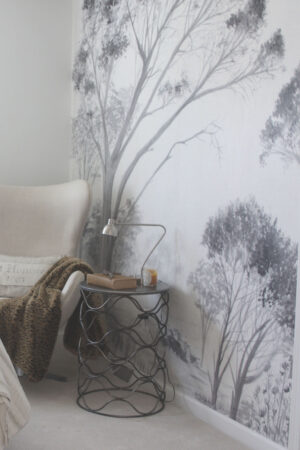
The staircase is so dramatic and fussy that we just wanted to calm down everything around it. We started by painting the stairs white and painting the doors and hand rail a wrought iron color. Then we refinished the hardwoods and built walls on either side of the staircase (where the columns are) before wallpapering with a poetic scenic mural.
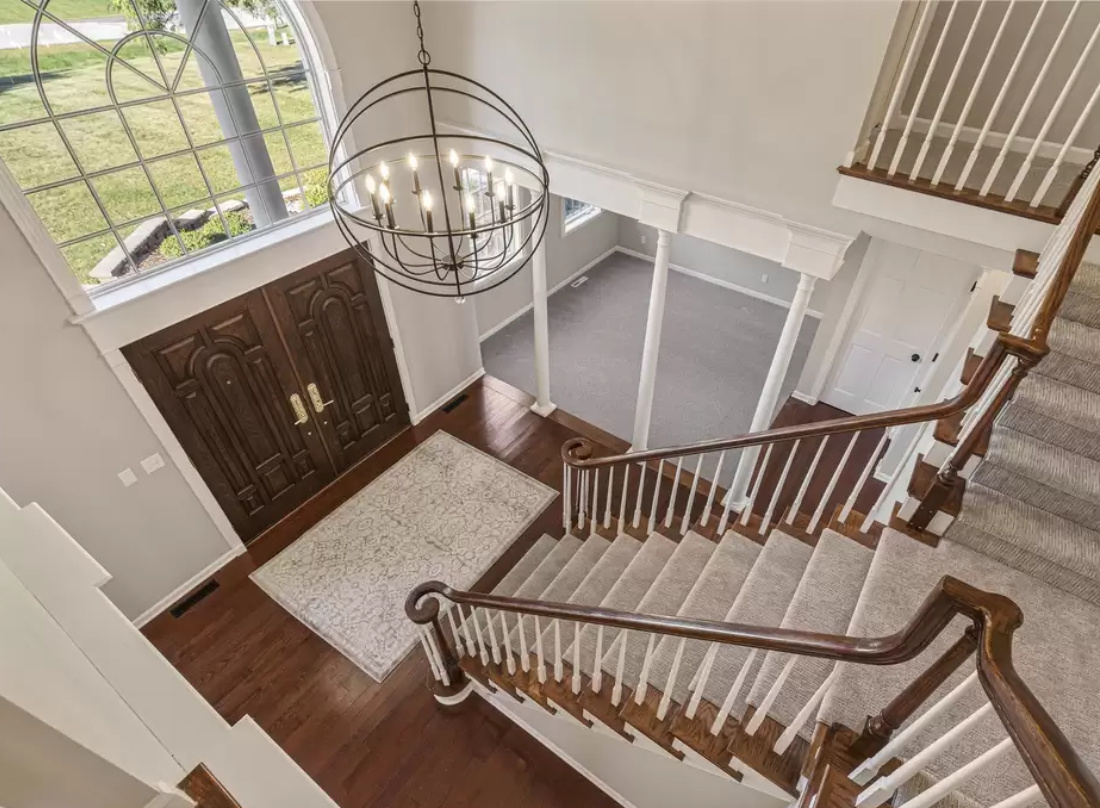
The vintage window is one we collected and were so excited to repurpose. On the other side of the window is a small living room/parlor.
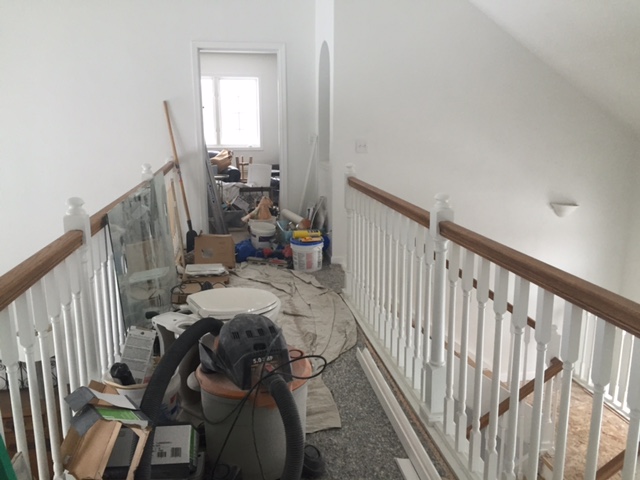
So much easier to furnish the foyer, sunken living, and sunken dining rooms after the construction of walls. Huge projects for my husband! The smartest thing we did was not live here for the first half of the renovation. So messy, and soooo depressing! We stayed in our perfect “done” house so we could escape, rest, and recover. We didn’t even have to list that home when we were ready to sell. 🙂
Before/After of Our First Whole House Reno
We renovated the whole house entirely ourselves back in 2015 and learned so much!
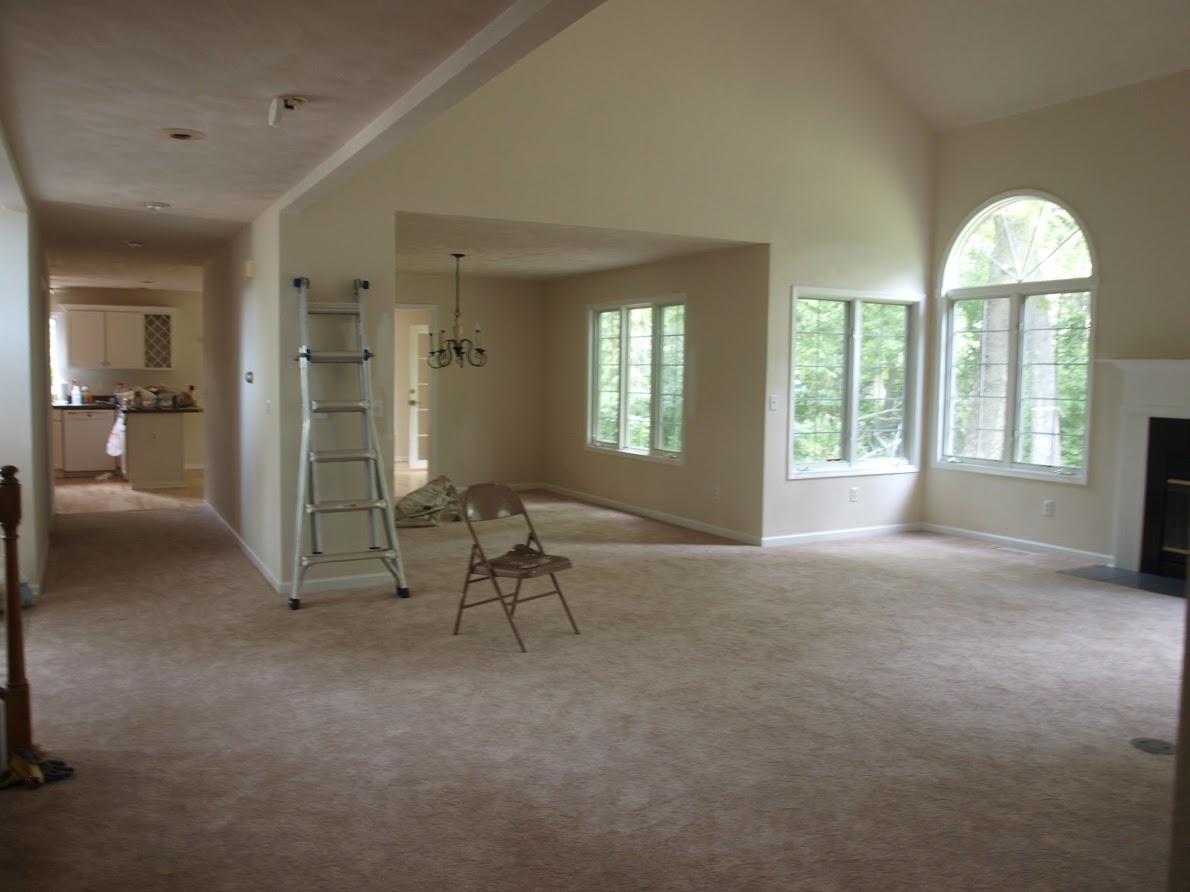
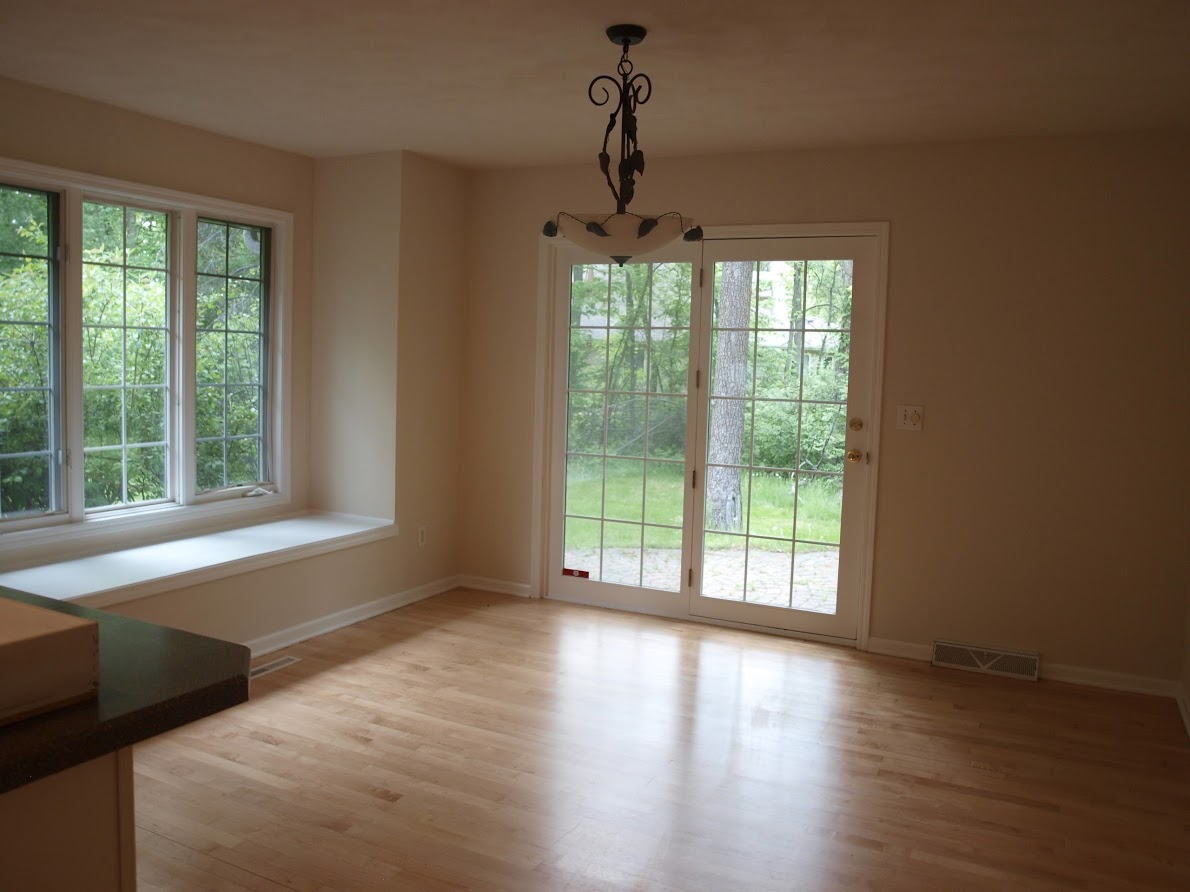
Living Room Re-do
Here’s how it looked initially…mauve-y carpet, yellow walls, and headaches. But I could see the potential. Unfortunately there were costly hidden problems (bad subfloor had to be replaced) and surprises (we couldn’t knock down the wall between dining and kitchen)…
But it all worked out. The original white painted fireplace surround you see above came out quickly when I found a French surround I loved. But we didn’t toss the old one…it’s what you see in our Georgian dining room! And a perfect fit.
Dramatic Changes in Kitchen
Things get worse before they improve.
So I hope seeing process photos encourages you to see what is possible if you’re half crazy like us.
The kitchen needed a full gut, and we decided to keep the window seat even though its presence limited the design.
It became a cozy space, and even though it was 1/4 of the size of our prior kitchen (that was a HUGE dream kitchen!), we made it work.

The vinyl cabinets were worn out and well past their prime so we removed them, repaired them, and installed them in a lower level workshop.
I designed a European-style modern French kitchen and finally got the farm sink I had always dreamed of. We were able to donate appliances and fixtures to Habitat for Humanity so as not to add to landfills.
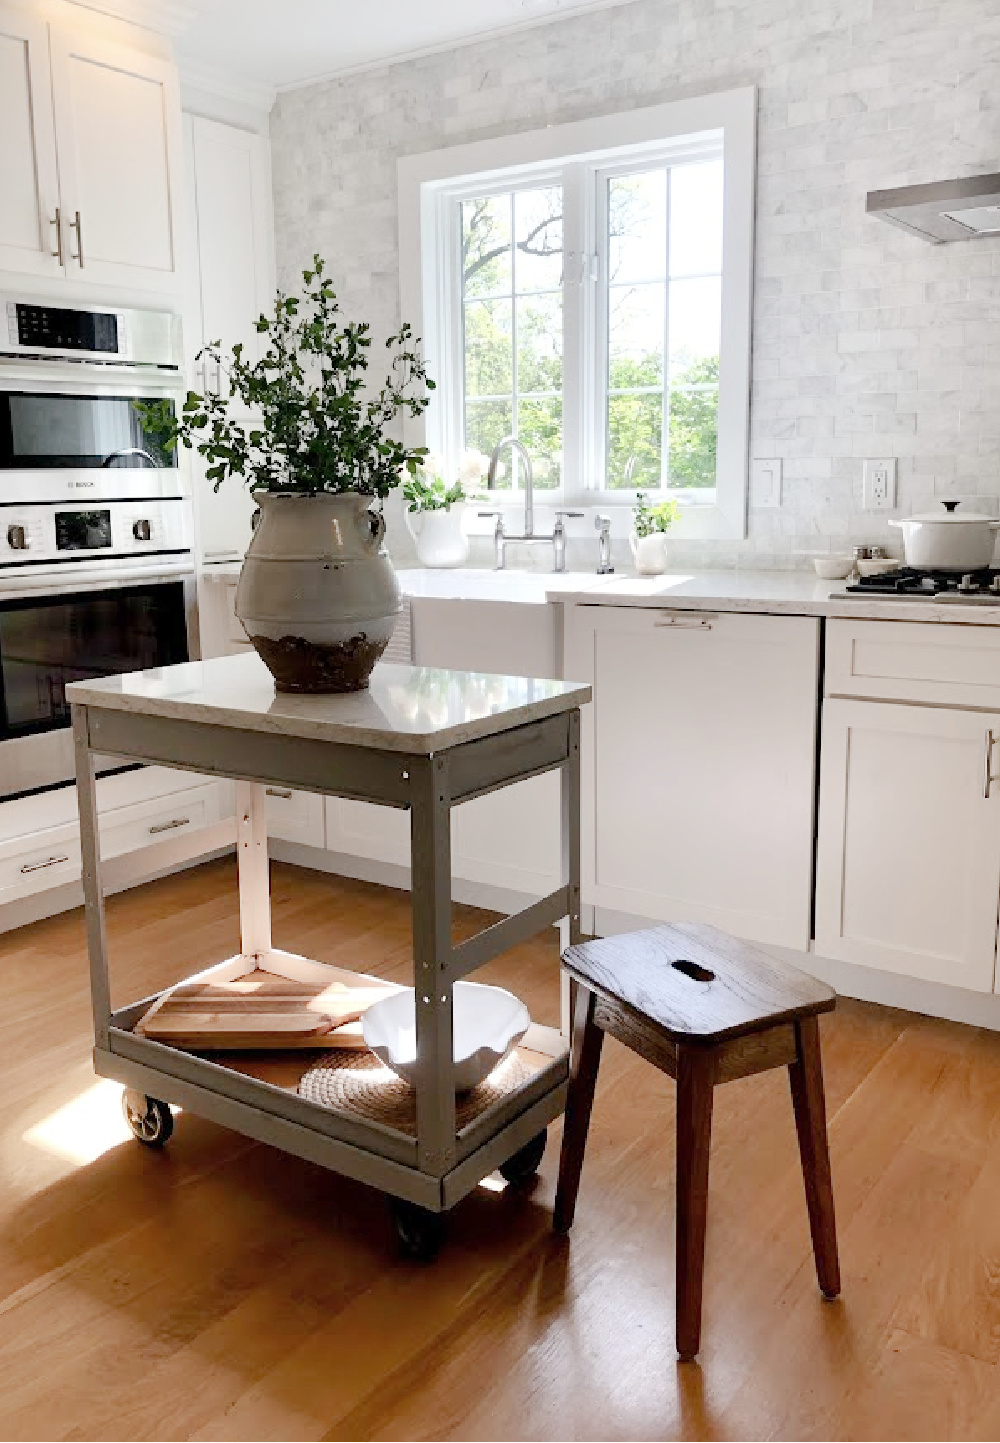
Adding the vintage steel work cart was a gamechanger. Don’t ever think your kitchen is too tiny for a work table or cart of some sort. Keep your eyes peeled, and if it’s cheap, just try it!
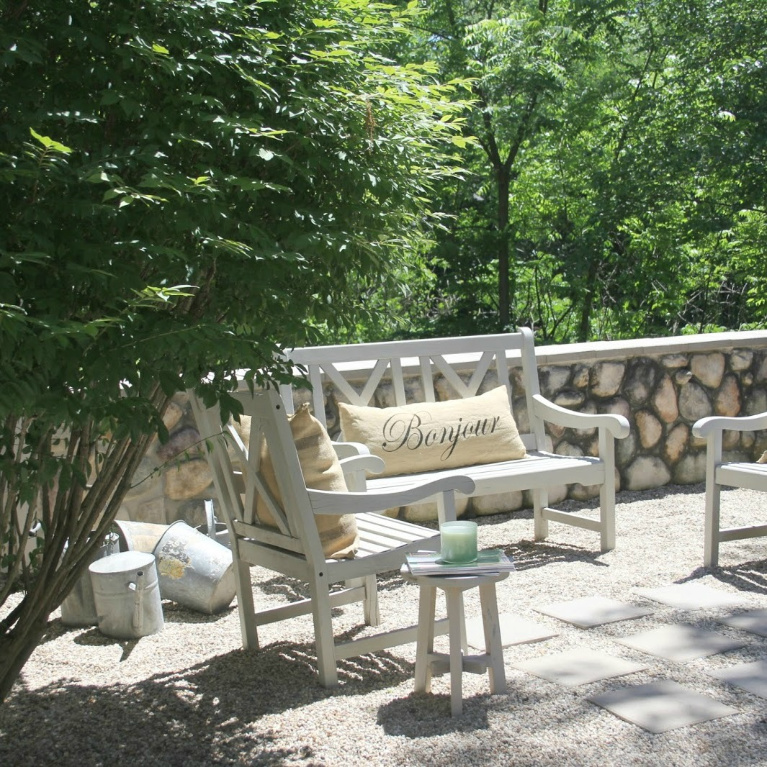
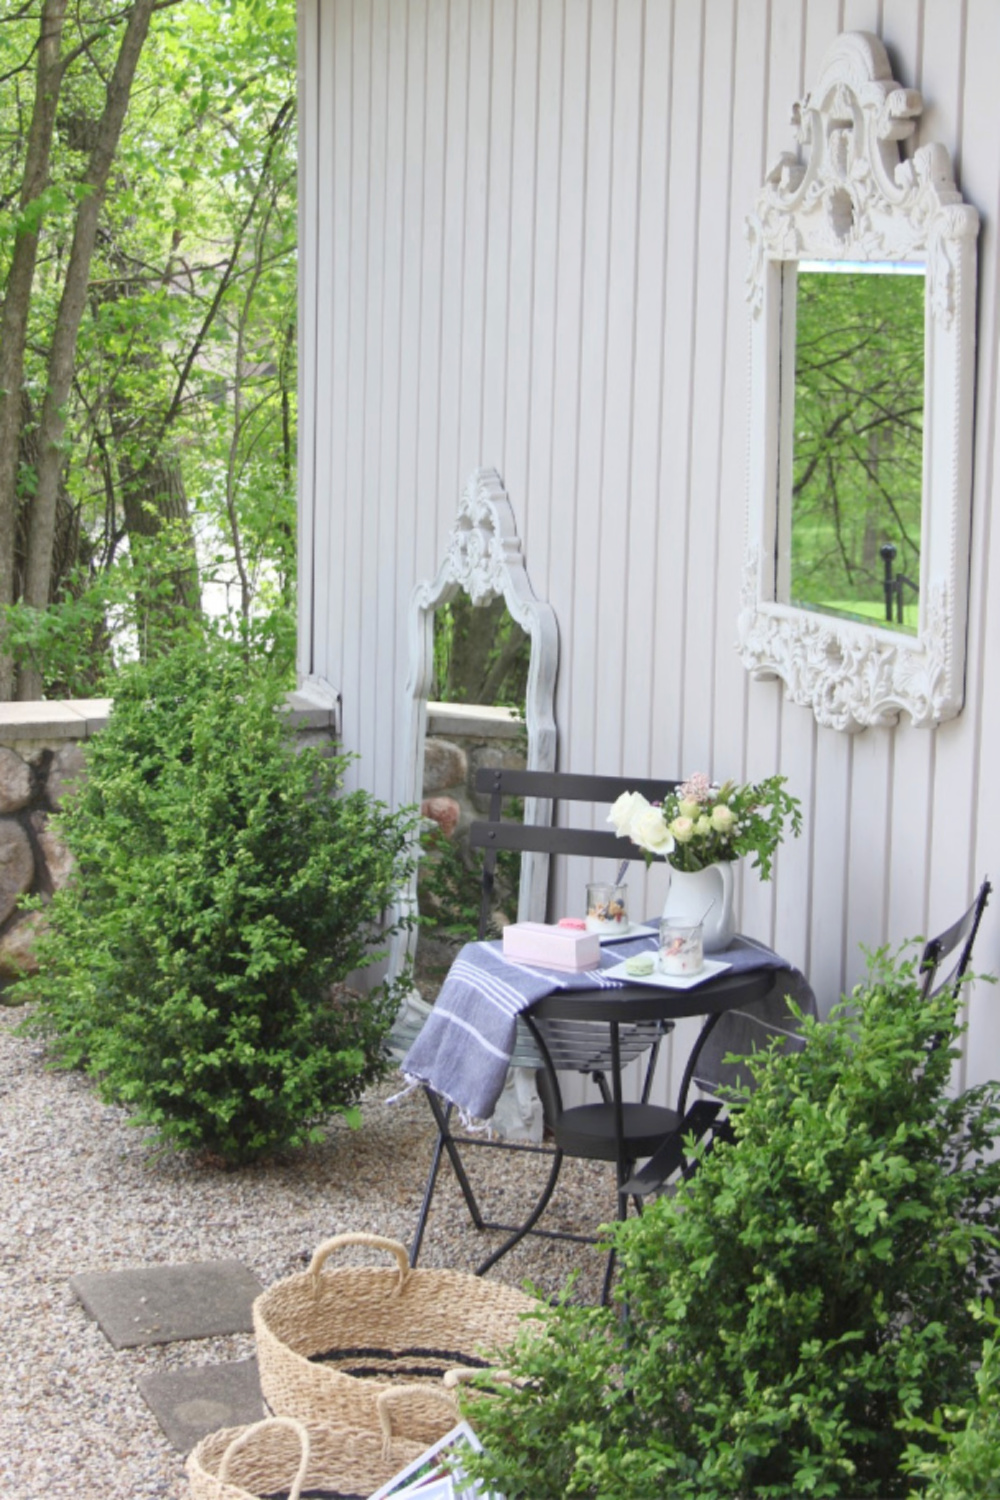
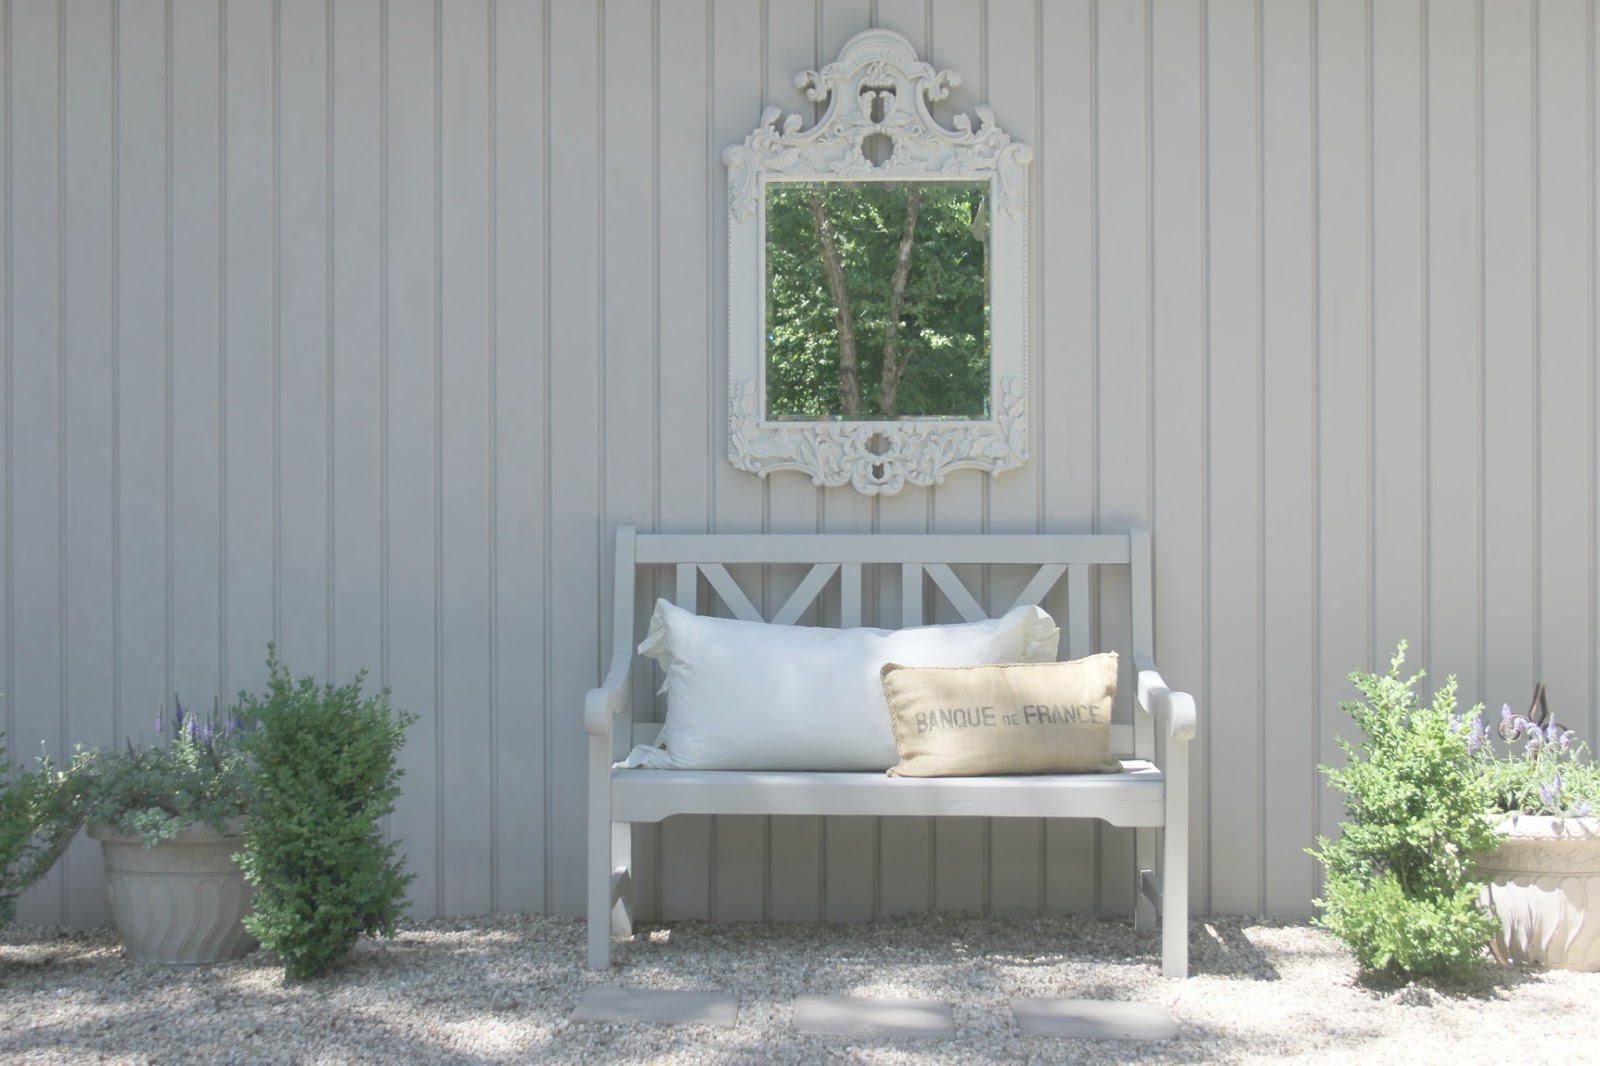
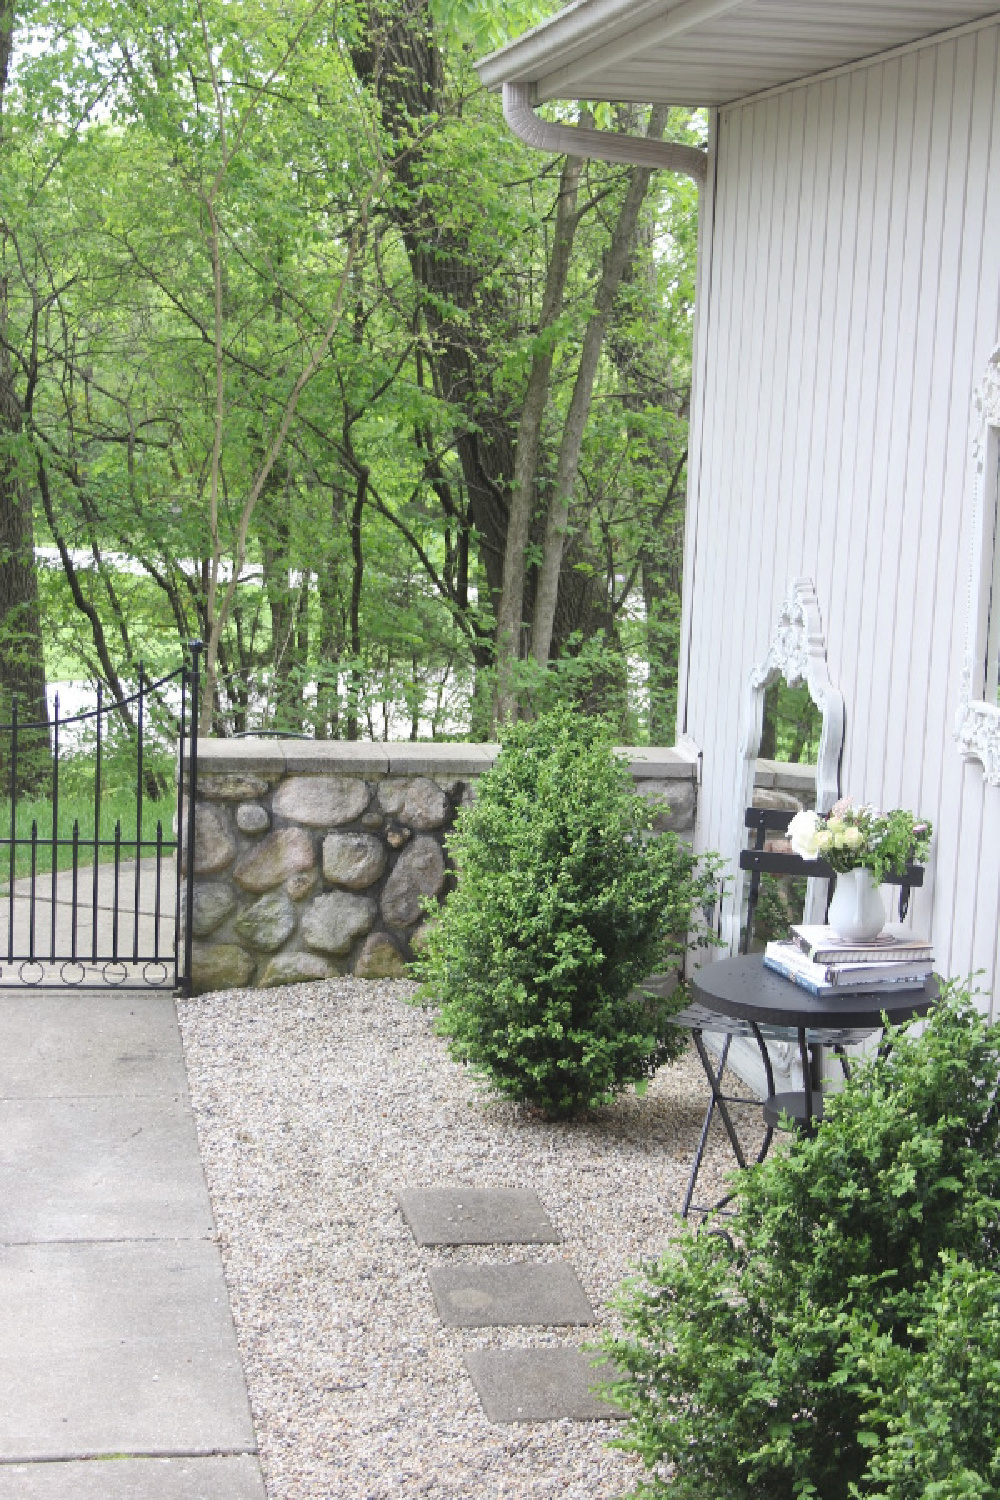
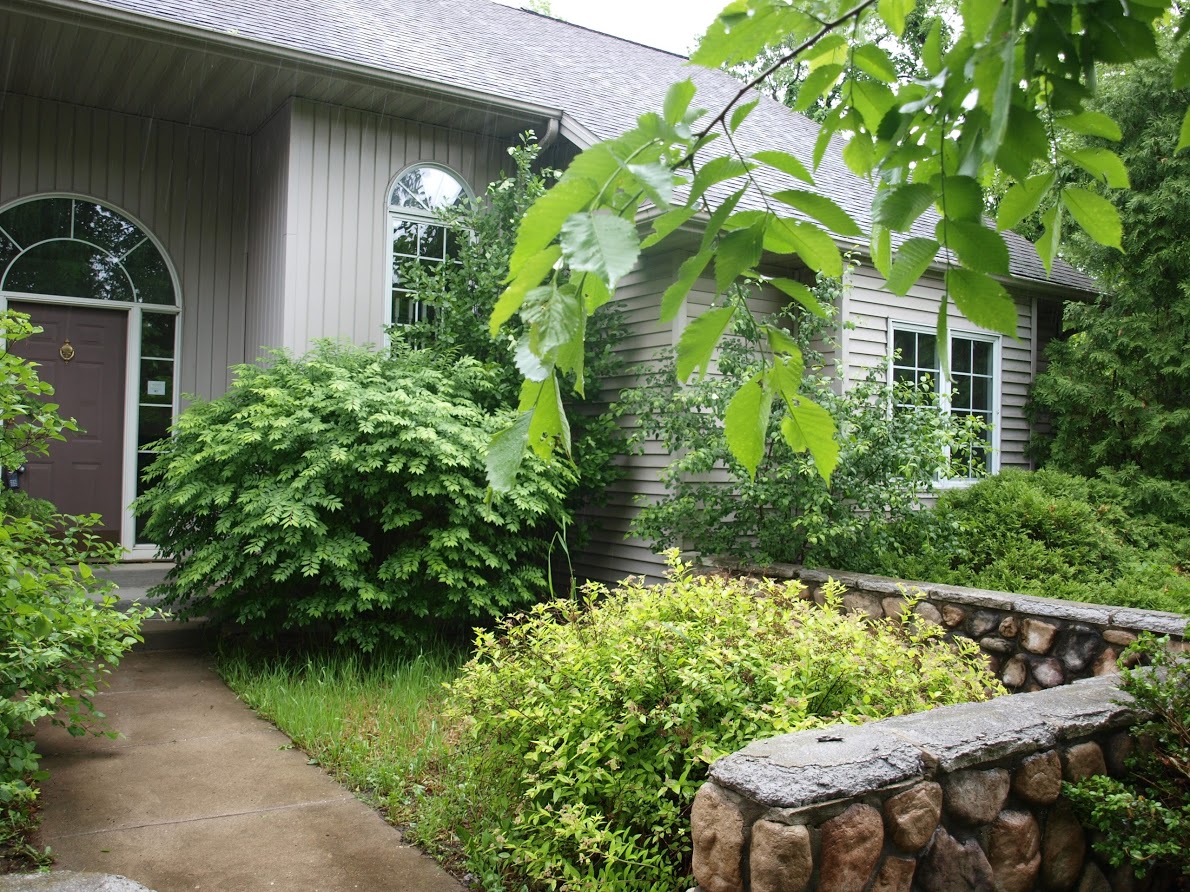
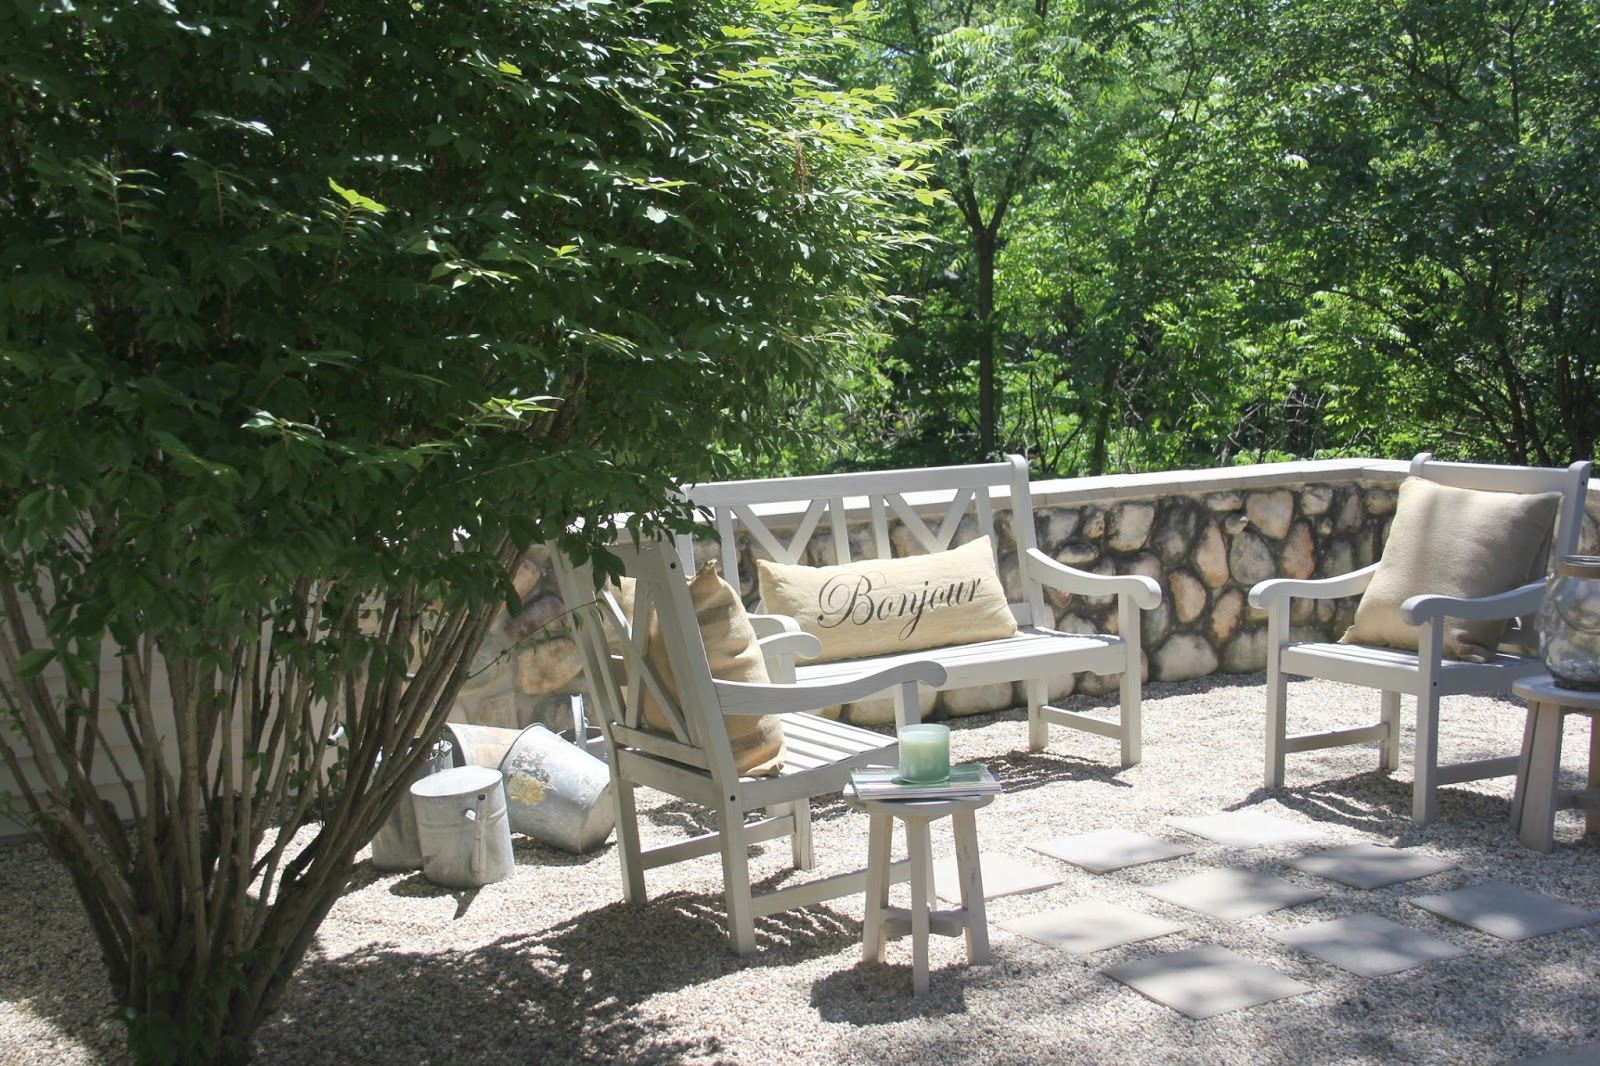
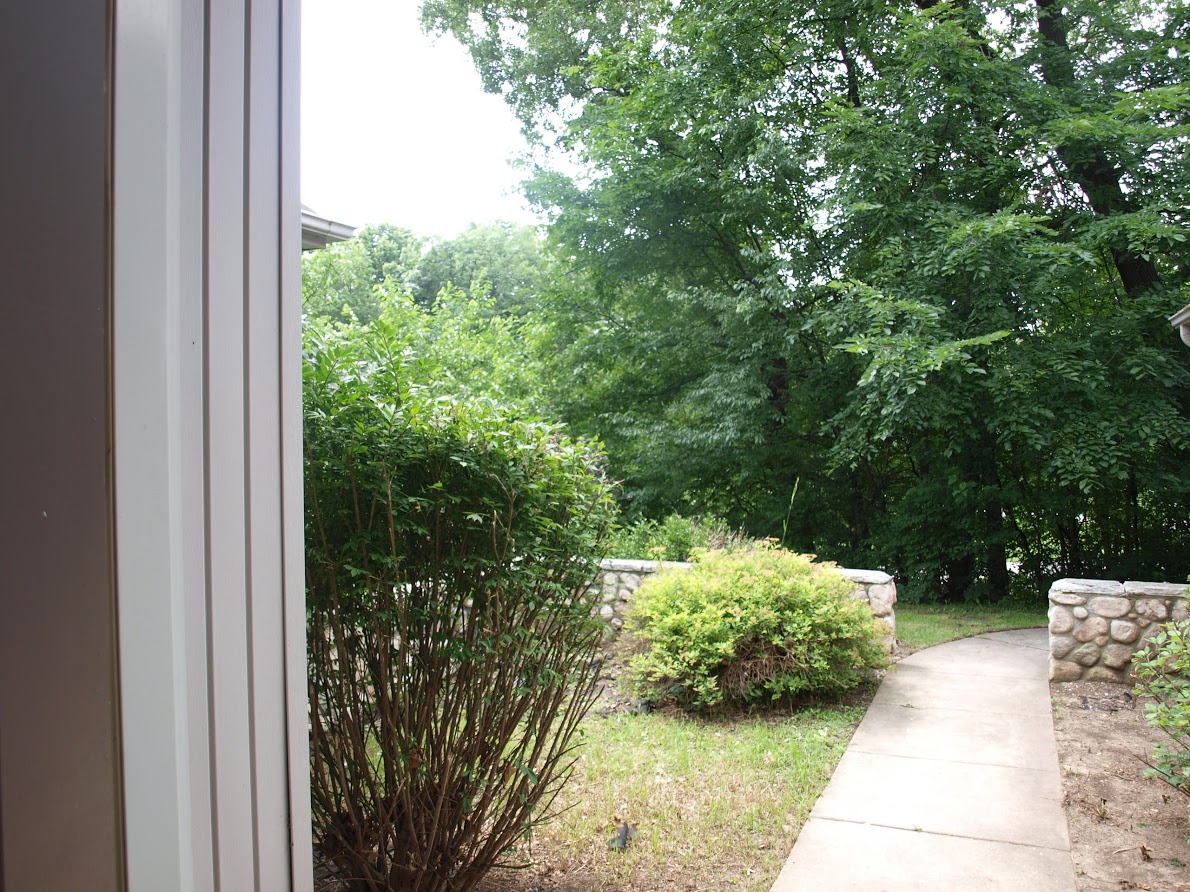
Our Renovation Journey: Garden Matters
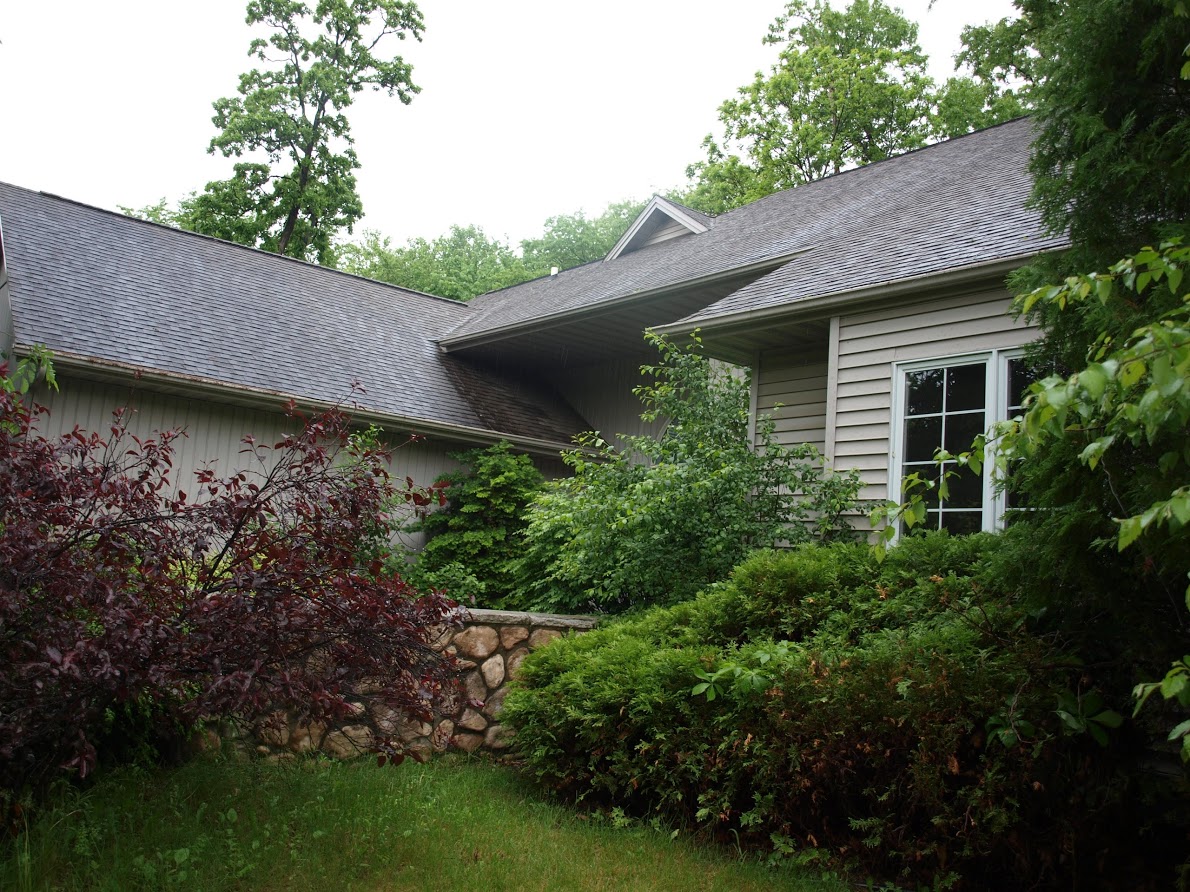
This home had been vacant for a long time, and the neglect showed.

Creating a French country courtyard was one of our favorite projects because it came together seamlessly and added beauty to the everyday. I loved having this sanctuary.
After clearing the overgrown shrubs and weeds, we added weed barrier, planted a few boxwood, then added pea gravel and stepping stones.
This woodsy lot was so alive with wildlife, and even though the grass was hopeless to grow, everything else did.

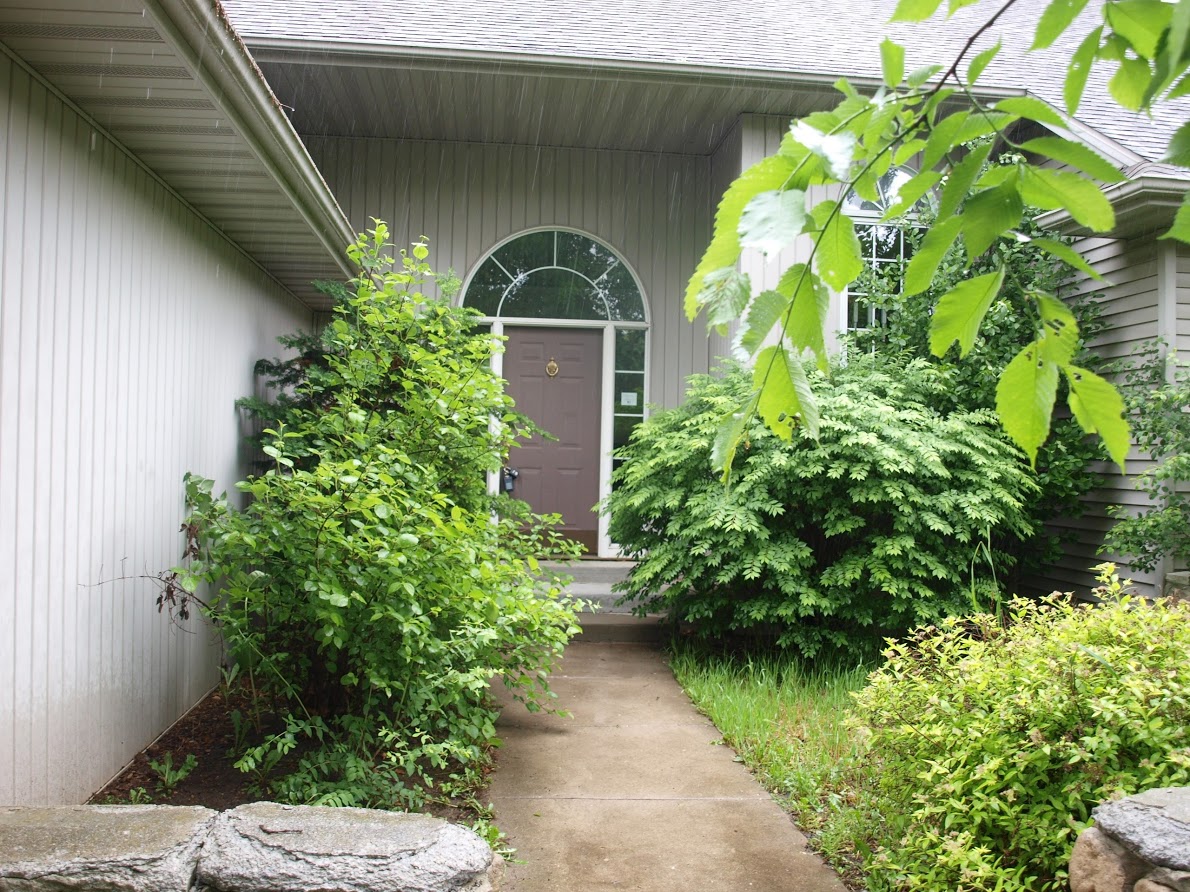
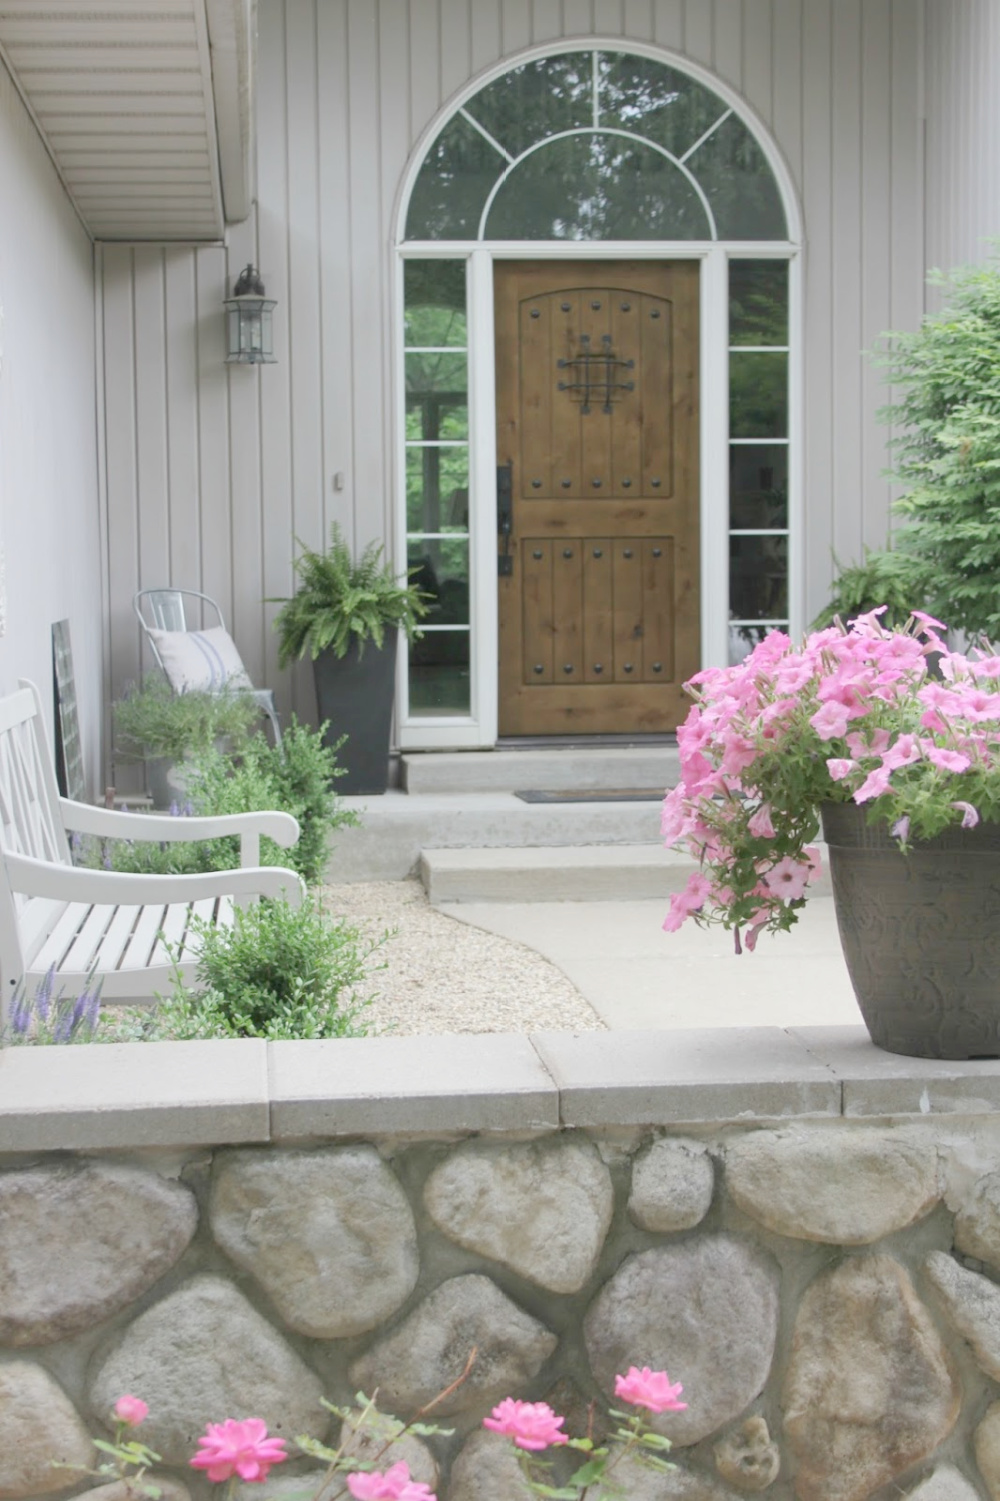
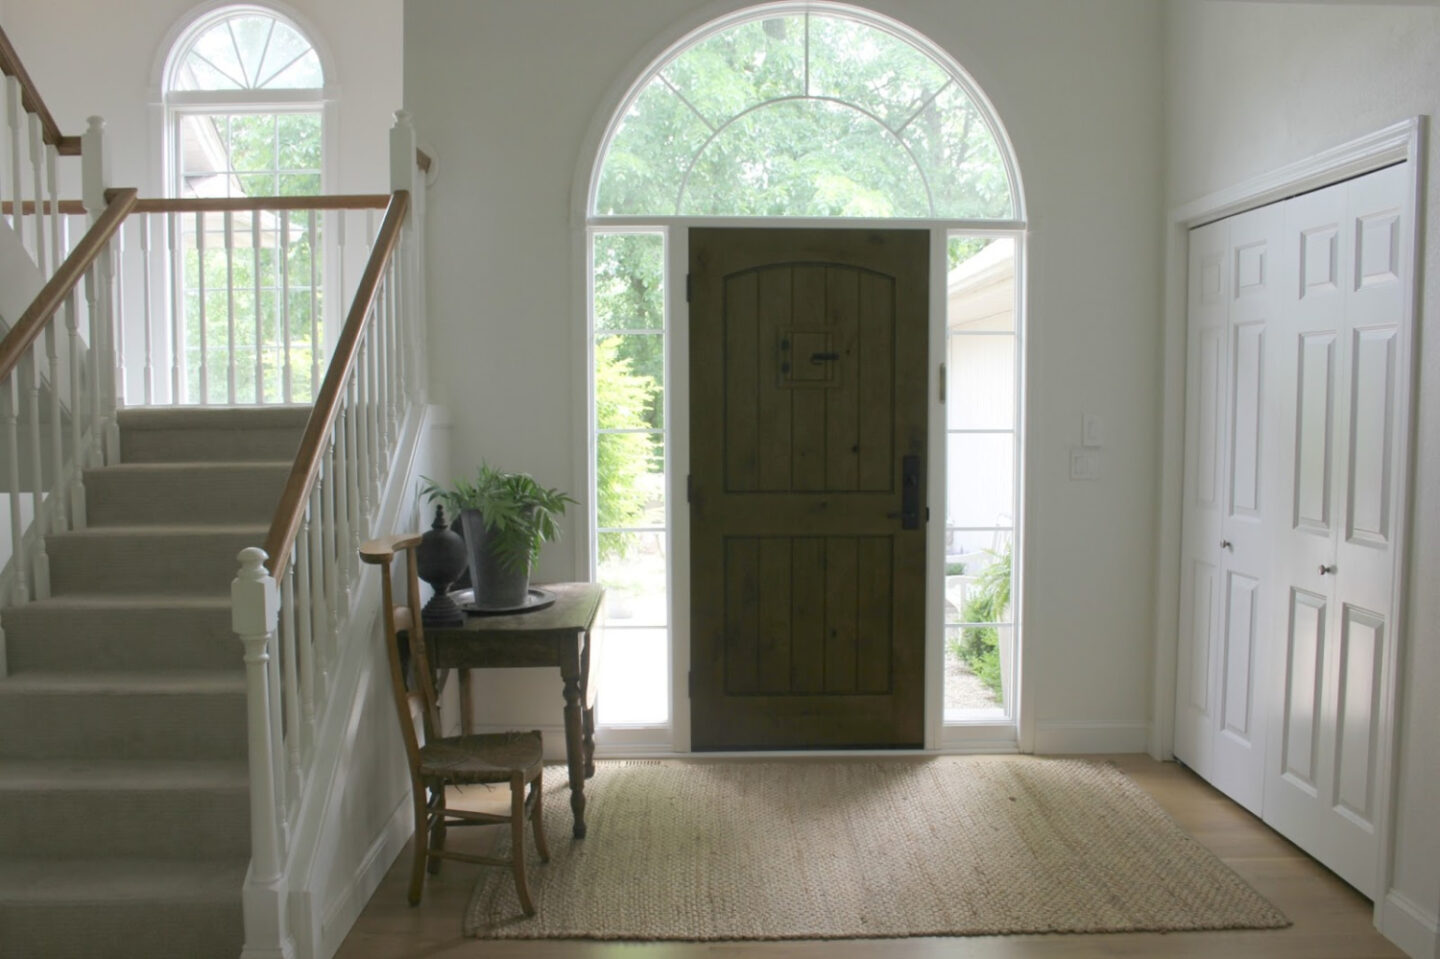
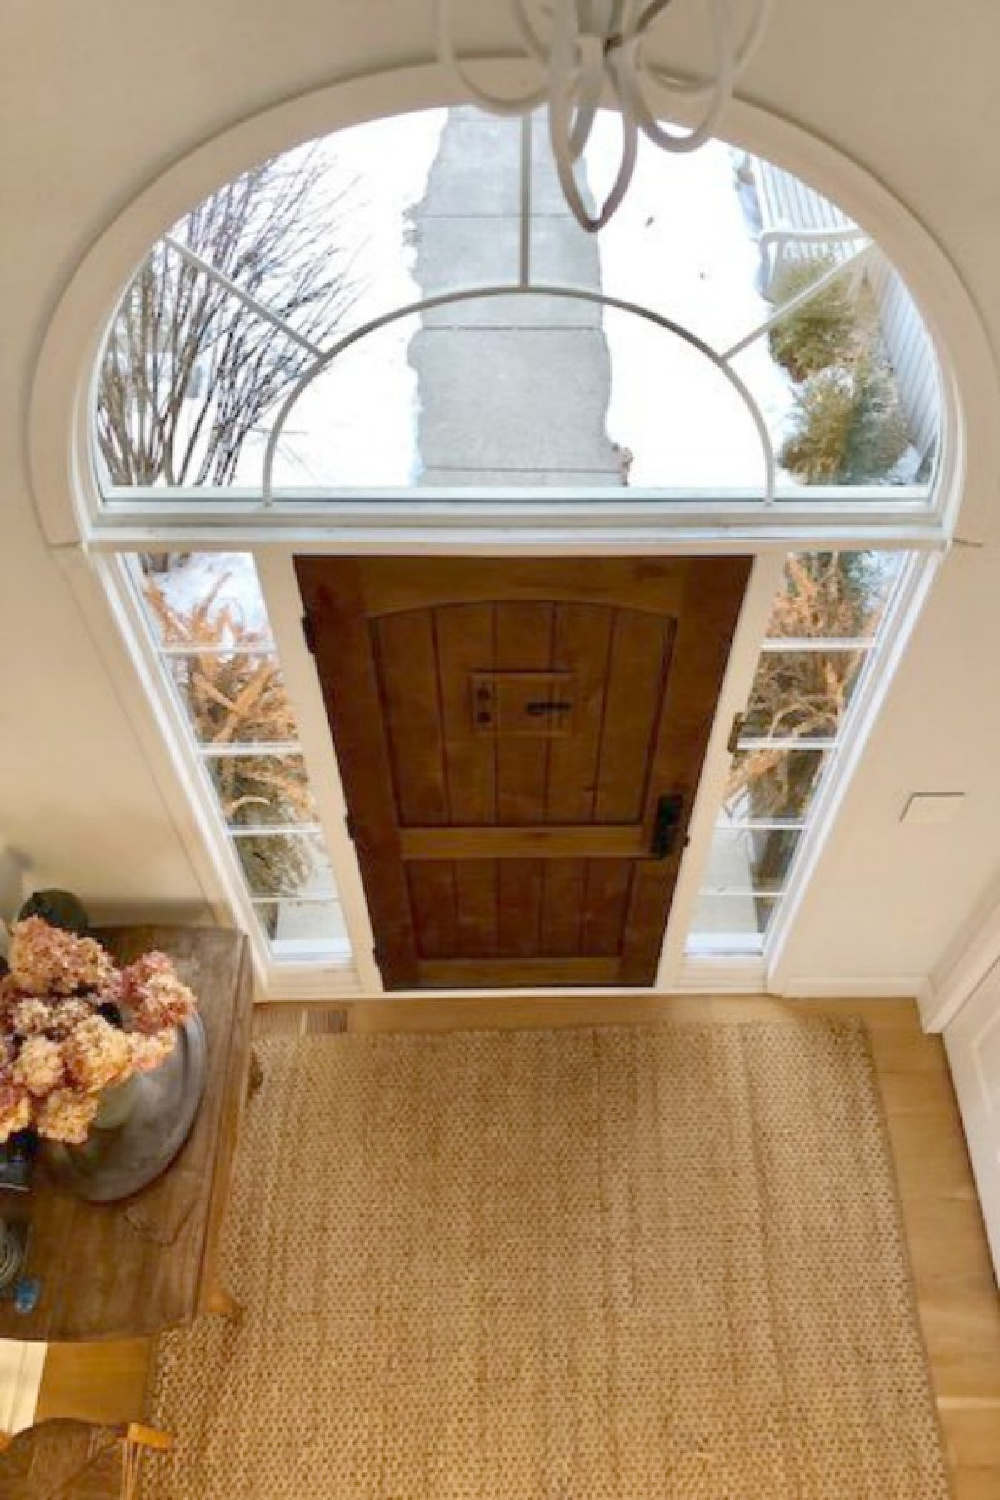
Replacing the front door was actually not a priority since I knew painting the existing steel door could make a big difference. It was after we collaborated with Pacific Entries to replace most of the hollow core interior doors with solid, rustic alder planked doors that we realized we could transform both the interior entry and exterior porch in one fell swoop!
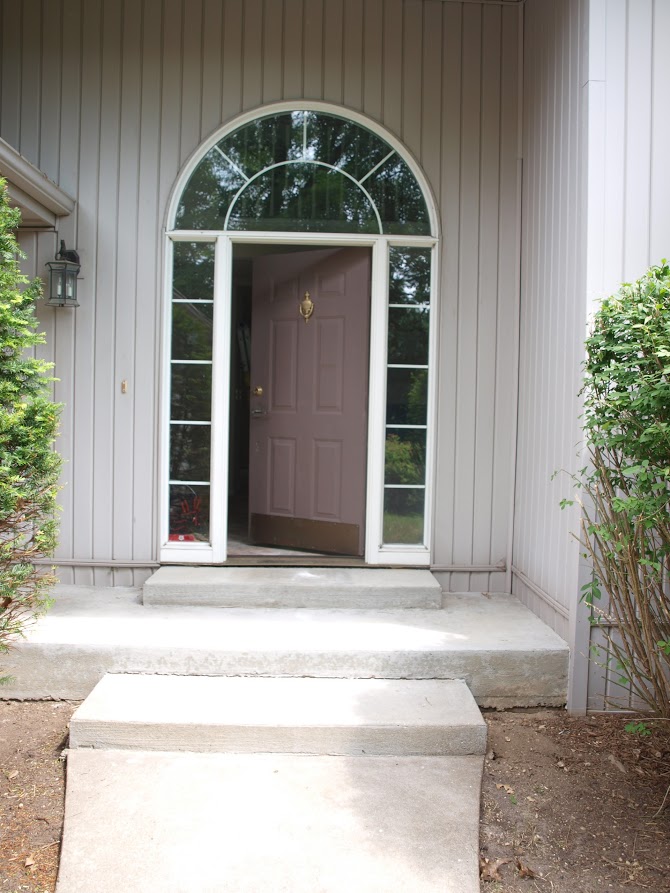
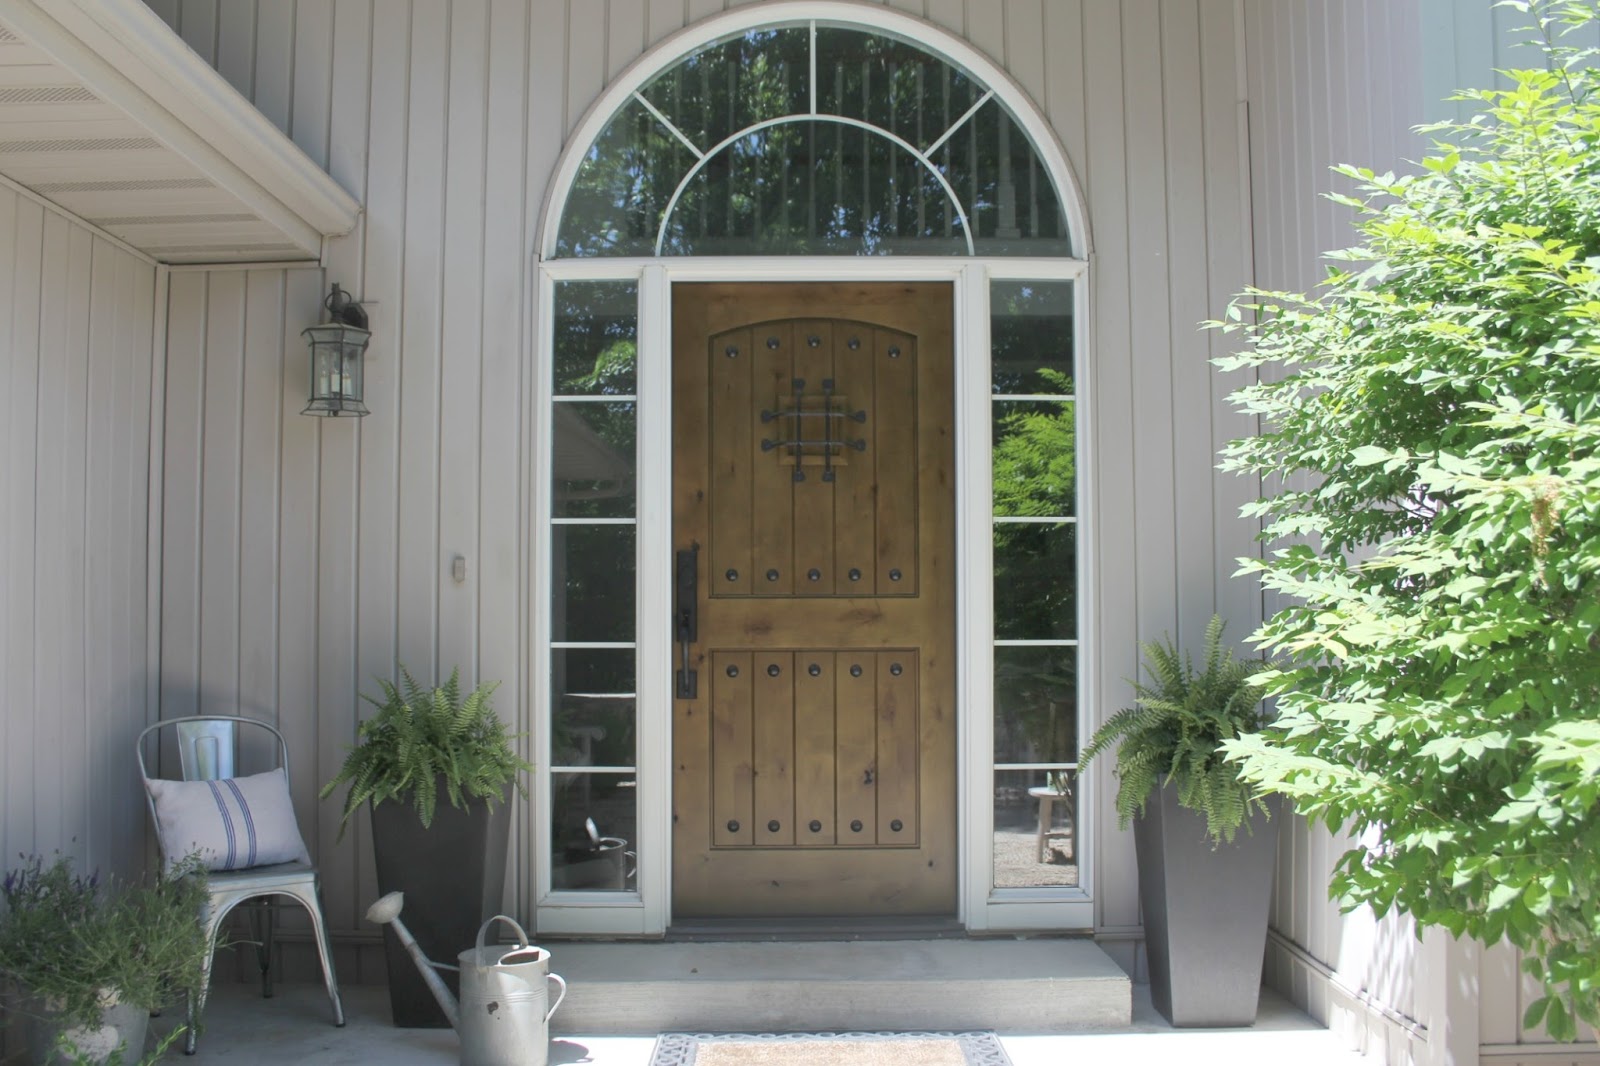
For under $40 (concrete pavers were under a dollar each from Home Depot), this solution served us well.
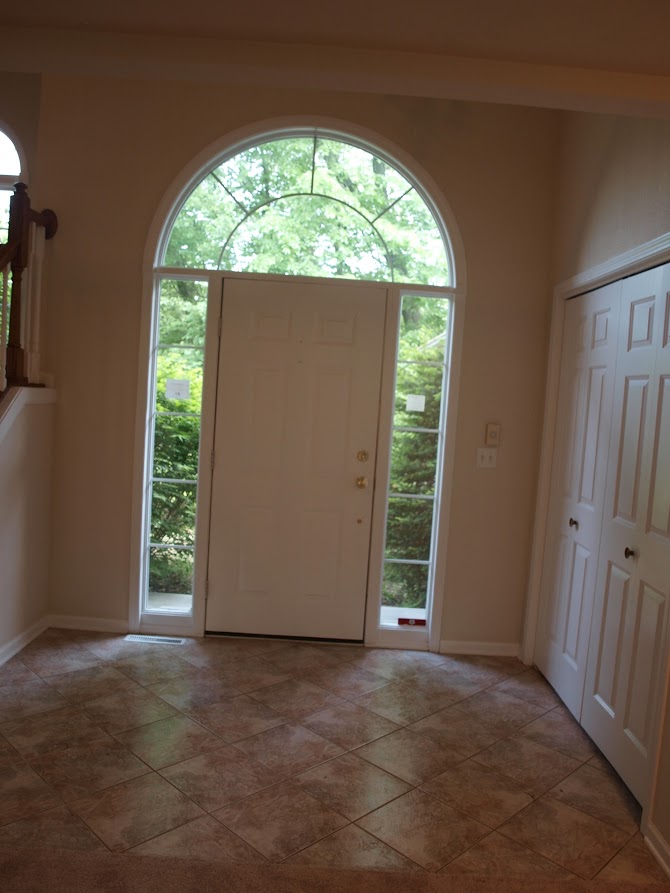
Creating a Peaceful Entry
I’m not exaggerating when I say the tile near the front door was the precise color of an awful bruise…that whole house had been walloped.
The stairs were the open riser type I associate with the Brady Bunch, and they can be charming in the right MCM project when they are wood and not wrapped in cheap carpet. We needed a budget friendly fix! Oh, and this was the view initially out of the front door:
We closed the risers, installed a linen-hued durable carpet (yes, WE did the carpet…total DIYers!) then painted everything except the handrail white. I sanded most of the existing stain and varnish from the rail and then rubbed on a clear wax.
We even painted those two story vaulted ceilings ourselves!
Reflections from a Real Life Renovator
Paint made such a huge difference, and since the shady woods could make some rooms feel pretty dim, the reflective cool white countered that.
What helped this kitchen feel airy more than anything was removing those wall cabinets flanking the sink window.
I didn’t lose storage space since I opted for floor to ceiling cabinets on the frig/pantryoven wall:
Not an inch of space wasted on that wall!
My favorite custom cabinet feature in that kitchen? The cabinet for appliances that lifts up (on left, below).
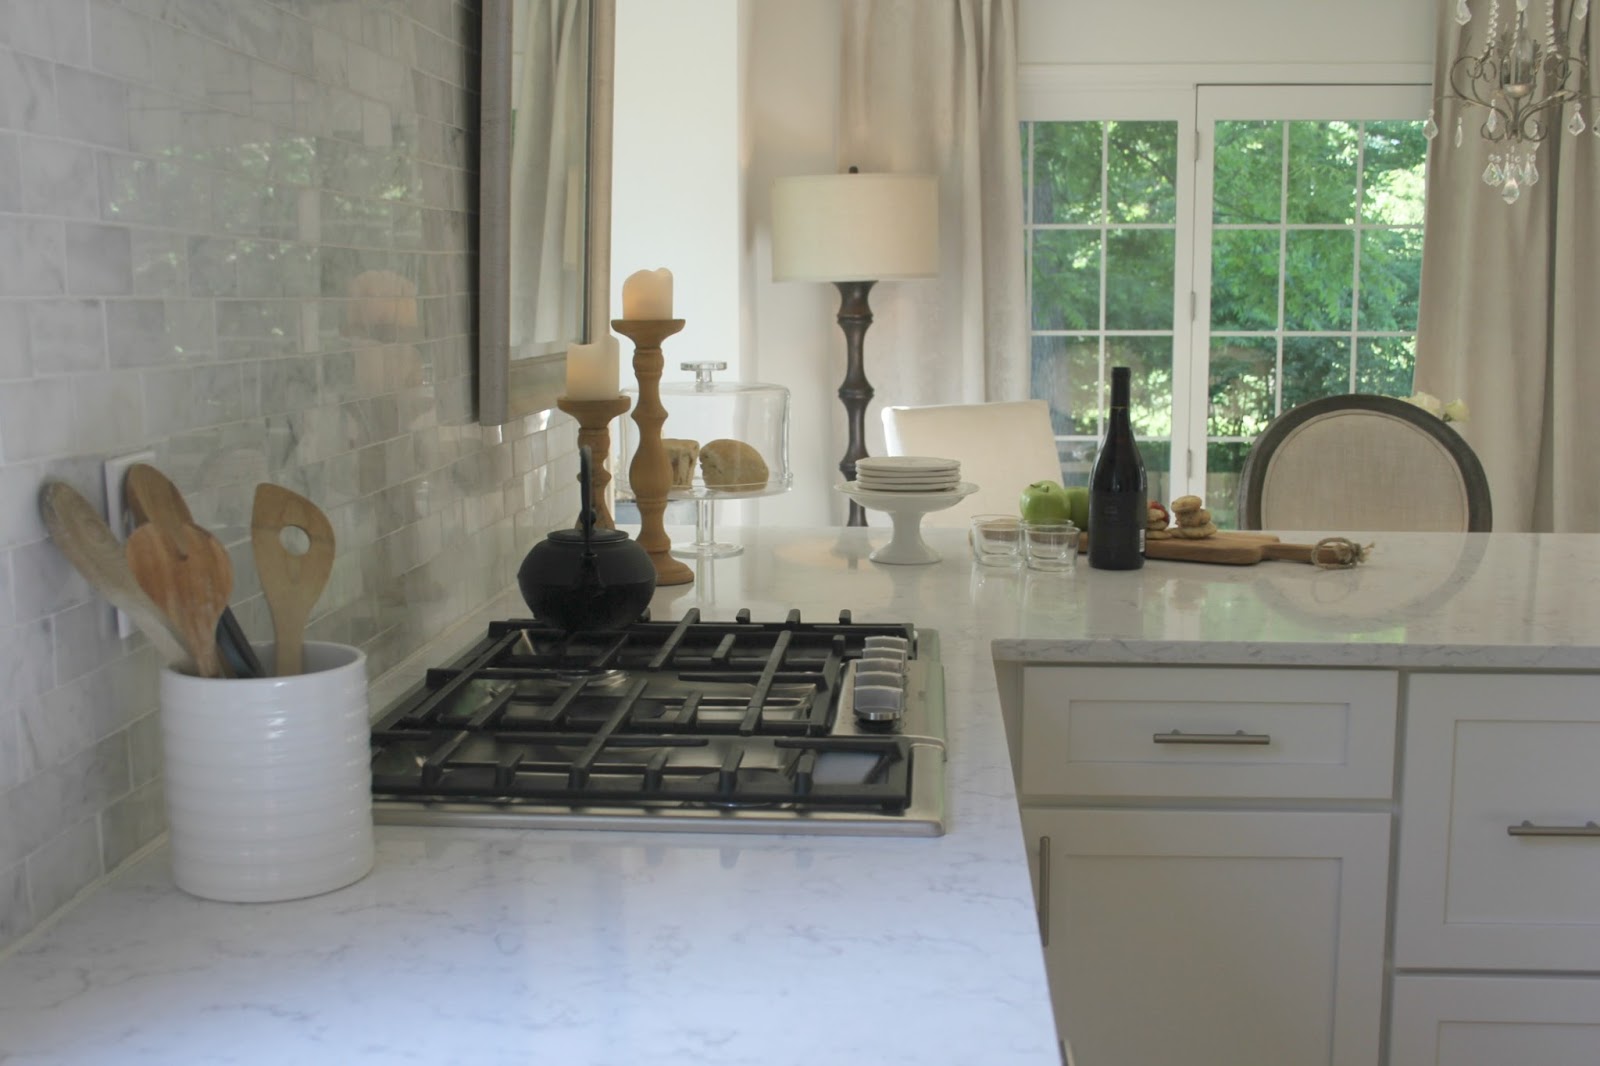
Minuet quartz was a brilliant choice for this kitchen since it reflected so much light and felt like a French kitchen.
This was my first cooktop, and I liked it enough to buy the exact same one for our current house. Bear in mind you will probably pay an upcharge when you buy countertops just to have them remove material for the cutout.
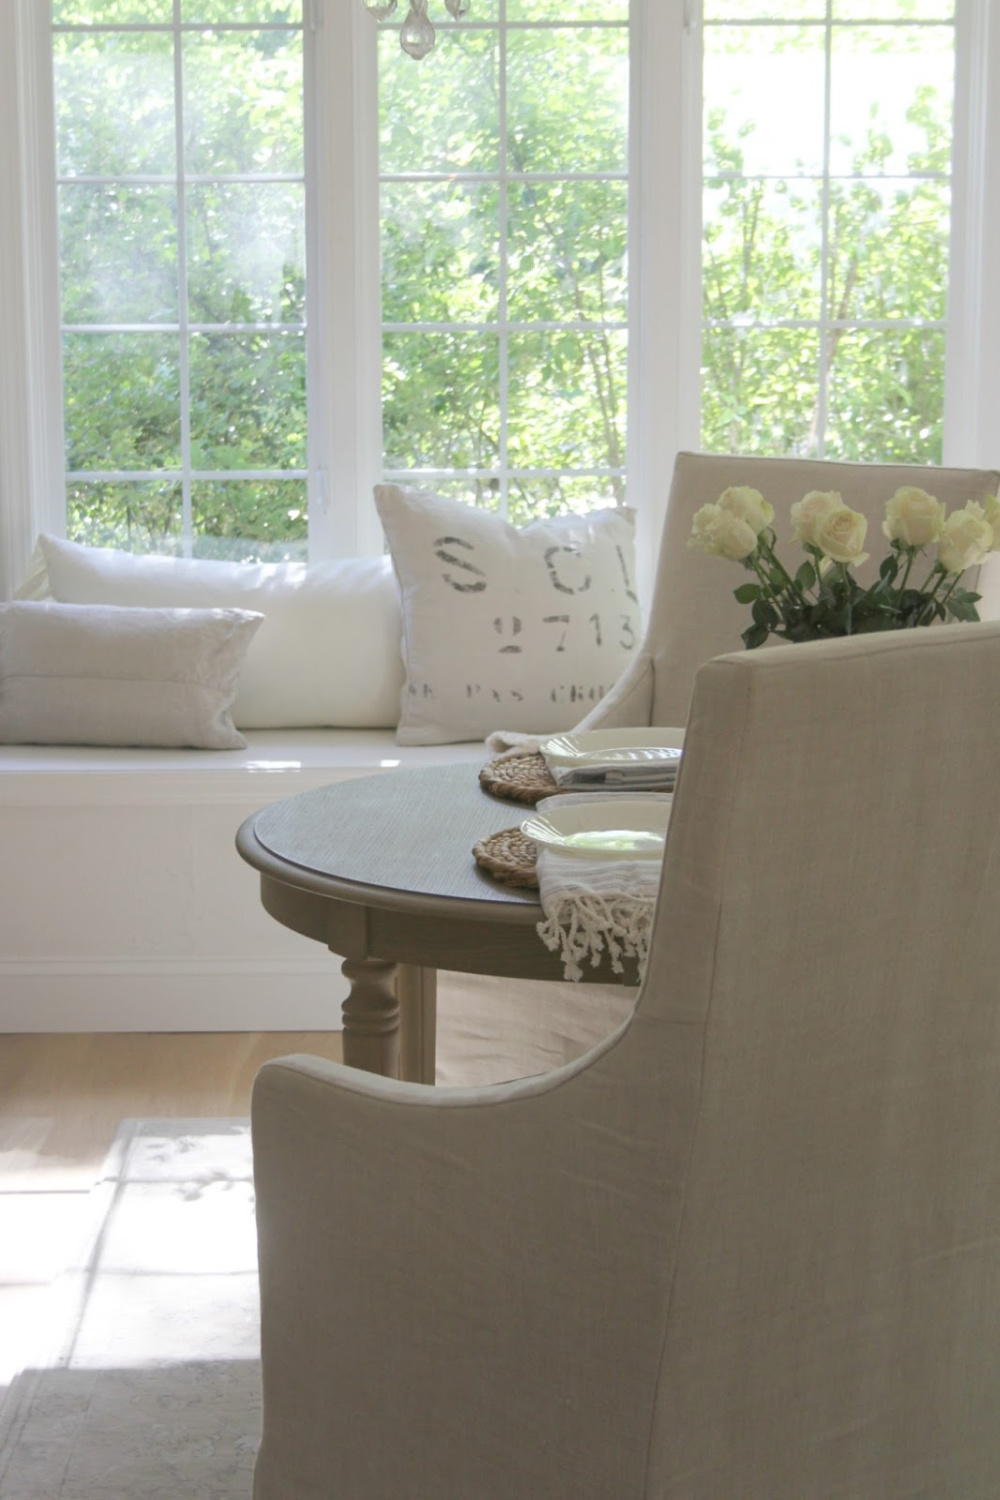
I never regretted preserving the window seat. The birds that kept me company there at those windows? Priceless.
Not every kitchen needs to have a monstrous island or any island at all. I kept the peninsula.
A simple but smart addition to the breakfast bar: horizontal installed solid wood beadboard which I painted white. It took all sorts of abuse. You can read about my journey to find the right white countertop RIGHT HERE.
Glimpses of the Afters
Can you believe how dark this kitchen felt? It needed love!

Hope you enjoyed these before/after favorites!
Peace to you right where you are.
-michele
I independently selected products in this post—if you buy from one of my links, I may earn a commission.
Thanks for shopping RIGHT HERE to keep decor inspiration flowing on Hello Lovely!
Hello Lovely is a participant in the Amazon Services LLC Associates Program, an affiliate advertising program designed to provide a means for sites to earn fees by linking to Amazon.com and affiliated sites.


Unfortunately all your sponsors and ads make it impossible to load and read. It is so frustrating not to be able to follow and I think you have much to offer and enjoy what I can read☹️
Author
Thanks for letting me know – sometimes I forget to click the box to remove most ads! I know how cluttered and chaotic it can get and apologize for the frustration.